The Live Set function is a convenient way to change among different Performances as you play songs on a setlist, for example.
On the MONTAGE M, you can create a Live Set simply by registering your favorite Performance to each slot.
You can register a Performance to the Live Set by following the procedure below.
Store the Performance you have just edited before registering the Performance to the Live Set. However, when you register to the Live Set and select Store As New Perf. and Register or Overwrite Current Perf. and Register, you do not need to store the Performance in advance.
When you select a different Performance or turn off the instrument without first storing the Performance, you will lose the edited settings you have made.
Here, the [LIVE SET] button needs to be fully lit or dimly lit.
The Live Set Register screen appears.
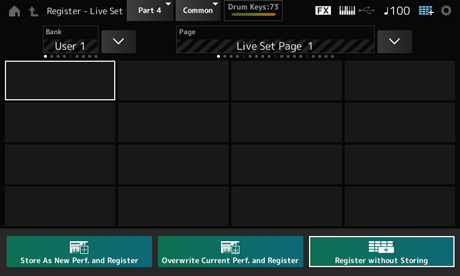
Move the cursor using the Slot number and Category name selection buttons, or tap the slot shown on the screen.
Store As New Perf. and Register: Store as a New Performance and register to the slot
Overwrite Current Perf. and Register: Overwrite the current Performance and register to the slot
Register: Register
The selected Performance is registered to the slot.
To insert a new Live Set between already existing Live Set slots, press the [ENTER] button while holding down the [SHIFT] button (or tap on any of the Register buttons on the screen while holding down the [SHIFT] button). The new Live Set is then registered at the cursor location.
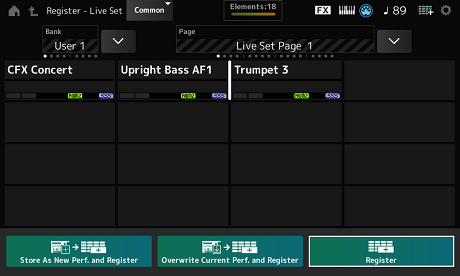
The Performance registered on the last slot on the bottom right corner will be deleted.
You can exchange the contents of two slots.
The Live Set Edit screen appears.
When the Live set page on the Preset bank or the Library bank is open, the Live Set Edit screen will not appear.
The Job screen appears.
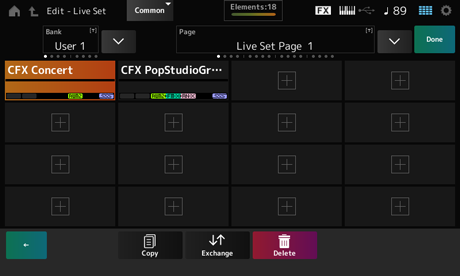
The Performances of the two slots will be exchanged.
If you wish the copy or exchange the entire bank or the entire Live set page, simultaneously hold down the [SHIFT] button and press the [EDIT/] button. Then the dialog box will appear.
You can also add Patterns, Songs, or Audio files to Live Set slots. This way, you can select a slot for playing back a desired Pattern, Song, or Audio file, and then play the Performance on the keyboard along with it.
The Live Set Edit screen appears.
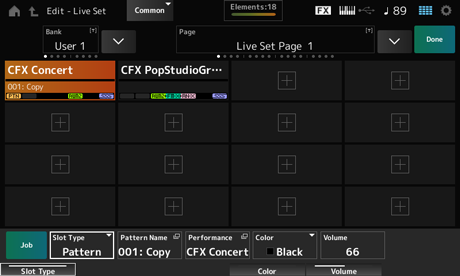
| Slot Type | Type |
|---|---|
| Perform | Performance |
| Song | Song |
| Audio | Audio file |
| Pattern | Pattern |
You can also register a Pattern or Song to the Live Set slot by pressing the [SHIFT] and [LIVE SET] buttons if the recorded file is selected on the Pattern screen or Song screen.
You can select a different Live Set slot by using a separately sold footswitch, such as the FC4 or FC5.
Follow the procedure below.
The MIDI I/O screen appears.
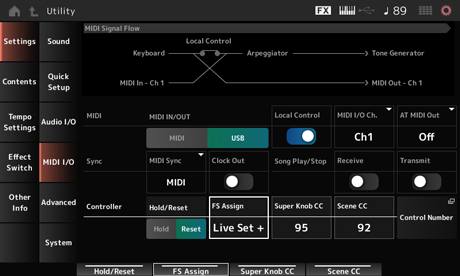
With Live Set +, you can select the next Live set slot in forward order, and with Live Set −, you can select the next Live set slot in reverse order.