

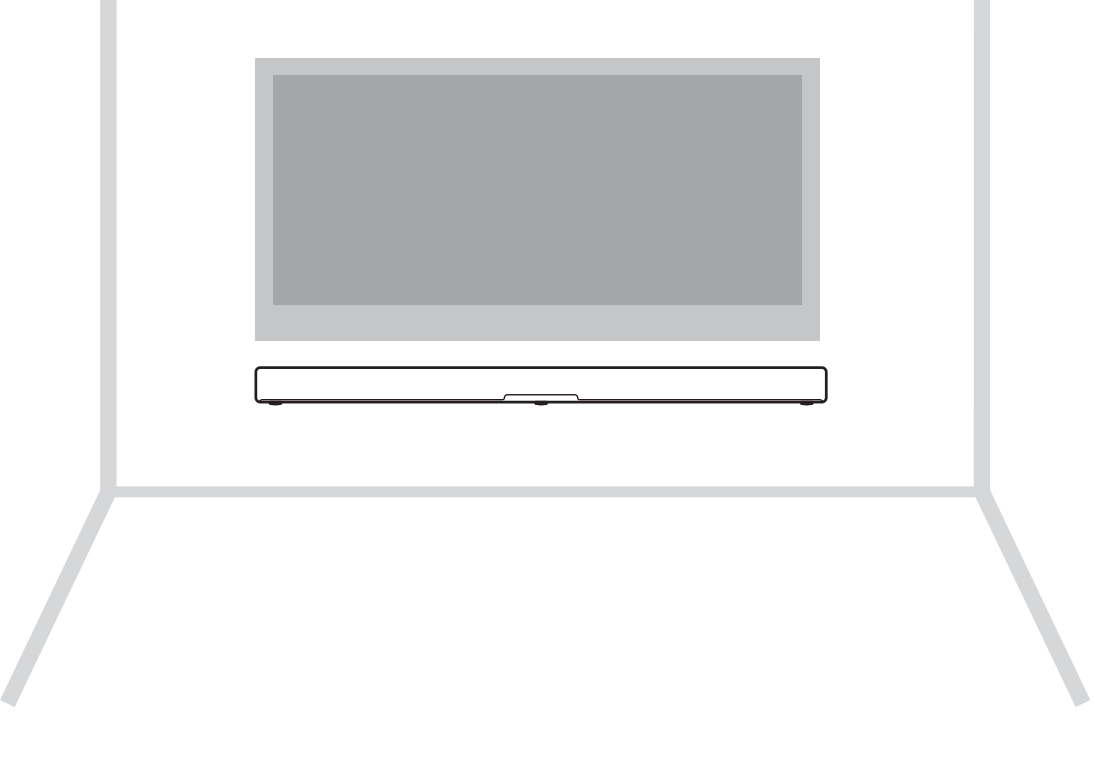
Mounting the sound bar on a wall
- Before mounting the sound bar on a wall, be sure to read the following precautions.
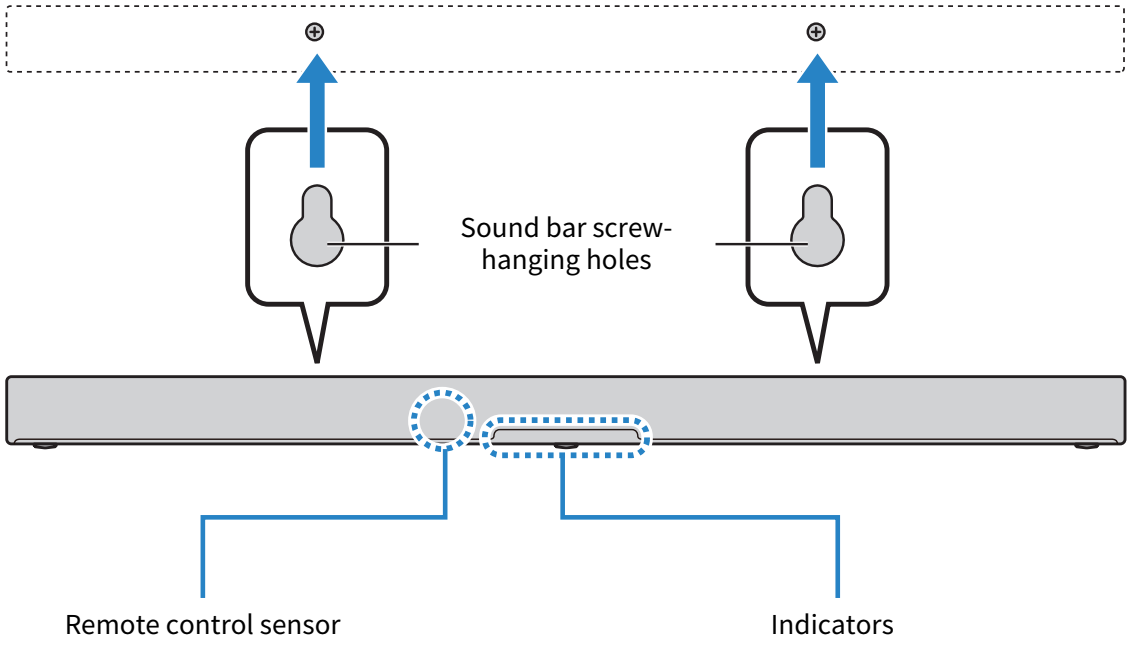
Use the screw-hanging holes on the sound bar to mount the sound bar on a wall.
NOTE
- The top of the sound bar is equipped with built-in height speakers that output the sound of the height channels.
A space of at least 10 cm (4 in) above the top of the sound bar ensures unobstructed output of the height channels. This will provide you the best possible surround sound field.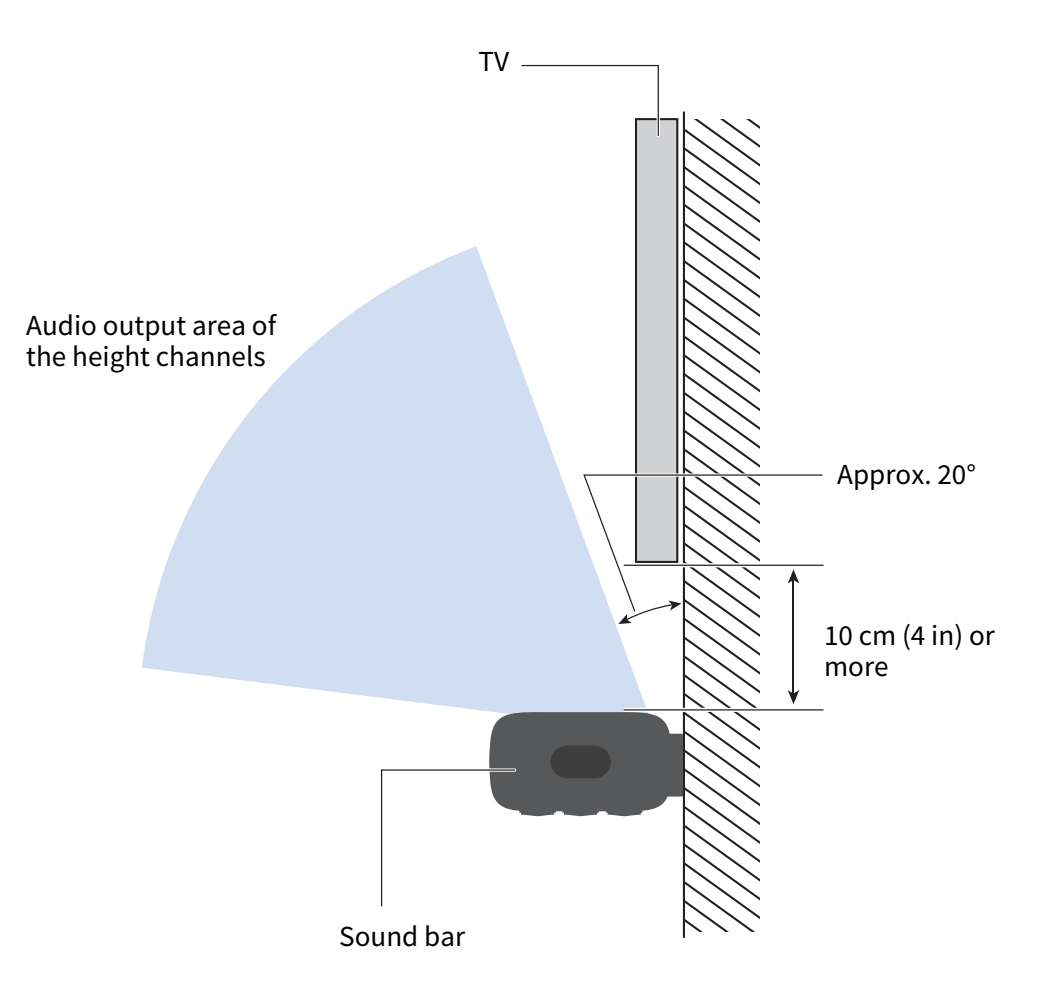
- Attach the mounting template (included) on a wall temporarily.
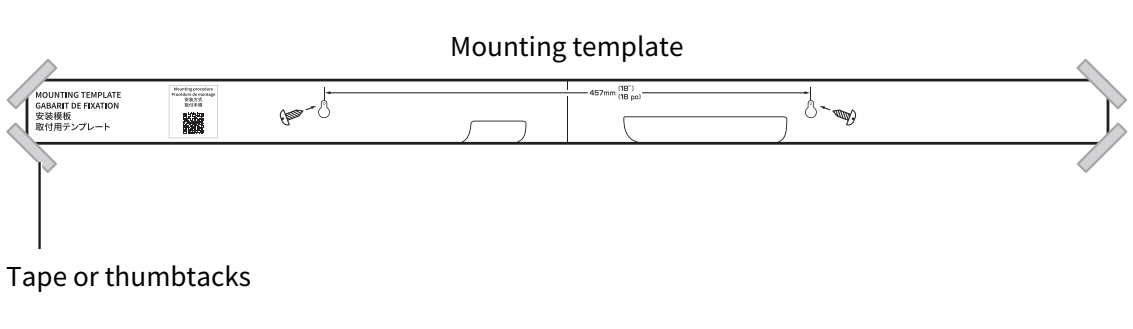
- Mark the positions for the screws on the wall using a pencil.
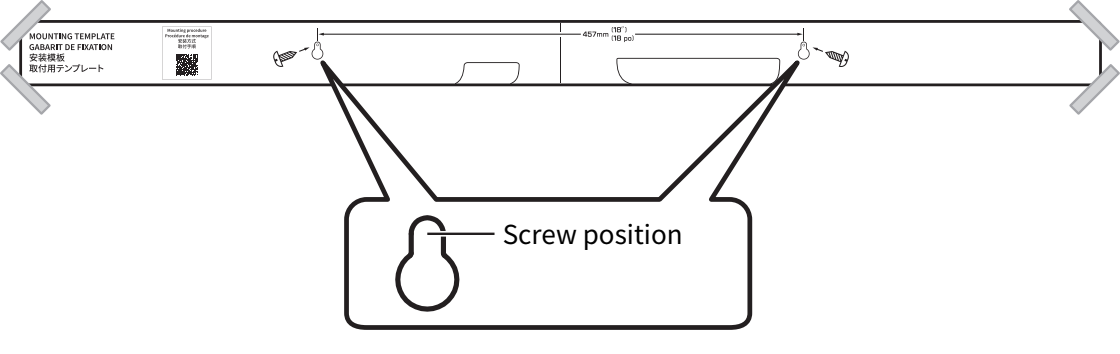
- Remove the mounting template from the wall.
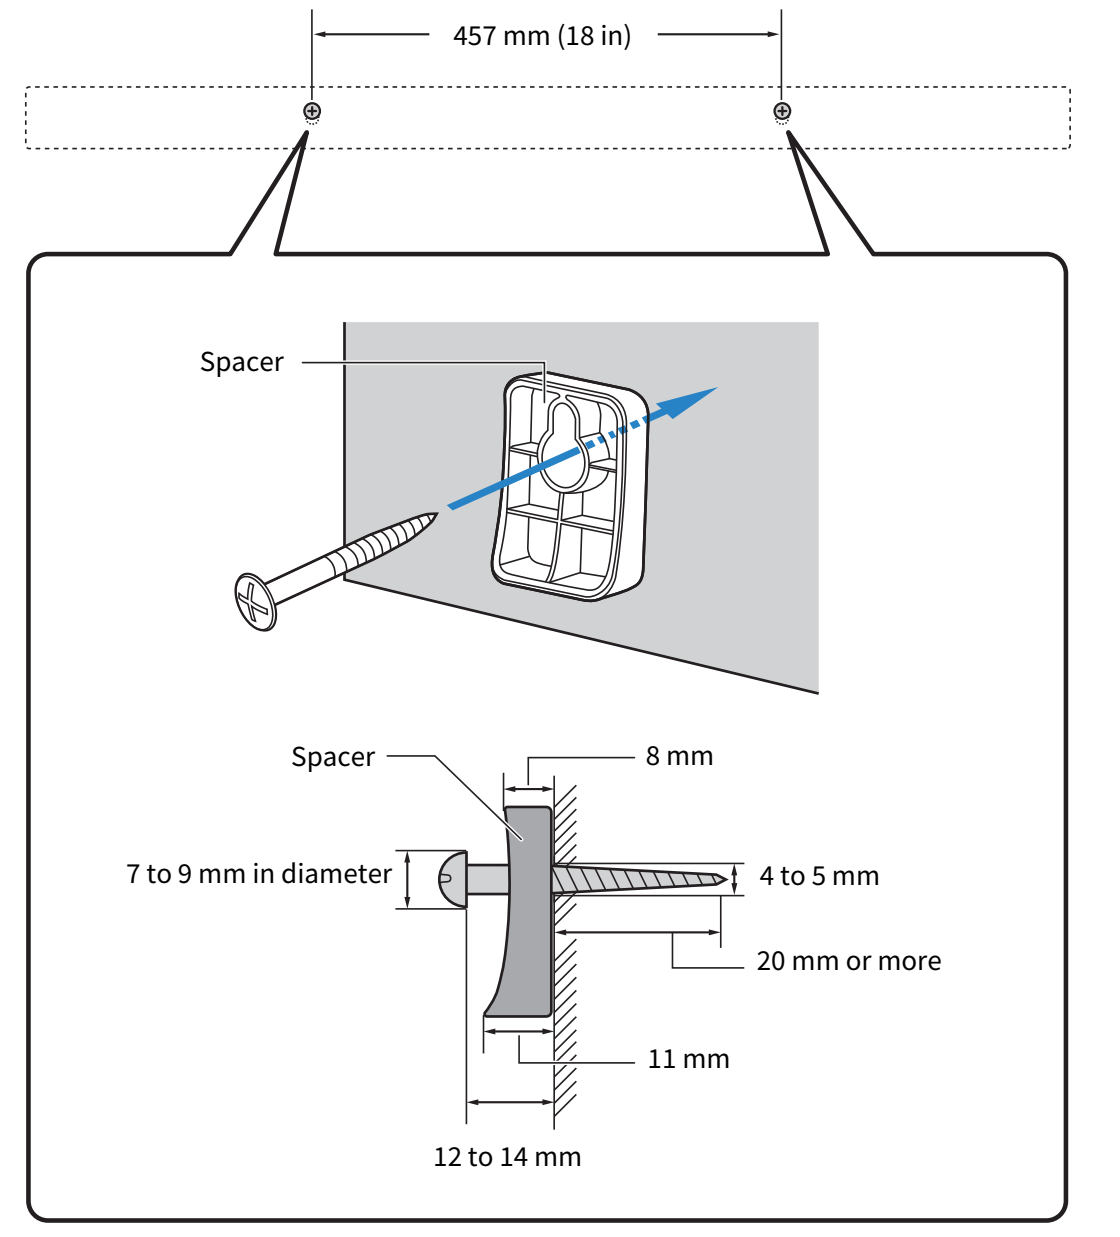
- Install the spacers (included) and screws at the points marked on the wall.
- Be sure to use screws of the following size.
NOTE
- You can also install the spacers by hanging them on the screws after installing the screws first.
- Connect cables to the sound bar.
- For the connection procedure, see the Quick Start Guide or User Guide of your product.
- Hang the sound bar on the screws.
The installation and connection are completed.