

Rear panel
The following explains the names and functions of each component on the rear panel of this unit.
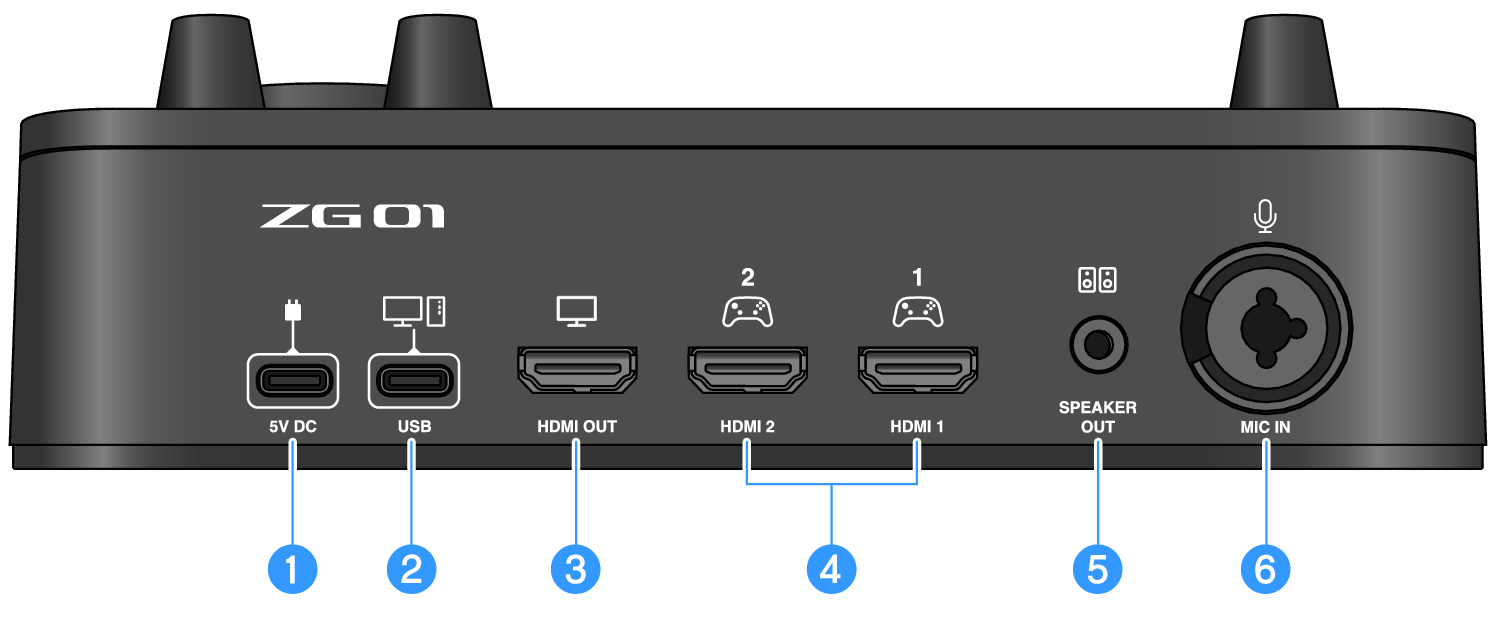
a | [5V DC] jack (USB Type-C™) Connect a USB power adapter (commercially available) here. Use a USB power adapter rated at 5 V DC output (1.5 A or greater). To operate using bus power To use this unit via bus power, connect the b [USB] jack to the USB Type-C port on your computer with the included USB 2.0 cable (Type-C to Type-C). By doing this, you won’t need a separate USB power adapter. |
b | [USB] port (USB Type-C™) Connect your computer using the USB 2.0 cable (included). Follow the important precautions below to prevent device malfunctions or loss of data. NOTICE
|
c | [HDMI OUT] jack Connect your TV or monitor/display using an HDMI cable (commercially available). |
d | [HDMI 1] jack,[HDMI 2] jack Connect a gaming device or computer that supports HDMI output using an HDMI cable (commercially available). |
e | [SPEAKER OUT] jack Connect your powered speakers here (3.5 mm stereo mini-plug). |
f | [MIC IN] jack Connect a mic here (either XLR or a TRS phone jack). NOTE
|