

Connecting the speaker
Connect a speaker cable between the negative (–) terminal of the unit and the negative (–) terminal of the speaker, and between the positive (+) terminal of the unit and the positive (+) unit of the speaker.
NOTICE
When connecting the speaker cables, take notice of the following:
- Prepare speaker cables in a place away from the unit, to avoid accidentally dropping wire strands into the unit's interior which could result in a short circuit or malfunction of the unit.
- Improper connecting of the speaker cables may cause a short circuit and also damage the unit or the speakers.
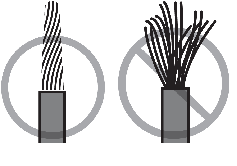
- Twist the bare wires of the speaker cables firmly together.
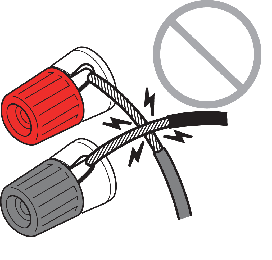
- Do not let the bare wires of the speaker cable touch one another.
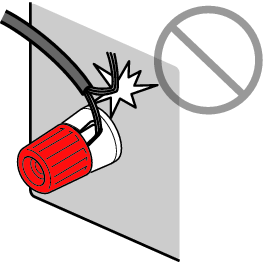
- Do not let the bare wires of the speaker cable come into contact with the unit’s metal parts (rear panel and screws).
NOTE
- Remove the unit’s power cable from an AC wall outlet before connecting the speakers.
- Be sure to connect the front left and right speakers.
- Under its default settings, the unit is configured for 8-ohm speakers. When connecting 6-ohm speakers, set the unit’s speaker impedance to “6 Ω MIN”. For details, see the following:
- Remove approximately 10 mm (3/8”) of insulation from the ends of the speaker cable, and twist the bare wires of the cable firmly together.
- Loosen the speaker terminal.
- Insert the bare wires of the cable into the gap on the side (upper right or bottom left) of the terminal.
- Tighten the terminal.
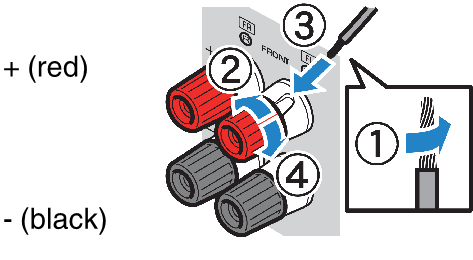
- This completes the connection.
NOTE
- If “Check SP Wires” appears on the front display when the unit is turned on, turn off the unit, and then confirm that the speaker cables are not short circuited.
- (U.S.A., Canada, China, Taiwan, Brazil, Central and South America and General models only)
When using a banana plug, tighten the speaker terminal and insert a banana plug into the end of the terminal.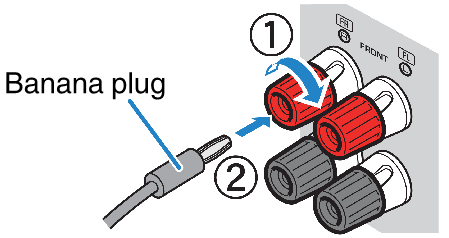
Related links