

Mounting the sound bar on a wall
- Before mounting the sound bar on a wall, be sure to read the following precautions.
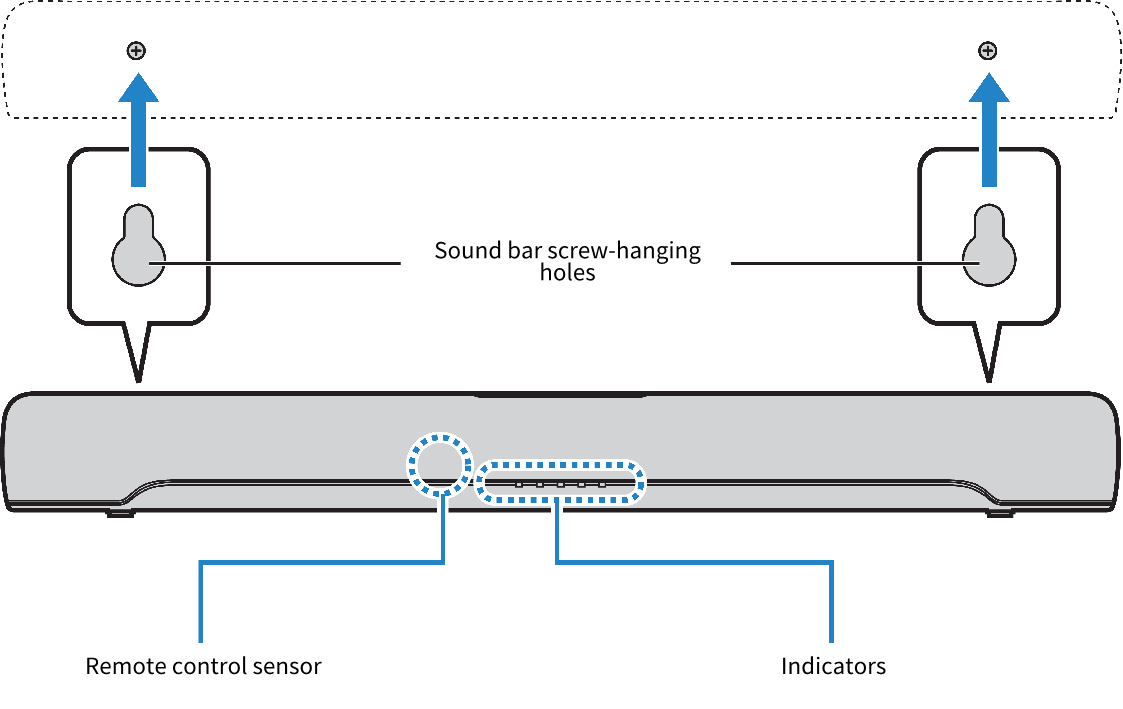
Use the screw-hanging holes on the sound bar to mount the sound bar on a wall.
NOTE
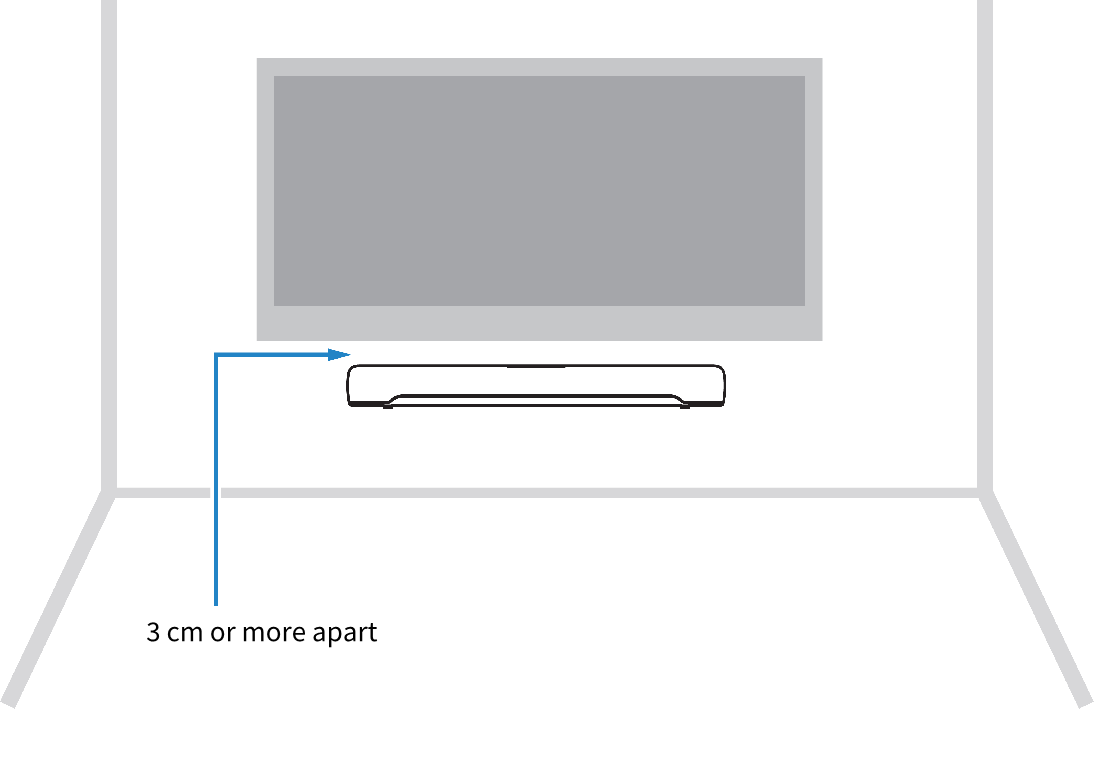
- To bring out the best performance of the sound bar, install the sound bar 3 cm or more apart from the TV.
- Attach the mounting template (included) on a wall temporarily.
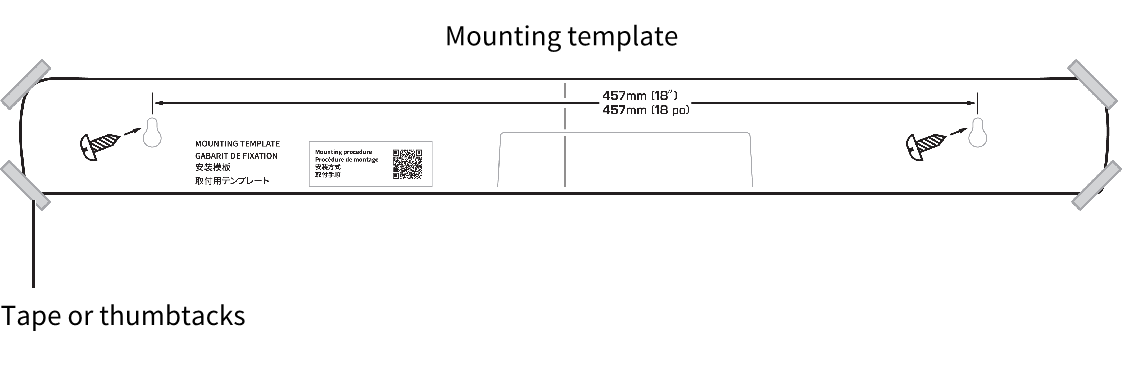
- Mark the positions for the screws on the wall using a pencil.
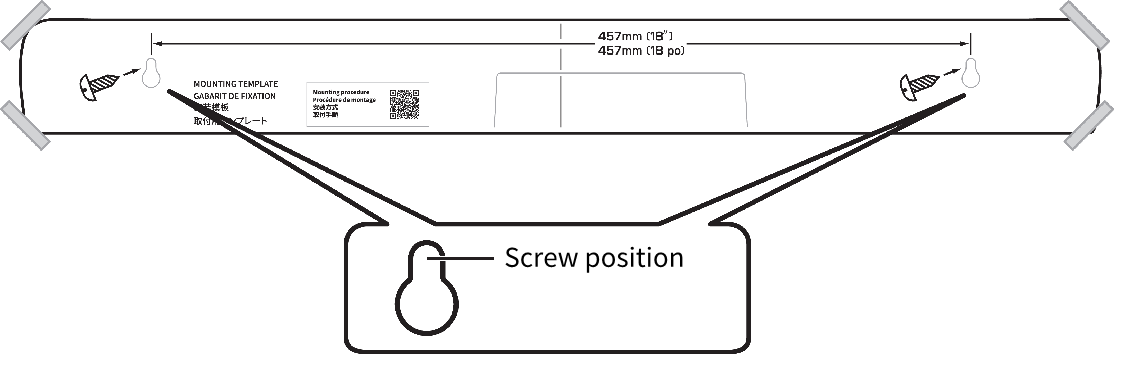
- Remove the mounting template from the wall.
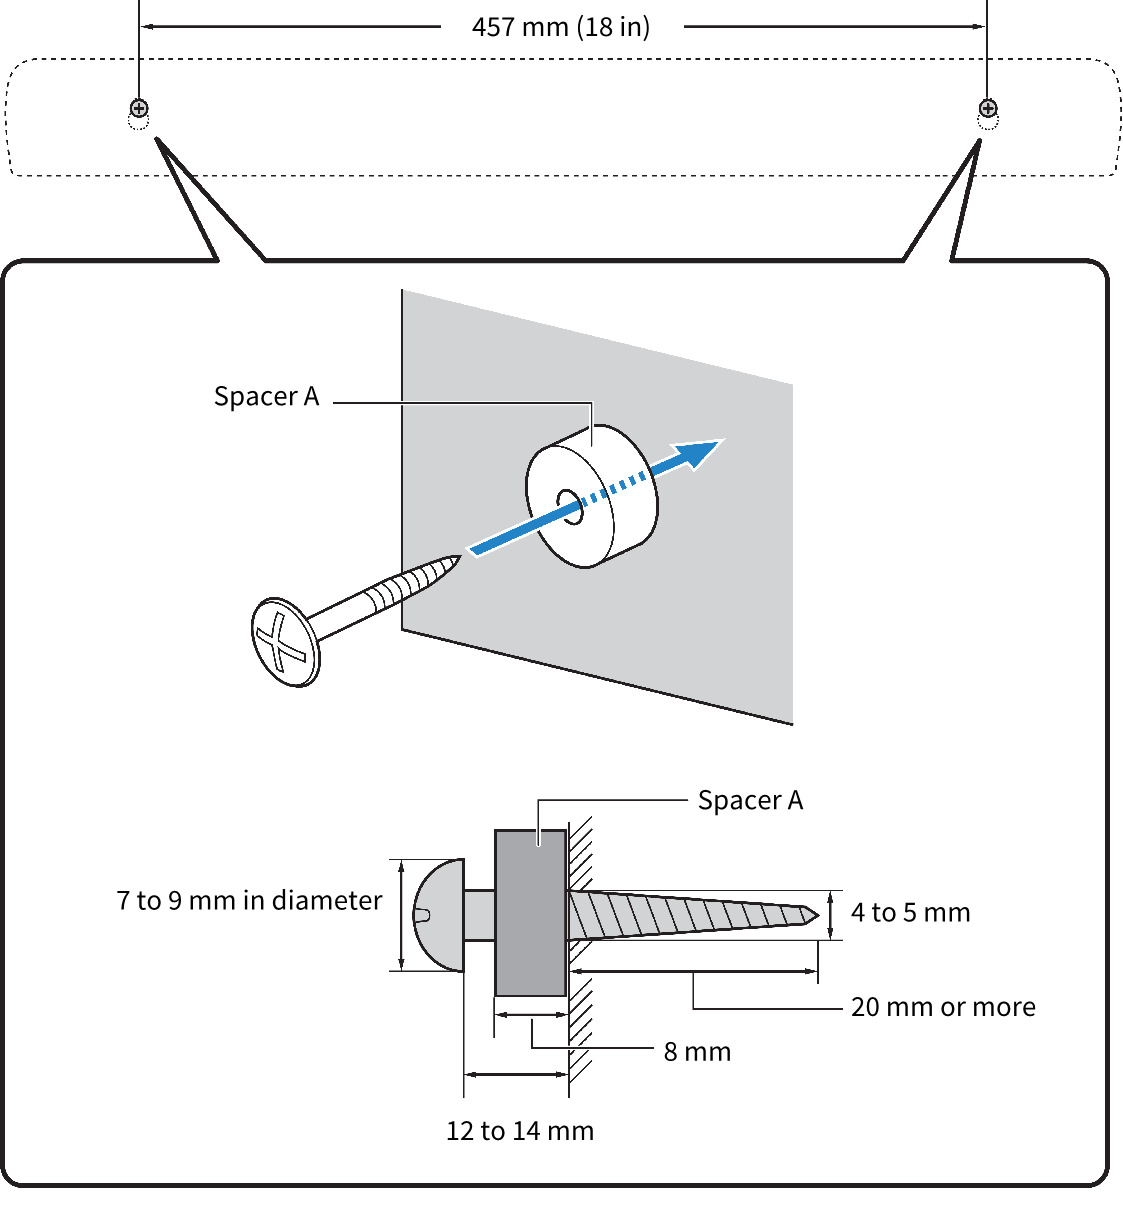
- Install the spacers A (included) and screws at the points marked on the wall.
- Be sure to use screws of the following size.
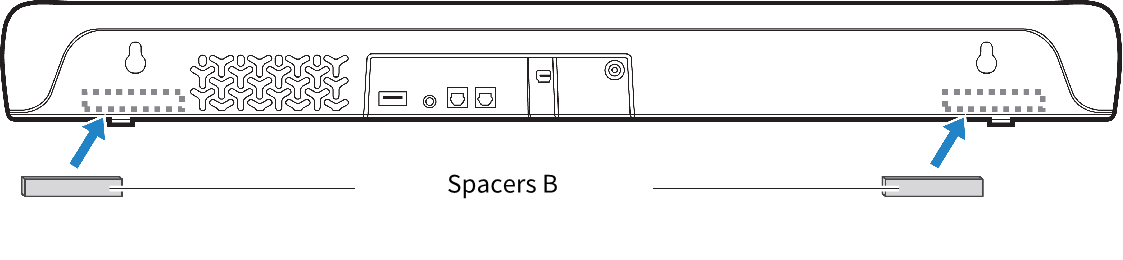
- Peel off the backing paper from the spacers B (included), and attach the adhesive face of each spacer to the rear of the sound bar.
- Connect cables to the sound bar.
- For the connection procedure, see the Quick Start Guide or User Guide of your product.
- Hang the sound bar on the screws.
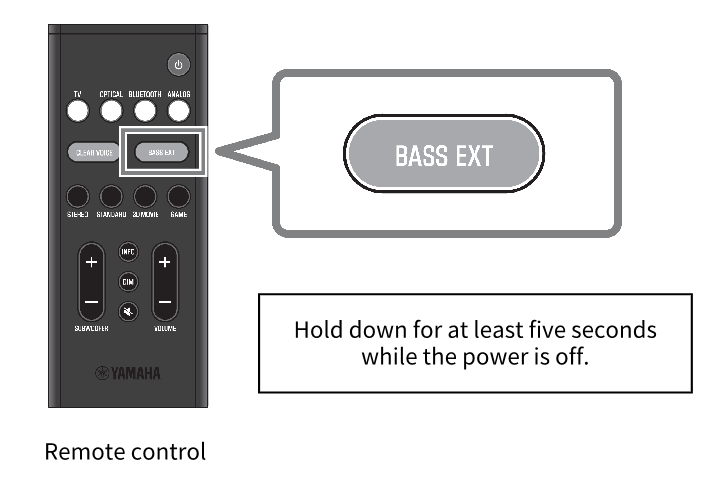
When installation and all connections are complete, while the power is off, hold down BASS EXT on the sound bar’s remote control for at least five seconds to optimize the frequency characteristics setting for wall mounting. The indicators show the setting status as follows, and the sound bar is turned on.
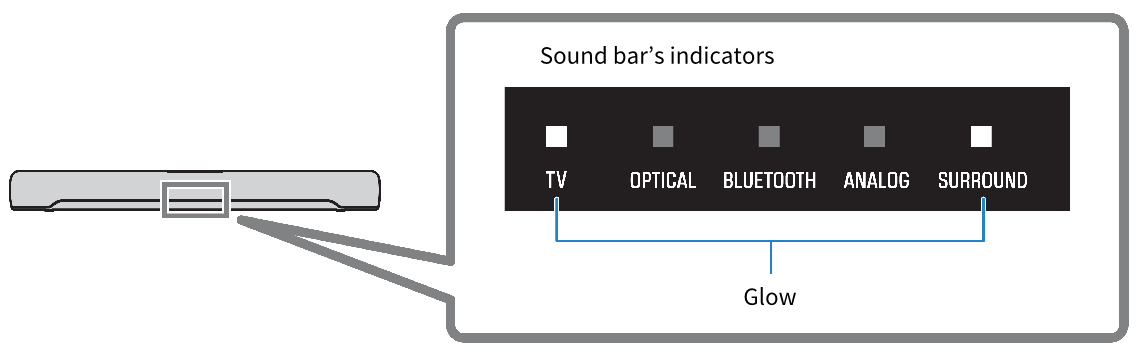
The setting is completed.
NOTE
- When changing the installation of the sound bar from wall-mounted to on a stand, also change the frequency characteristics setting. For more information, refer to the User Guide of your product.