

Installing optional cards
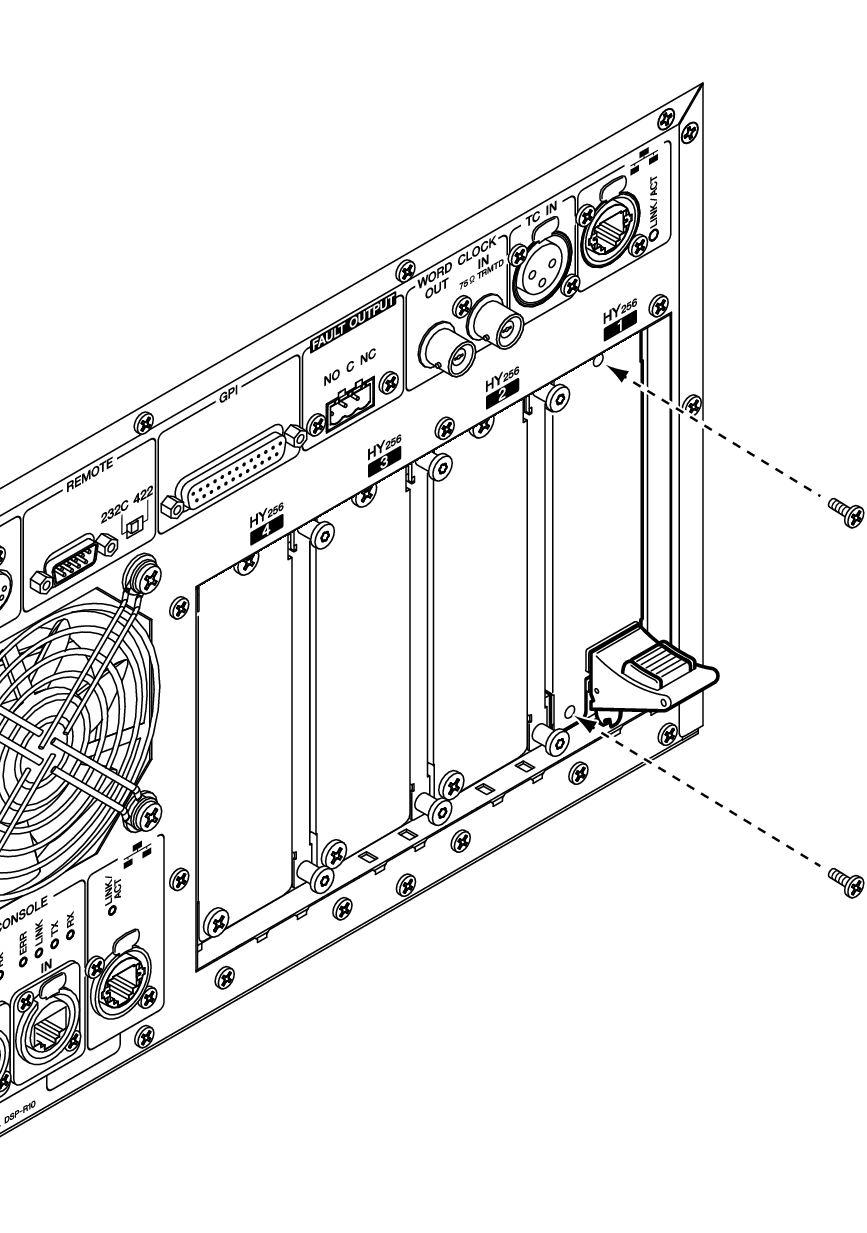
Installing the HY cards
Insert each TWINLANe network card into HY card slot 1 on the DSP engine and the I/O rack.
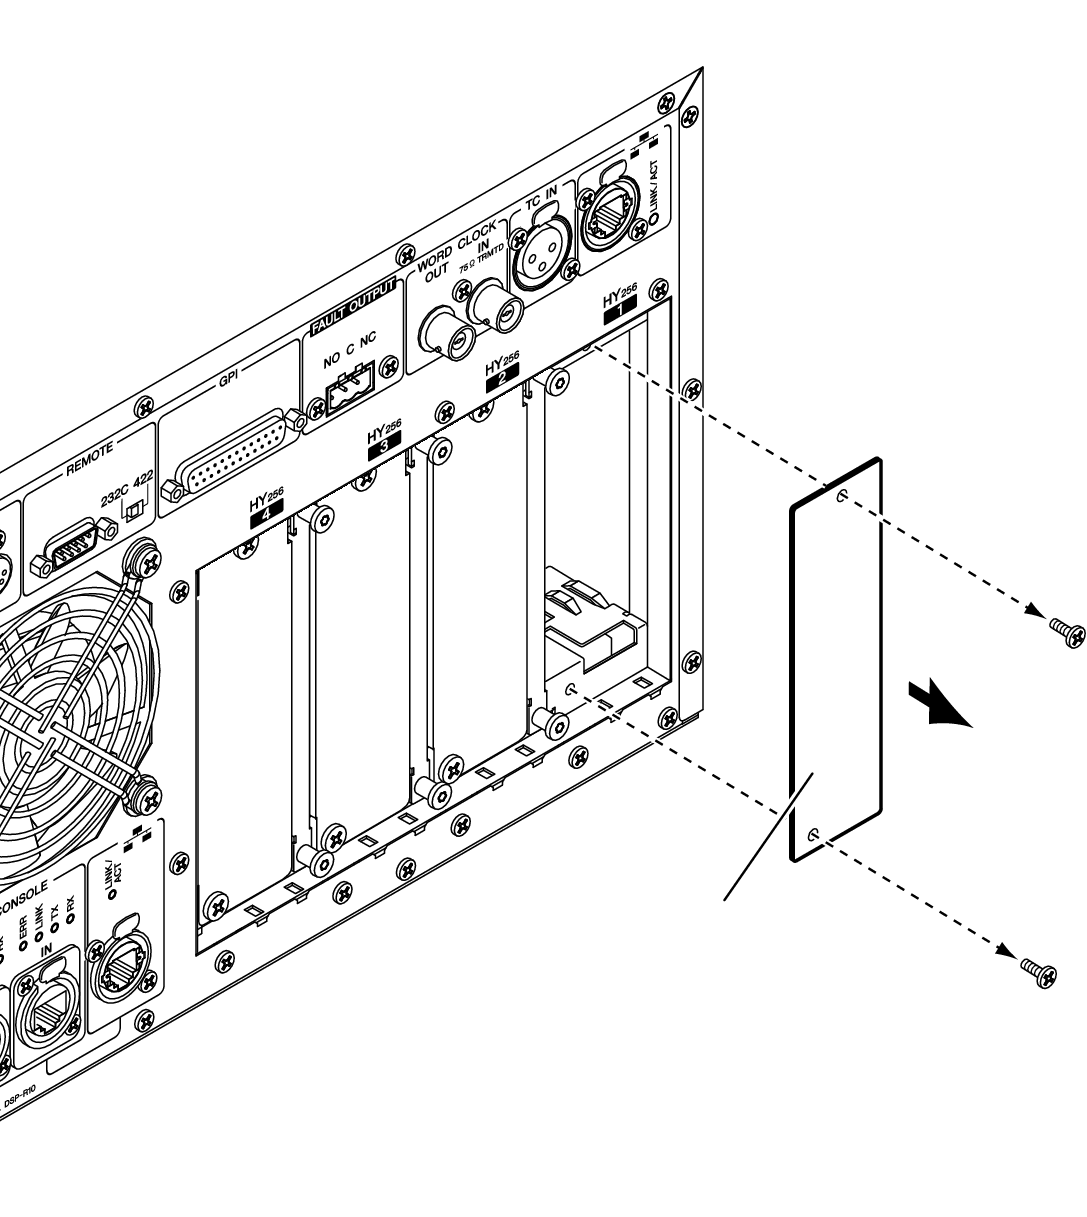
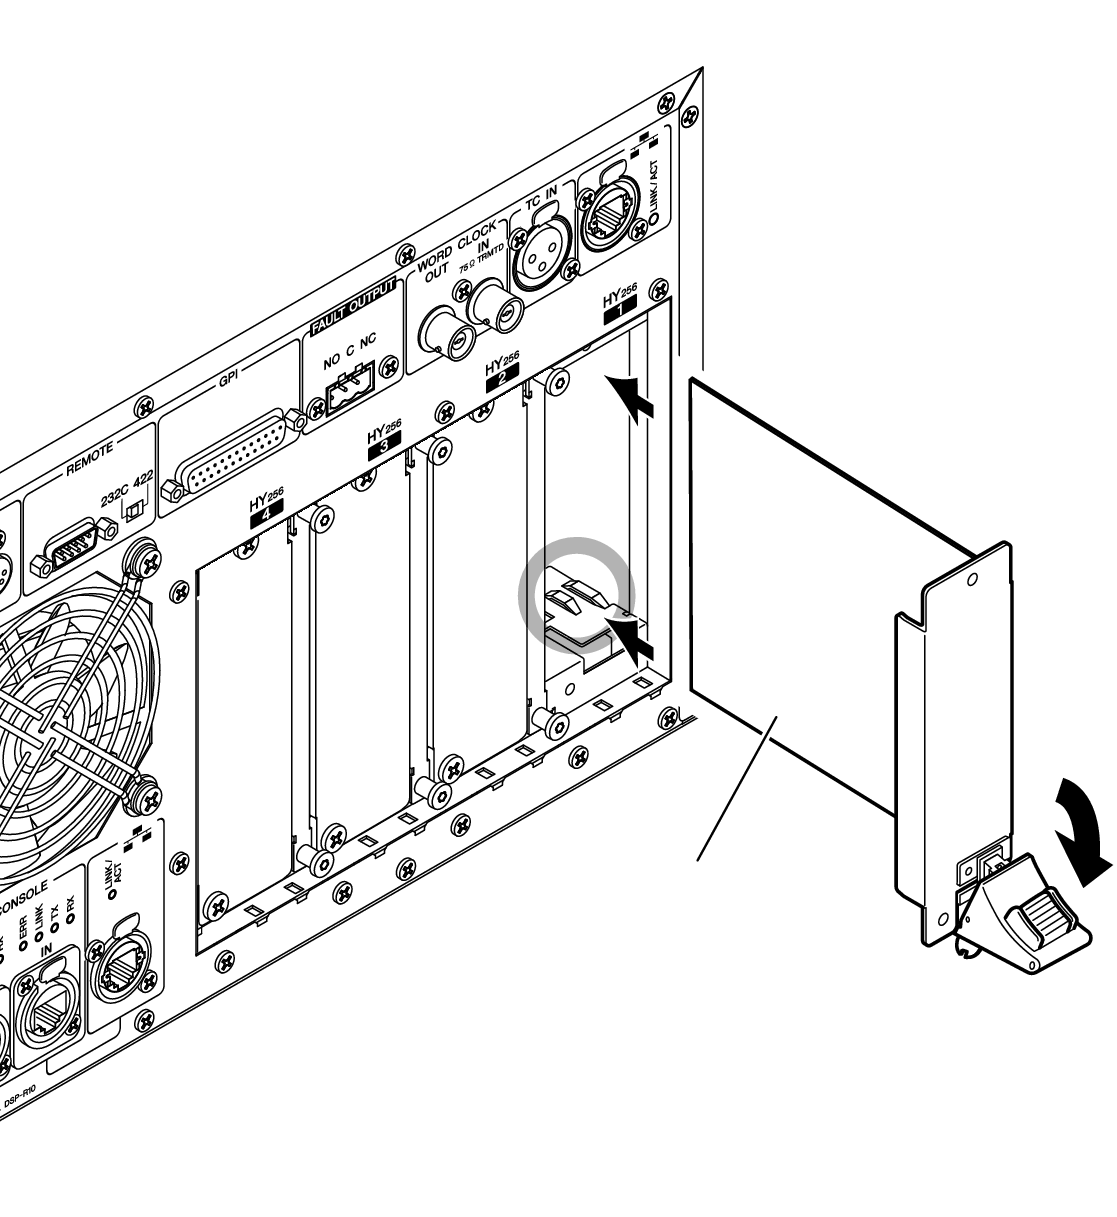
Installing an HY Card
- Make sure that both power indicators are off.

- Installing or removing a card while the power is on may lead to component failure or electric shock.
- Remove the screws that fasten the slot cover to remove the slot cover.
- Keep the cover and fixing screws in a safe place for future use.
- Align both edges of the HY card with the guide rails inside the slot, and then insert the card into the slot with the card installation lever pressed down.
NOTE
- For information on cards supported by each slot, refer to “Component Structure.”
- Push the card all the way into the slot so that the connector at the end of the card is correctly inserted into the connector inside the slot.
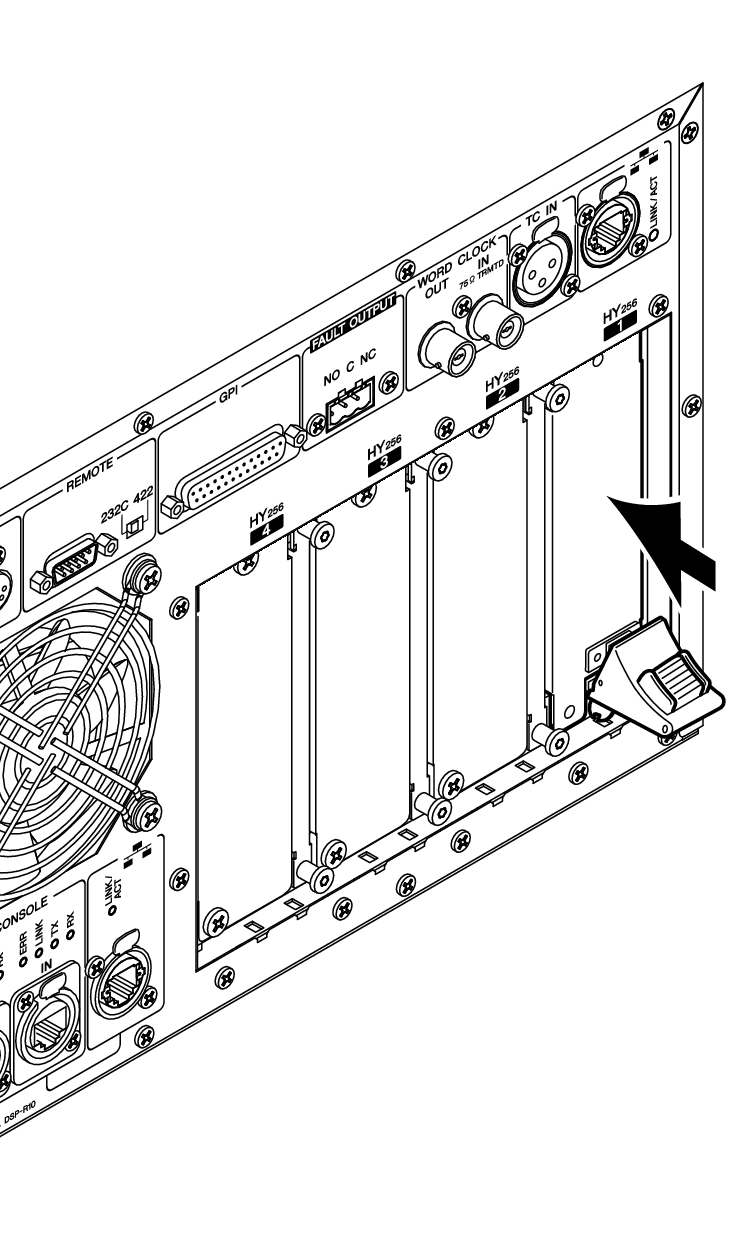
- Pull up the card installation lever to lock in the card.
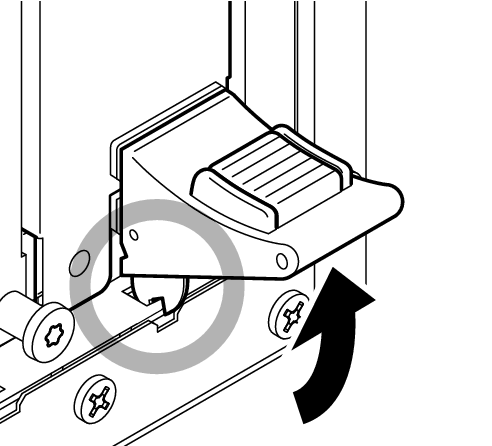
- Make sure that the lever claw is securely locked under the bottom part of the slot.
NOTE
- If the lever claw does not lock in, pull up the card slightly, then push it in.
- Affix the card using the screws that were previously used to affix the slot cover.
- If the card is not fastened securely, component failure or malfunction may occur.
Installing the RY card
Insert the Mic/line input card (RY16-ML-SILK) into RY card slot 1 on the I/O rack. Insert the analog output card (RY16-DA) into RY card slot 2 on the I/O rack.
Installing an RY Card
- Make sure that both power indicators are off.
- Installing or removing a card while the power is on may lead to component failure or electric shock.
- Remove the screws that fasten the slot cover to remove the slot cover.
- Keep the cover and fixing screws in a safe place for future use.
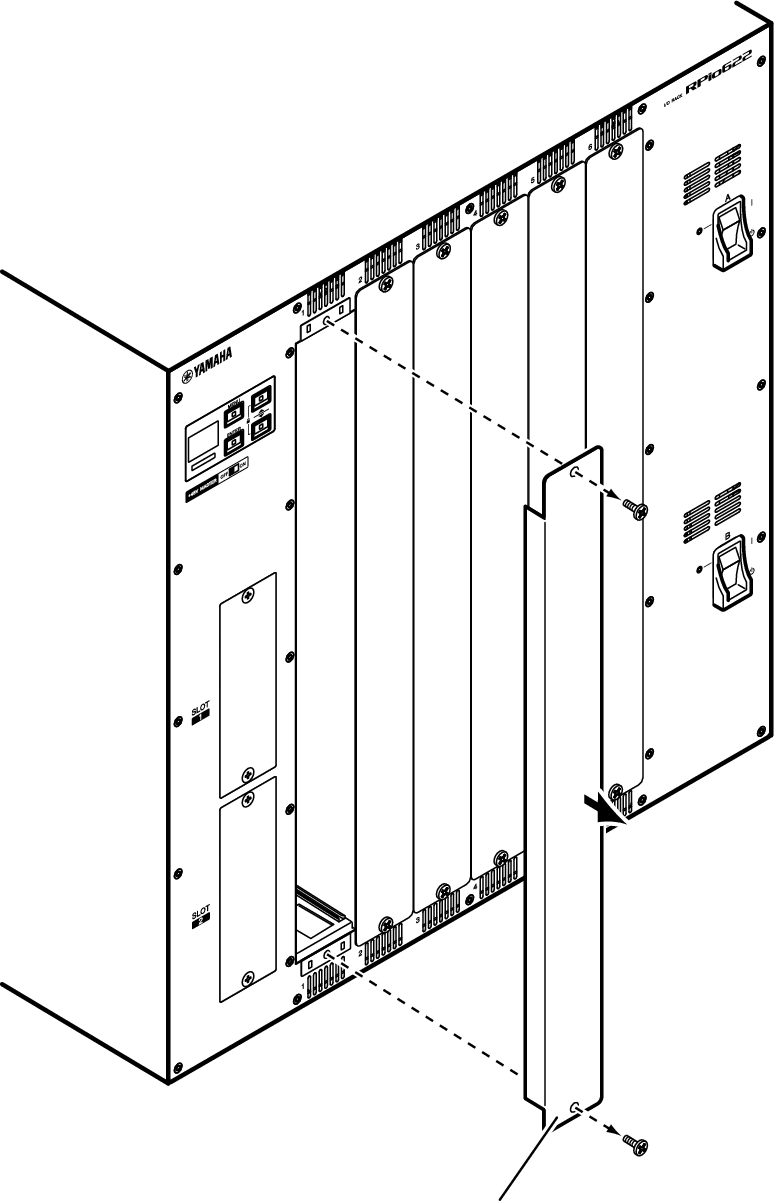
- Align both edges of the card with the guide rails inside the slot, and then insert the card into the slot.
- Push the card all the way into the slot so that the connector at the end of the card is correctly inserted into the connector inside the slot.
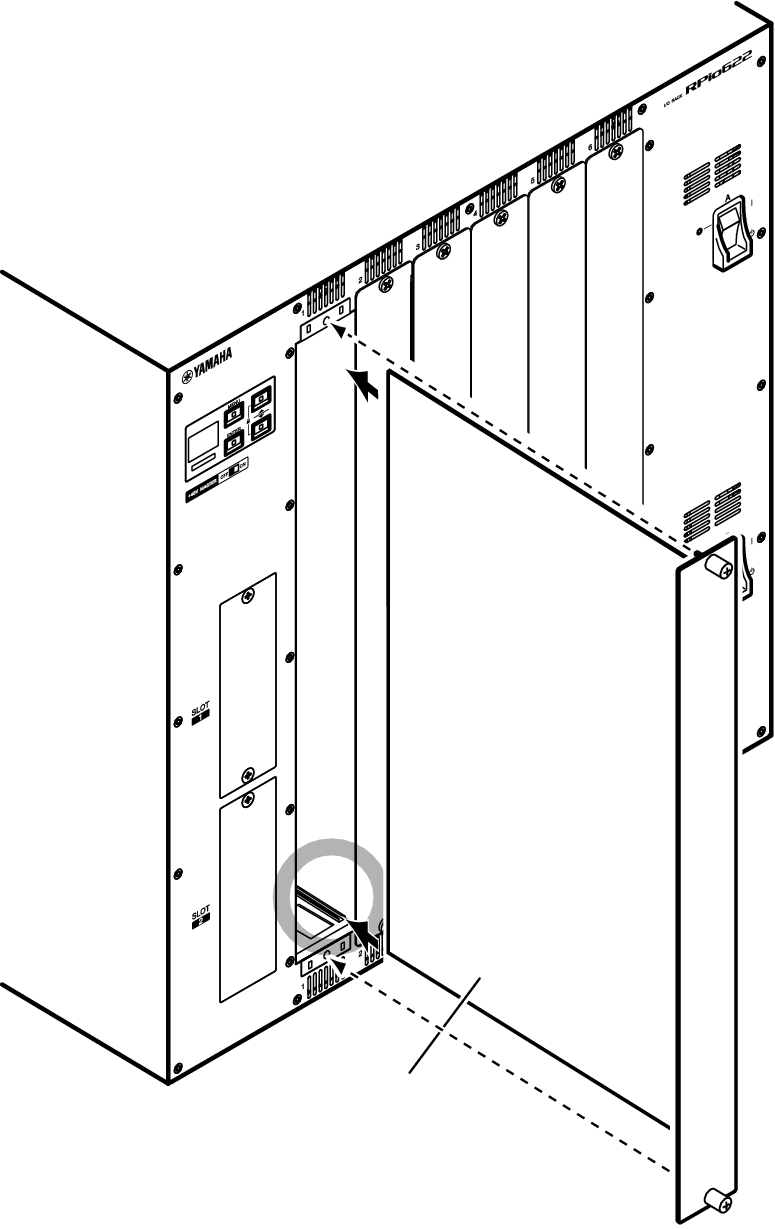
- Fasten the card using the screws attached to the card.
- If the card is not fastened securely, component failure or malfunction may occur.
NOTE
- Use a tool, such as a screwdriver, to tighten the screws to secure the cards. The slots on the unit are well structured and shielded so that the cards will fit tightly into the slots. If the screws are not sufficiently tightened, the card might not be efficiently shielded and other cards might not fit into the slots easily.