Screens and Components
Screens and Components
DEVICE LIST screen
The DEVICE LIST screen appears when you tap the
![]() button in the toolbar.
button in the toolbar.
In the DEVICE LIST screen, you can view a list of all devices that have been paired via Bluetooth and are now available for operation (online). You can also adjust the main levels for multiple units simultaneously.

①
Refresh button
Tap to search again for other devices that can be connected.
NOTE
-
If a device was connected in the past and the password has not changed, it will connect automatically.
②
ALL SELECT button
Tap to select all devices that are online (connected). Each selected device will be surrounded by a white rectangle.
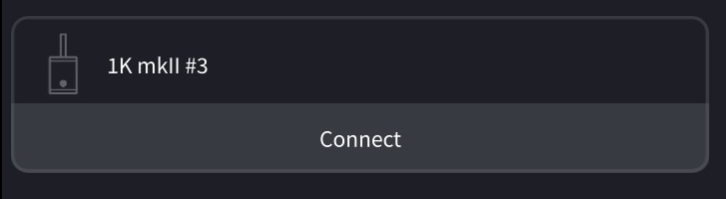
③
Connect button
Appears for an offline device (a device that has been found during search but has not been connected yet). Tap this button to connect to the selected device.
④
MAIN LEVEL button/slider
Tap the up or down buttons to set the main volume level. You can adjust the level for a single selected device, or multiple selected devices simultaneously.
About the device list display
■
Offline devices
If a device has been found during search but has not been connected online yet, the device icon will be grayed out.
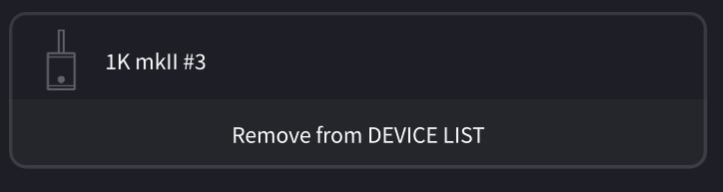
■
Virtual devices
If a device was connected in the past but its corresponding STAGEPAS unit does not exist any longer, it will appear as a virtual device.
If you do not plan to connect that device, tap the [Remove from DEVICE LIST] button to remove the virtual device from the list.
NOTE
-
If you remove the virtual device, the corresponding stored password will also be deleted.
■ Online (connected) devices
STAGEPAS 1K mkII

STAGEPAS200

①
Main level meters, LIMIT indicator
The meters indicate the speaker output signal level in real time in stereo for STAGEPAS 1K mkII or monaural for STAGEPAS200. The indicator lights red when the limiter is applied.
②
Device name
This field indicates the device name you specified.
③
Identify button
If you tap this button, the indicators on the selected STAGEPAS unit will flash for a time.
④
Open Mixer button
Tap to display the screen for the corresponding device.
⑤
Disconnect button
Tap to disconnect the STAGEPAS unit.
⑥
Main level
Indicates the main volume level.
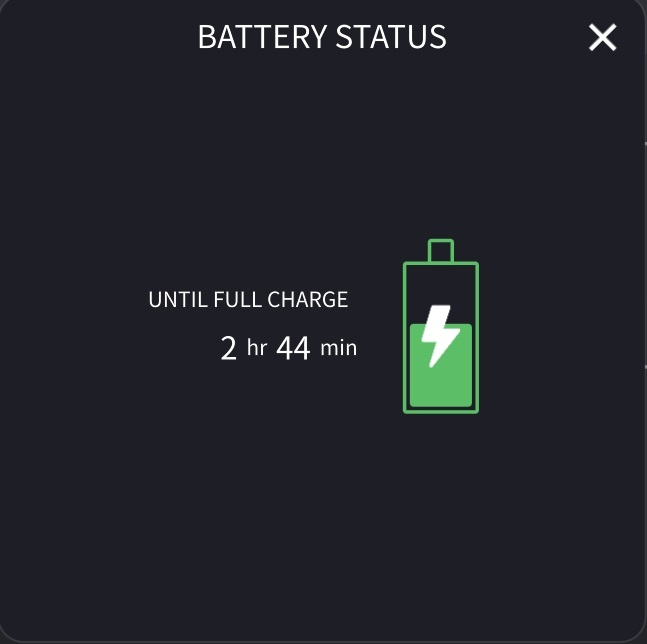
⑦
Battery (STAGEPAS200 only)
This icon indicates the remaining battery charge amount.
Tap the icon to open a popup menu that enables you to check the battery status in more detail.
NOTE
-
Time duration indication may vary depending on the operating environment. Use this indicator only as a rough guide. We recommend that you maintain the battery charge as high as possible.
⑧
PHANTOM indicator (STAGEPAS200 only)
Lights red when phantom power is turned on.
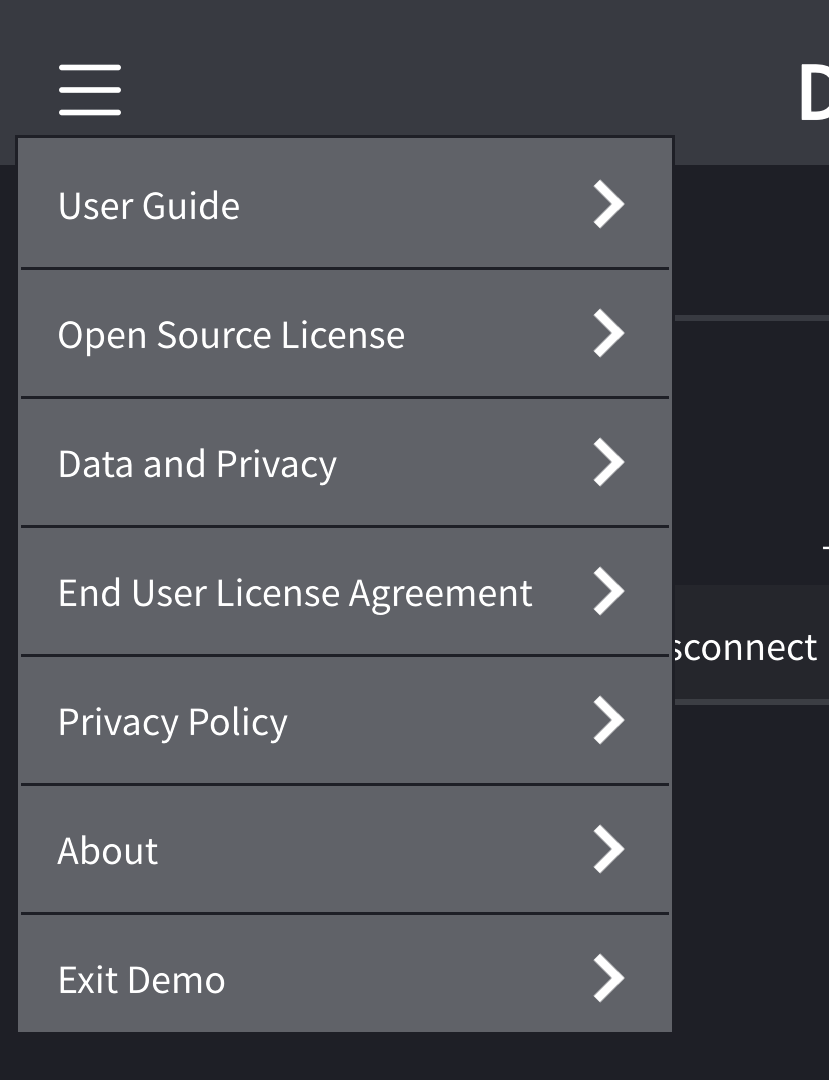
About the hamburger icon
Tap this three-line icon in the upper left corner to access the navigation menu.
FADER screen
■ STAGEPAS 1K mkII

■ STAGEPAS200

①
Input level faders, level meters, PEAK indicators
Each fader enables you to set the input signal level for the corresponding channel. Each level meter indicates the input signal level in real time.
From -60 dB to -18 dB, the meter lights green, and up to 0 dB it lights yellow. The PEAK indicator lights up at -3 dB or higher.
②
Monitor level fader (STAGEPAS 1K mkII only)
Enables you to set the monitoring level of the output signal.
③
Channel view open buttons
Tap to display the channel view screen for the corresponding channels.
④
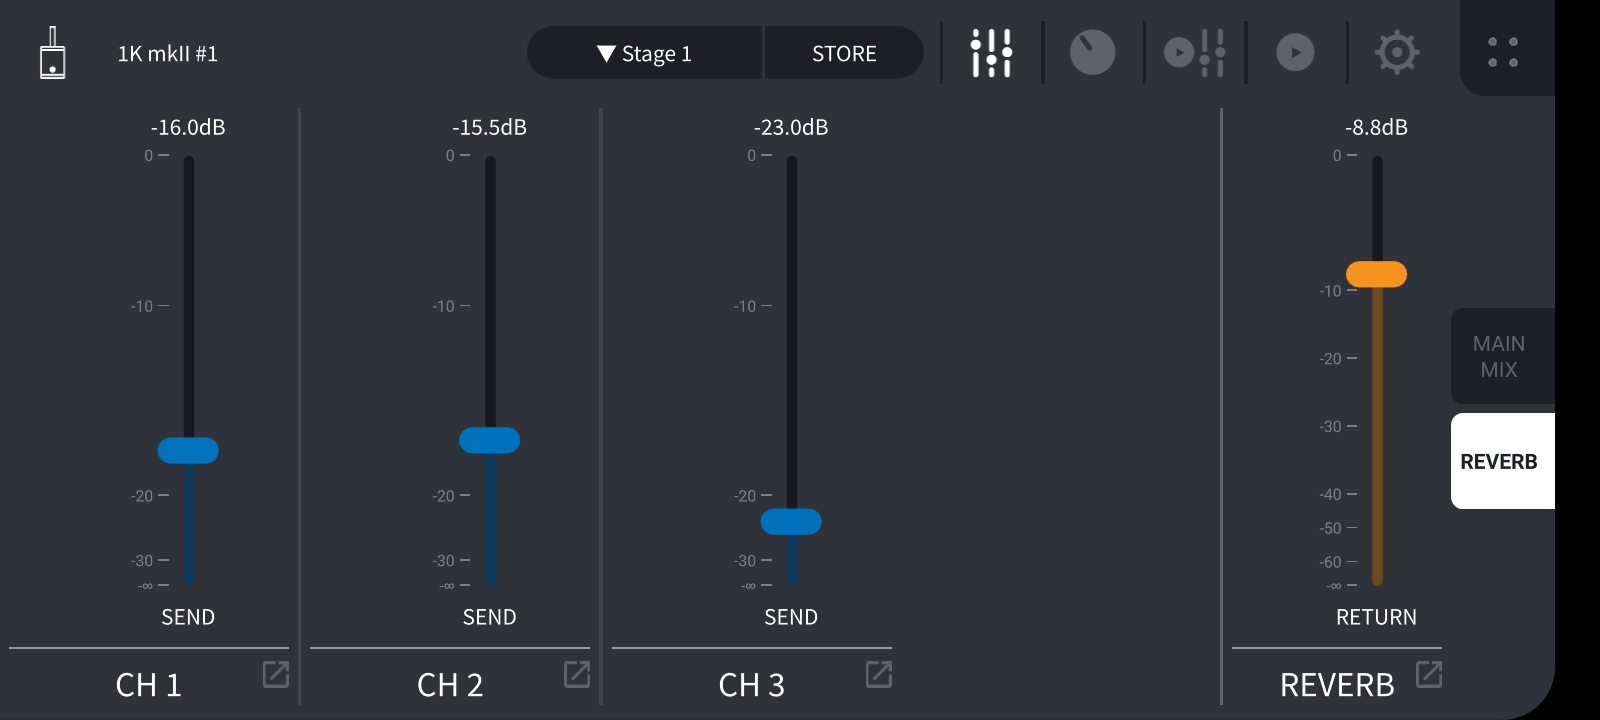
MAIN MIX/REVERB switching tabs (STAGEPAS 1K mkII only)
Enable you to switch between the MAIN MIX screen and the REVERB screen.
In the REVERB screen, you can set the Sends On Fader level (signal amount sent from each channel via the fader) .
⑤
LIMIT indicator
Lights red when the limiter is applied.
⑥
Main level fader, level meters
The fader enables you to set the overall level of the output signal. The level meters for the STAGEPAS 1K mkII indicate the output signal level in stereo.
NOTE
-
Each input level fader in STAGEPAS Controller affects the digital level immediately after the corresponding channel level of the STAGEPAS unit. Use the [LEVEL] knobs on the STAGEPAS unit to adjust the volume level roughly, and then use these faders to fine-adjust the digital level.
⑦
MAIN MIX/REVERB/DELAY/CHORUS switching tabs (STAGEPAS200 only)
Enable you to switch among the MAIN MIX screen, REVERB screen, DELAY screen(STAGEPAS200 only) and CHORUS screen(STAGEPAS200 only).
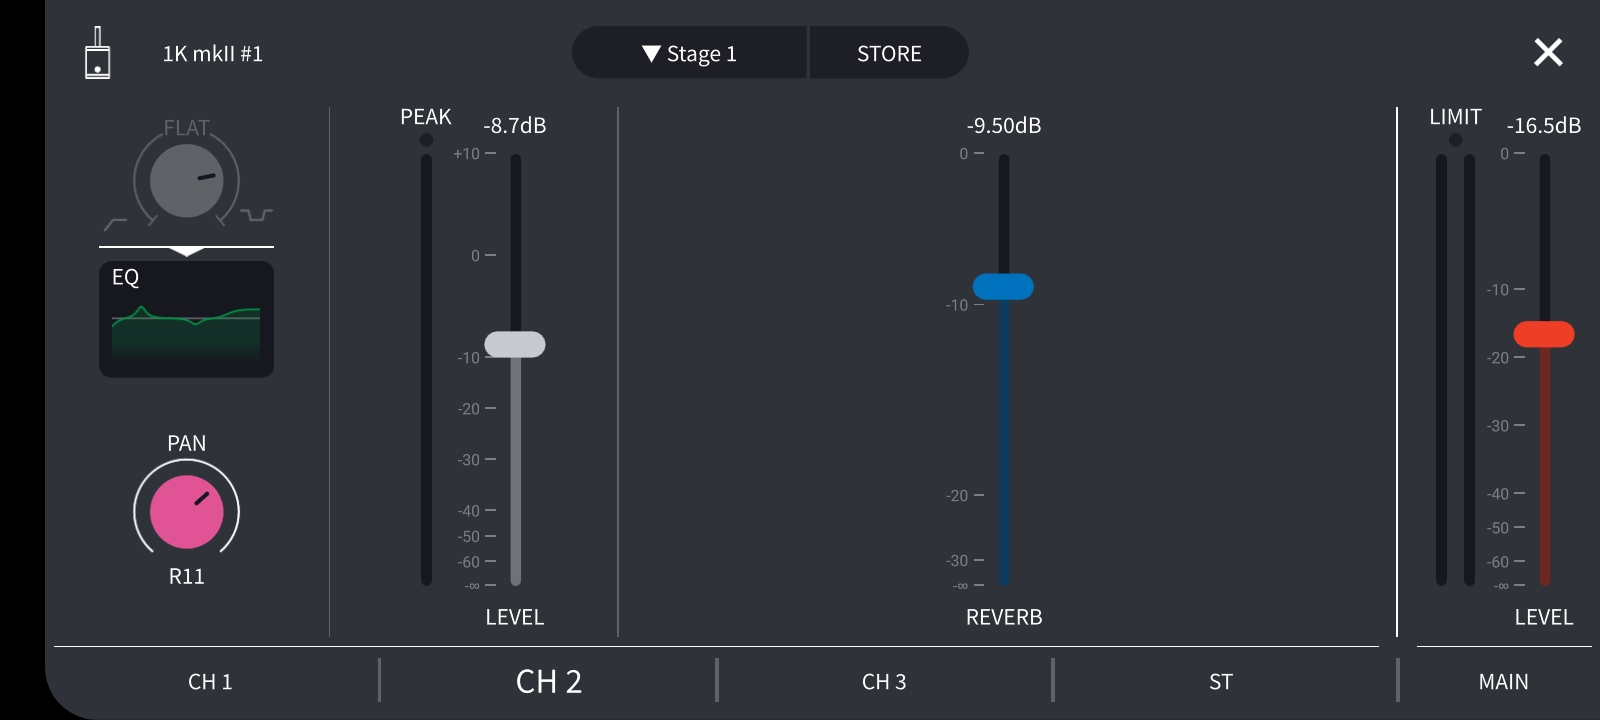
EQ/PAN screen (STAGEPAS 1K mkII)

①
EQ knobs
Each knob specifies the EQ value of the corresponding channel. From the center (FLAT) position, turn the knob counter-clockwise to cut the low range. Turn the knob clockwise to boost both low and high ranges.
②
EQ frequency chart icons
Touch each icon to access the detailed settings screen where you can edit EQ frequencies.
③
PAN knobs
Enables you to specify the L/R position in STEREO mode.
④ DUCKER ON indicator, open button for the detailed settings screen
⑤
MONO/STEREO mode indicator
Lights up in STEREO mode. Use the STAGEPAS unit to switch modes.
⑥
MODE knob
Enables you to adjust the overall sound pressure and frequency balance. The center position (MUSIC) is a basic setting. If you turn the knob counter-clockwise (SPEECH), it will cut unneeded low-range frequencies, and create an optimum setting for speech, or for singing while playing an acoustic musical instrument. If you turn the knob clockwise (CLUB), it will create an optimum setting for playback of sound sources, since the high and low ranges are boosted.
⑦ REVERB ON indicator, open button for the detailed settings screen
⑧
Channel view open buttons
Tap to display the channel view screen for the corresponding channels.
EQ/PRESET screen (STAGEPAS200)

①
EQ/PRESET knobs
Turn the knobs counter-clockwise from the center (FLAT) position to cut the low range. Turn them clockwise to boost both low and high ranges.
[PRESET] knobs
Turn the knobs beyond the EQ setting range to select a preset. These presets cover EQ, Comp and microphone simulator.
Channel 1 is suitable for microphone or keyboard.
Channels 2 and 3 are suitable for microphone or guitar.
Channels 4 and 5 are suitable for music player or keyboard.
②
EQ frequency chart icons
Touch each icon to access the detailed settings screen where you can edit EQ frequencies.
③
COMP frequency chart icons
Touch each icon to access the detailed settings screen where you can edit COMP frequencies.
④
MIC SIM icons
You can view the virtual microphone setting with these icons. Touch each icon to access the detailed settings screen where you can edit virtual microphone characteristics. (Channels 2 and 3 only)
⑤ DUCKER ON indicator, open button for the detailed settings screen
⑥
PHANTOM indicator
Lights up when phantom power is turned on.
⑦
Main EQ frequency chart
Touch this icon to access the detailed settings screen where you can edit EQ frequencies.
⑧
FBS (Feedback Suppressor)
Enables you to turn the FBS function on or off. The annoying howl of feedback is an oscillation that is triggered by sound entering the microphone from a loudspeaker. The Feedback Suppressor function prevents this feedback from occurring.
⑨
MODE knob
Enables you to adjust the overall sound pressure and frequency balance. The center position (MUSIC) is a basic setting. If you turn the knob counter-clockwise (SPEECH), it will cut unneeded low-range frequencies, and create an optimum setting for speech, or for singing while playing an acoustic musical instrument. If you turn the knob clockwise (CLUB), it will create an optimum setting for playback of sound sources, since the high and low ranges are boosted.
⑩
MONI/LINK button
Set this button according to how the MONITOR/LINK connectors will be used.
【MONITOR mode】
In this mode you can adjust the output level only for the MONITOR or LINK level, independent from the main level. Use this mode when you want to adjust the volume level separately from the speaker volume.
【LINK (OUT/THRU) mode】
When you connect multiple STAGEPAS200 units through the LINK connectors, set the first unit to [LINK OUT] mode. The MONITOR/LINK OUTPUT will link with the main level on this first unit.
Set the second and subsequent units to [LINK THRU] mode. Each of these units will send the MONITOR/LINK OUTPUT to the next STAGEPAS unit without being affected by its own main level.
⑪ EFFECT ON button, open button for the detailed settings screen
⑫
Channel view open buttons
Tap to display the channel view screen for the corresponding channels.
EQ screen
■ STAGEPAS 1K mkII

■ STAGEPAS200

①
EQ ON button
Enables you to turn the equalizer on or off.
②
Frequency band selection
Tap a number (1-4) (or 1-6 for MAIN EQ of STAGEPAS200) for the frequency band for which you want to adjust EQ frequencies by dragging the corresponding number (①-④) (or ①-⑥for STAGEPAS200) in the frequency chart.
③
EQ frequency chart
A green line in this chart indicates EQ frequencies synthesized from all bands. Frequencies of a selected individual band are represented by a white line.
Drag the numbers in the chart to directly edit the frequency of each band.
④
Detailed parameter settings area
Enables you to set the parameters for the selected band. If you want to exclude a certain band from being synthesized, tap the [BYPASS] button.
⑤
PRESETS
Here you can recall an EQ preset. You cannot store a preset here.
⑥
EQ/COMP/MIC SIM switching tabs
Enable you to switch among the EQ (equalizer) screen, COMP (compressor) screen, and MIC SIM (microphone simulator) screen.
NOTE
-
The frequency range which you can adjust differs depending on the band.
COMP screen (STAGEPAS200 only)
The Compressor function compresses the dynamic range of the signals. If the input signal level exceeds a specified level (THRESHOLD), the dynamic range will be reduced.

①
COMP ON button
Enables you to turn the Compressor function on or off.
②
COMP characteristic chart
Indicates how the COMP effect works on the signal by a graph. The horizontal axis represents the input signal level, and the vertical axis represents the output signal level.
③
Input meter
Indicates the input signal level in real time.
④
GR meter
Indicates the amount of gain reduction.
⑤
PRESETS
Here you can recall an COMP preset. You cannot store a preset here.
⑥
EQ/COMP/MIC SIM switching tabs
Enable you to switch among the EQ (equalizer) screen, COMP (compressor) screen, and MIC SIM (microphone simulator) screen.
⑦
Detailed parameter settings area
Enables you to set detailed parameters, such as the threshold level at which compressor starts working.
MIC SIM screen (STAGEPAS200 only)
You can simulate an acoustic guitar sound picked up by a microphone (for channels 2 and 3 only).

①
MIC SIM ON button
Enables you to turn the Microphone Simulator function on or off.
②
MIC TYPE button
Enables you to select a microphone type.
【DYAMIC (dynamic microphone)】: You can simulate an acoustic guitar sound picked up by a dynamic microphone. It features a well-framed tight sound.
【CONDENSER (condenser microphone)】: You can simulate an acoustic guitar sound picked up by a condenser microphone. It features a supple mid range.
③
BLEND slider
Enables you to adjust the amount of microphone simulation sound to be mixed (blended).
④
PRESETS
Here you can recall a MIC SIM preset. You cannot store a preset here.
⑤
EQ/COMP/MIC SIM switching tabs
Enable you to switch among the EQ (equalizer) screen, COMP (compressor) screen, and MIC SIM (microphone simulator) screen.
DUCKER screen
The Ducker function automatically lowers the channel volume of BGM and the like only when a microphone or certain other signal sources are being input.
The ST channel volume (or CH4/5 volume for STAGEPAS200) will automatically be lowered if the signal level input to channels 1-3 exceeds a certain level. Use this function if you want to automatically lower the BGM volume level while using the microphone.

①
DUCKER ON button
Enables you to turn the Ducker function on or off.
②
SOURCE selection
Select the input channel for the source signal here. You can also select multiple channels.
③
Ducker characteristic chart
Displays a characteristic image indicating how the ducker works. Refer to this chart when setting the ducker parameters.
④
Detailed parameter settings area
Enables you to set detailed parameters, such as threshold.
REVERB screen
■ STAGEPAS 1K mkII

■ STAGEPAS200

①
REVERB ON button
Enables you to turn the Reverb function on or off.
②
USER PRESET buttons
Enable you to store three different effect settings (reverb, delay, and chorus) all together in each preset. You can store up to three presets (A, B, and C).
To store the settings as a preset, touch and hold down the desired button for three seconds or longer. To recall a preset, tap the desired button.
③
Effect type
Tap to select the desired reverb. You can select one of the following reverb types.
|
HALL
|
As you can tell from the name, this reverb simulates the acoustic ambience of a large room, and features a longer reverb time.
|
|
ROOM
|
This reverb simulates acoustic ambience of a room, and features shorter reverb time. |
|
PLATE
|
This reverb simulates reverberation created by a metal plate, which was often used to create a reverb sound in recording studios in the past.
|
|
ECHO
|
This reverb adds a delay to stereo signals while cross-feeding left and right feedback. |
④
Reverb return level
Use this fader to specify the amount of reverberation.
⑤
TIME
Use this slider to specify the reverb time.
⑥
EFFECT ON button
Enables you to turn the overall Effect function on or off.
⑦
REVERB/DELAY/CHORUS switching tabs
Enable you to switch among the REVERB screen, DELAY screen, and CHORUS screen.
DELAY screen (STAGEPAS200 only)

①
DELAY ON button
Enables you to turn DELAY on or off.
②
USER PRESET buttons
Enable you to store three different effect settings (reverb, delay, and chorus) all together in each preset. You can store up to three presets (A, B, and C).
To store the settings as a preset, touch and hold down the desired button for three seconds or longer. To recall a preset, tap the desired button.
③
TAP button
Tap this button twice or more to set the delay time, which will be set as the time duration between two taps.
④
Detailed parameter settings area
Enables you to set detailed parameters, such as delay time.
⑤
Delay return level
Use this fader to specify the amount of delay.
⑥
EFFECT ON button
Enables you to turn the overall Effect function on or off.
⑦
REVERB/DELAY/CHORUS switching tabs
Enable you to switch among the REVERB screen, DELAY screen, and CHORUS screen.
CHORUS screen (STAGEPAS200 only)

①
CHORUS ON button
Enables you to turn CHORUS on or off.
②
USER PRESET buttons
Enable you to store three different effect settings (reverb, delay, and chorus) all together in each preset. You can store up to three presets (A, B, and C).
To store the settings as a preset, touch and hold down the desired button for three seconds or longer. To recall a preset, tap the desired button.
③
Detailed parameter settings area
Enables you to set detailed parameters, such as chorus speed.
④
Chorus return level
Use this fader to specify the amount of chorus.
⑤
EFFECT ON button
Enables you to turn the overall Effect function on or off.
⑥
REVERB/DELAY/CHORUS switching tabs
Enable you to switch among the REVERB screen, DELAY screen, and CHORUS screen.
MUSIC PLAYER/FADER screen

①
PEAK indicator
Lights red (
![]() ) at -3 dB or higher.
) at -3 dB or higher.
②
Level indicator
Changes color according to the level.
From -60 dB to -18 dB this lights green (
![]() ), and up to 0 dB it lights yellow (
), and up to 0 dB it lights yellow (
![]() ).
).
This is unlit if there is no input.
③
Fader level
Indicates the current fader level.
④
Fader level INC/DEC buttons
Tap the INC(+)/DEC(-) buttons to set the fader level.
The numeric value of the fader level appears between the INC(+)/DEC(-) buttons.
⑤
USER PRESET buttons
Enable you to recall the reverb parameter settings (for STAGEPAS 1K mkII) or the effect parameter settings (for STAGEPAS200).
⑥
REVERB button (STAGEPAS 1K mkII)/EFFECT button (STAGEPAS200)
Tap to turn reverb (for STAGEPAS 1K mkII) or effect (for STAGEPAS200) on or off. The button lights up when reverb/effect is on.
⑦
MAIN level INC/DEC buttons
Tap the INC(+)/DEC(-) buttons to set the main level.
The numeric value of the main level appears between the INC(+)/DEC(-) buttons.
⑧
LIMIT indicator
Lights red when the limiter is applied.
MUSIC PLAYER screen

①
Song title
This field indicates the title of the currently-playing song. If the song is not titled, the file name appears.
②
Song position
This bar indicates the position in time being played. You can change the song position by dragging the song position marker. The remaining time in the song is shown at the right edge.
③
Song button
Tap to open the
SONG screen
.
④
Play/Pause button
When playback is stopped (or paused), the Play button appears here. Tap the Play button to play the song.
If Cued Mode is turned on, the player will pause at the beginning of the next song when the current song playback ends.
NOTE
-
You can specify playback mode using the Cued Mode parameter in the SETTINGS screen .
⑤
Back skip button
Tap once to jump to the beginning of the song. Tap twice in succession to jump to the beginning of the previous song.
If you tap this button during playback, playback stops at the beginning of the song if Cued Mode is turned on. If Cued Mode is turned off, playback starts from the beginning of the song.
⑥
Skip button
Tap to jump to the beginning of the next song.
If you tap this button during playback, playback stops at the beginning of the song if Cued Mode is turned on. If Cued Mode is turned off, playback starts from the beginning of the song.
⑦
Repeat button
Each time you tap this, the setting alternates between Repeat All ON (
![]() )→Repeat One Song ON (
)→Repeat One Song ON (
![]() )→ Repeat OFF. This button lights up when either repeat is turned on.
)→ Repeat OFF. This button lights up when either repeat is turned on.
⑧
Cued Mode indicator
Lights up when Cued Mode is turned on in the
SETTINGS screen
. If this mode is turned on, the player will pause at the beginning of the next song when the current song playback ends.
SONG screen
In this screen you can select a song to play back or create a playlist.
To switch screens, tap the menu tab at the left.
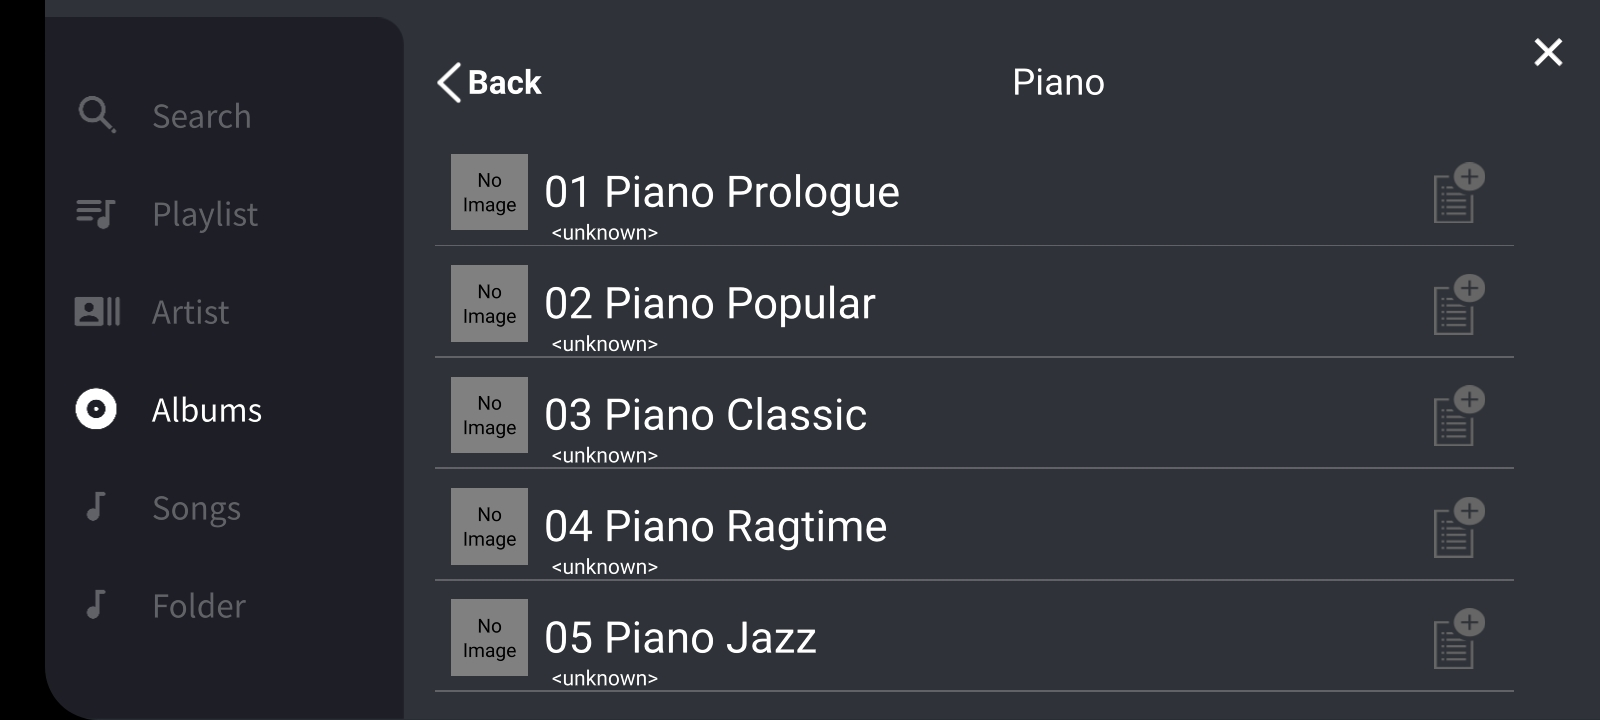
NOTE
-
You cannot edit playlists created elsewhere than this application. A playlist that cannot be edited is indicated by a lock symbol icon displayed in its upper left corner.
SETTINGS screen
Here you can make various settings for STAGEPAS Controller.

■
Editor Operation
①
Knob Operation
Specifies how the knobs in STAGEPAS Controller will operate.
Linear:
Drag upward or right to increase the value, or downward or left to decrease the value.
Rotary:
Drag in a circle around the shape of the knob to edit the value. Clockwise increases the value, and counter-clockwise decreases the value.
②
Double tap to default setting (Fader, EQ, etc.)
Enables you to turn double tap operation on or off. If this setting is turned on, you can reset a parameter in the FADER, EQ, or PAN screen to its default value by double-tapping it.
③
Recall Confirmation
Enables you to specify whether a confirmation message is displayed when recalling a scene.
■
Music Player
④
Count Leader
Enables you to specify a duration of time until playback actually starts after you tap the Play button of MUSIC PLAYER.
Use the slider to adjust the setting in one-second steps for a range of 0–10 seconds.
If you specified Count Leader, a circle that makes one rotation in the specified time appears around the Play button when you tap it.
If you tap the PLAY button again during the countdown, playback will be canceled.
⑤
Cued Mode
Enables you to specify the playback mode of MUSIC PLAYER. If this mode is turned on, the player will pause at the beginning of the next song when the current song playback ends. If this mode is turned off, the player will continue playing the next song.
■ DEVICE SETTINGS screen
■ STAGEPAS 1K mkII

■ STAGEPAS200

①
DEVICE NAME
Enables you to specify the device name of the STAGEPAS.
NOTE
-
Bluetooth Audio will be indicated by the device name (specified in field ①) with the word “AUDIO” added at the end on the Bluetooth screen of your mobile device.
Communication with STAGEPAS Controller will be indicated by the device name (specified in field ①) with the word “CONTROL” added at the end.
②
PASSWORD
Enables you to specify a 4-digit password for security.
③
LAST MEMORY RESUME
Enables you to specify how the unit starts when the power is turned on: whether the unit starts using the settings at the time of most recent power-off (ON); or whether the parameter settings are reset to default and the unit uses the settings specified on the unit’s panel (OFF).
④
NOISE GATE THRESHOLD
(STAGEPAS 1K mkII only)
You can reduce noise during Bluetooth Audio playback. In general, set this to NORMAL. If you think the gate effect is too obvious, set this to OFF. If the noise level is loud, set this to HIGH.
⑤
Update
You can update firmware for the STAGEPAS unit.
Tap the [Update] button to access the FIRMWARE UPDATE screen, which displays the information of the corresponding device, device version, and a new version included in STAGEPAS Controller. Tap the [Update] button to update firmware.
NOTE
-
Updating firmware might take from a few minutes up to 10 minutes or longer, depending on the surrounding radio wave environment.
If updating fails repeatedly, try it again in a different location or at a different time. -
Update firmware while the unit is connected to the power. If the unit is running on the battery, updating firmware will require more than 30% of the remaining battery charge.
⑥
AUTO STANDBY (STAGEPAS200 only)
If AUTO STANDBY is turned on and you do not use the STAGEPAS200 unit that is running on the battery for more than 30 minutes, the power to the unit will turn off automatically.