SETTINGS Window
SETTINGS Window
Use the SETTINGS window to configure the various settings in VST Rack.
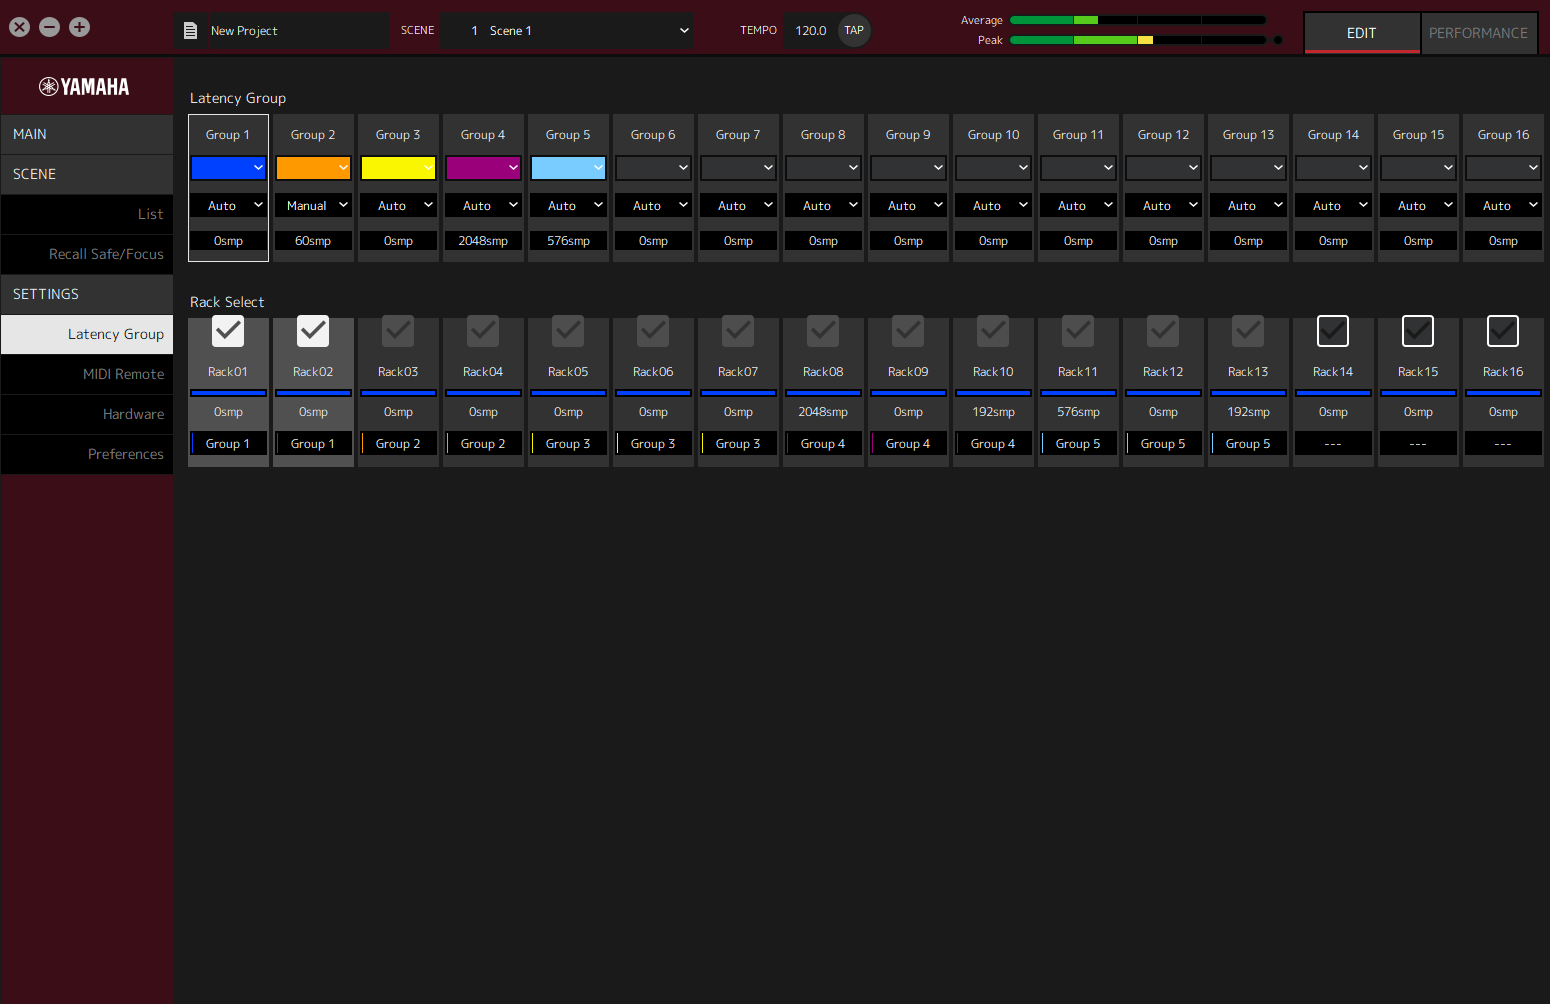
Latency Group window
Use this window to configure the settings for latency groups.

Latency Group field
- ① Latency group name
-
Shows the name of the latency group. Double-click to edit the name.
- ② Latency group color
-
You can specify the color for each latency group. Click to display the color palette.
- ③ Latency compensation method
-
Sets the latency compensation method. Click and then select a method from the menu that is displayed.
Latency Compensation Method Menu
| Setting | Description |
|---|---|
|
Auto |
Matches the latency of the entire group to the rack with the highest latency in the group. |
|
Manual |
Adjust the latency value manually. |
- ④ Latency
-
Shows the latency value. If the latency correction method is Auto, the maximum latency of the racks in the group is displayed. If the latency correction method is Manual, you can double-click to enter a value.
Context Menu
Right-click on the latency to display the context menu. Click the desired operation in the menu.
| Setting | Description |
|---|---|
|
sample |
Shows the latency in samples. |
|
msec |
Shows the latency in milliseconds. |
Rack Select field
- ① Rack Select checkbox
-
Select the checkboxes for racks that do not belong to the group to add them to the group.
Click a highlighted rack to remove it from the group.
|
Assigned to Group |
Not Assigned to Group |
Assigned to Other Group |
|
|
|
|
- ② Rack name
-
Shows the name of the rack. Rack names cannot be edited in the Latency Group window.
- ③ Rack color
-
Shows the rack color that was selected in the MAIN window. Rack color cannot be selected in the Latency Group window.
- ④ Latency
-
Shows the latency value for the rack.
- ⑤ Latency group name
-
Shows the name of the latency group to which the rack is assigned.
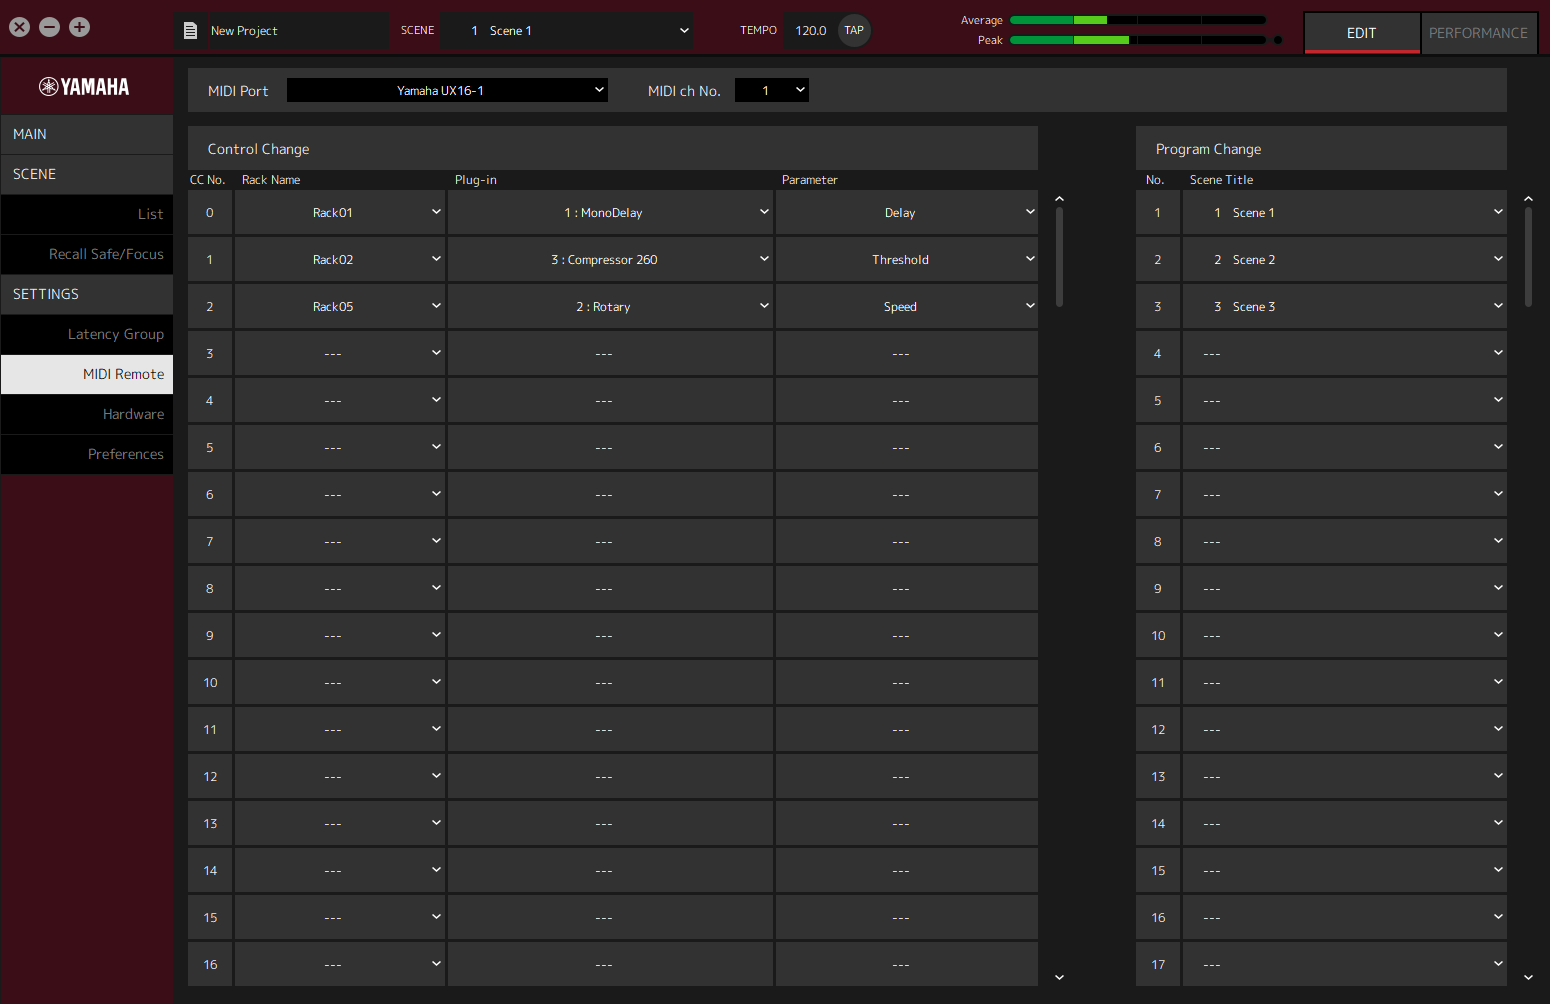
MIDI Remote Window
Use this window to configure remote settings.

- ① MIDI Port name
-
Shows the name of the MIDI Port. Click and then select a MIDI port from the menu that is displayed. This is a global setting for VST Rack.
- ② MIDI ch No.
-
Shows the MIDI channel number. Click and then select a number from 1 to 16 in the list that is displayed. This is a global setting for VST Rack.
Control Change List
The corresponding parameters can be changed by control change messages from a MIDI device.
- ① CC No.
-
Shows the control change number.
- ② Rack Name
-
Shows the name of the rack. Click and then select a rack name from the menu that is displayed.
- ③ Plugin
-
Shows the plug-in name. Click to display a list of plug-ins in the rack selected for Rack Name. Click a plug-in name to select it.
- ④ Parameter
-
Shows the name of the parameter. Click to display a list of parameters for the plug-in selected for Plugin. Click the name of a parameter to select it.
Program Changes List
The corresponding scenes can be recalled by Program Change messages from a MIDI device.
- ① No.
-
Shows the program change number.
- ② Scene Title
-
Shows the title of the scene that corresponds to the program change number. Click to display a list of the scenes that have been created. Click the title of a scene to select it.
Hardware Window
Use this window to configure the audio device.

- ① Audio device
-
Shows the name of the audio device. Click and then select a device name from the menu that is displayed.
- ② Setup button
-
Click to open a dialog. Click the [Control Panel] button in the dialog to display the audio device control panel. You can change the audio driver settings on the control panel.
| The buffer size can be adjusted in Control Panel. |
- ③ Sample Rate
-
Shows the sampling frequency.
| VST Rack supports only 44.1 kHz, 48 kHz, 88.2 kHz, and 96 kHz. Use Dante Controller to configure the sample rate. |
- ④ Monitor Output
-
Shows the channel that is output when the CUE button in the MAIN window is pressed. Click and then select a channel from the list that is displayed.
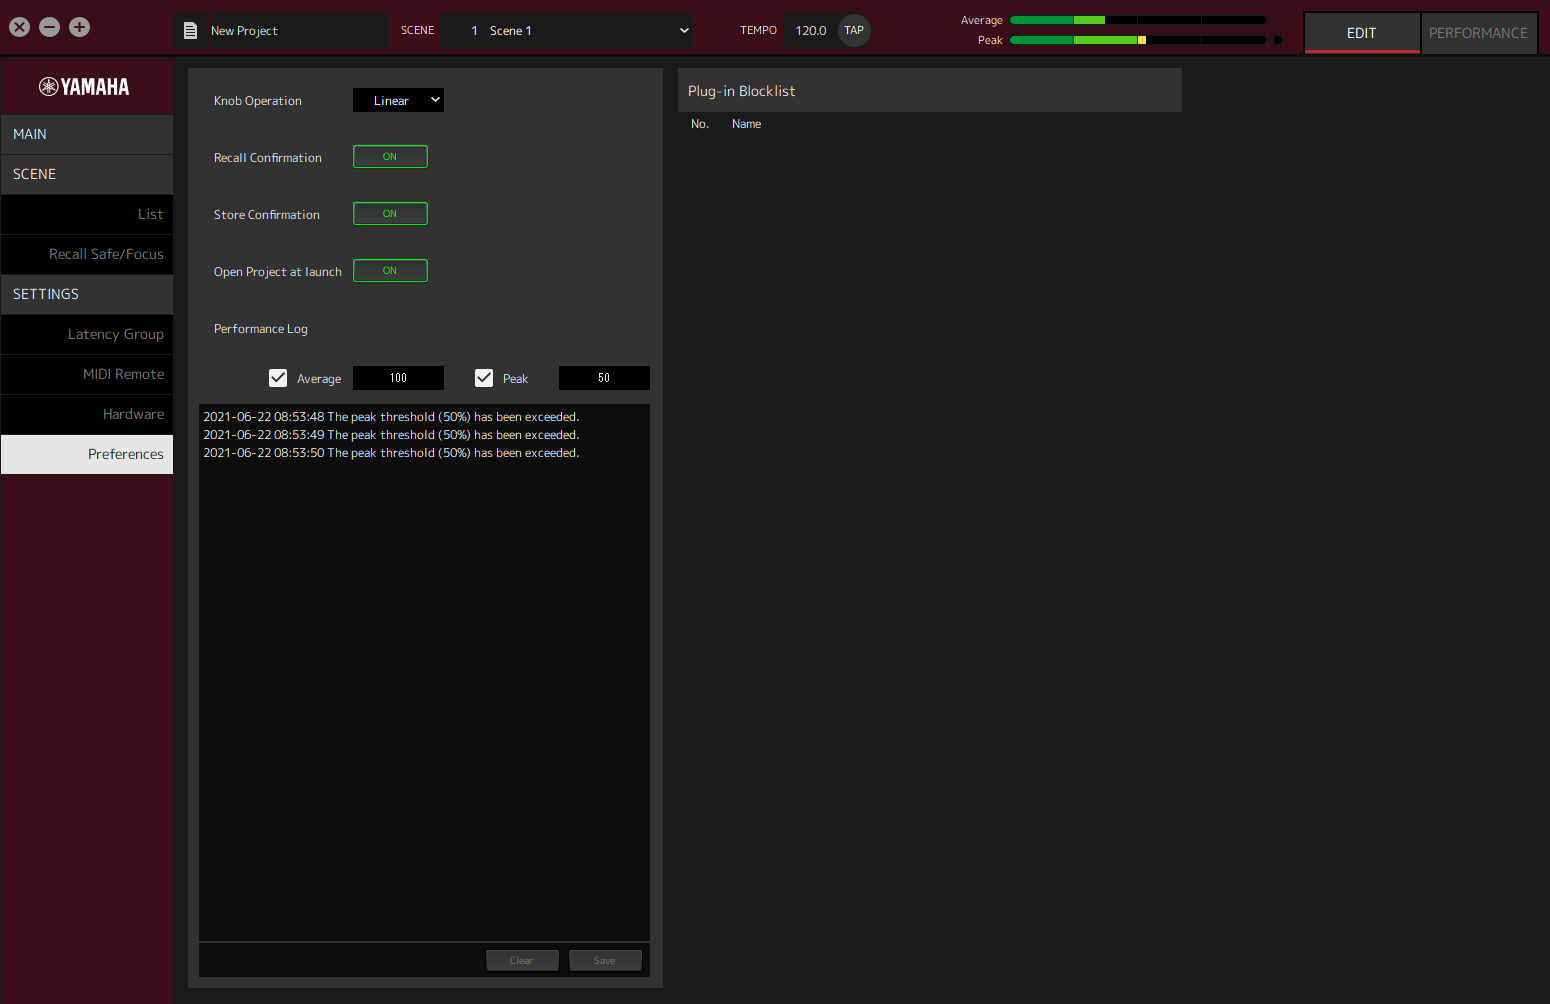
Preferences
Use this window to configure the VST Rack settings.

- ① Knob Operation
-
Shows the method for dragging knobs. Click and then select a dragging method from the menu that is displayed.
Knob Operation Menu
| Setting | Description |
|---|---|
|
Rotary |
Drag as if turning the knob to change the value. |
|
Linear |
Drag up/down or left/right to change the value. |
- ② [Recall Confirmation] button
-
Shows a confirmation message during the Recall operation. Click the button to select on/off.
- ③ [Store Confirmation] button
-
Shows a confirmation message during the Store operation. Click the button to select on/off.
- ④ Open Project at launch
-
Sets whether to load the previously opened project at startup. Click the button to select on/off.
- ⑤ [Performance Log Average] checkbox
-
Records a log when the Average performance meter exceeds the threshold. Click the button to select on/off. The logs are shown in ⑩ Performance log list.
- ⑥ [Performance Log Average] threshold
-
Shows the threshold for the Average performance meter. Click to edit the threshold.
- ⑦ [Performance Log Peak] checkbox
-
Records a log when the Peak performance meter exceeds the threshold. Click the button to select on/off. The logs are shown in ⑩ Performance log list.
- ⑧ [Performance Log Peak] threshold
-
Shows the threshold for the Peak performance meter. Click to edit the threshold.
- ⑨ Plugin Blocklist
-
Shows a list of plug-ins that crashed before, and plug-ins that are not supported.
- ⑩ Performance log list
-
Shows the logs for when the set threshold was exceeded.
- ⑪ [Clear] button
-
Clears all logs.
- ⑫ [Save] button
-
Saves the log. Logs are saved in a CSV format that includes the date, time, and a message.
|
© 2023 Yamaha Corporation
|


