

Configuring the speakers
Configure the speaker settings.
- It is recommended to configure the settings according to the procedure below.
a Room ceiling height setting: “Beam” > “Ceiling Height”
b Adjusting the volume of each of the channels: “Speaker” > “Level” > Select the channel for which to adjust the volume
c (If the above-listed surround effects are insufficient) Beam angle/Focal length adjustment: “Speaker” > “Beam” > “Angle” / “Focal Length”
See below for details about each of the settings.
Beam
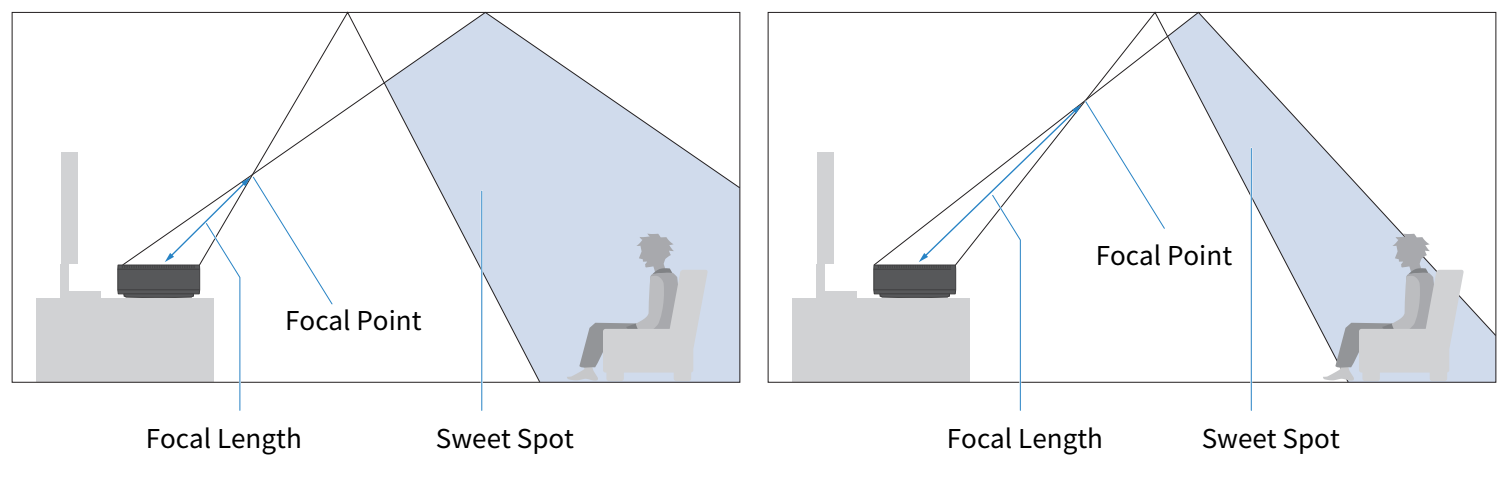
The viewing environment may not make it possible for the default settings to provide an adequate surround sound effect. In such cases, the surround sound effect can be improved by adjusting the beam angle, focal length, and ceiling height.
- This sound bar uses sound beam technology for height channel playback. Sound beam technology is a technology that uses a digital signal processor (DSP) to individually control the audio output from the array speakers (multiple small speaker units arranged in a row) located toward the ceiling at the left and right ends of the sound bar to create a beam-like high directivity characteristic in a specific direction. This technology generates a beam-like high directivity characteristic in a specific direction.
The height channels use sound beams to reflect sound off the ceiling creating an effect that make it seem the sound comes from speakers embedded in the ceiling.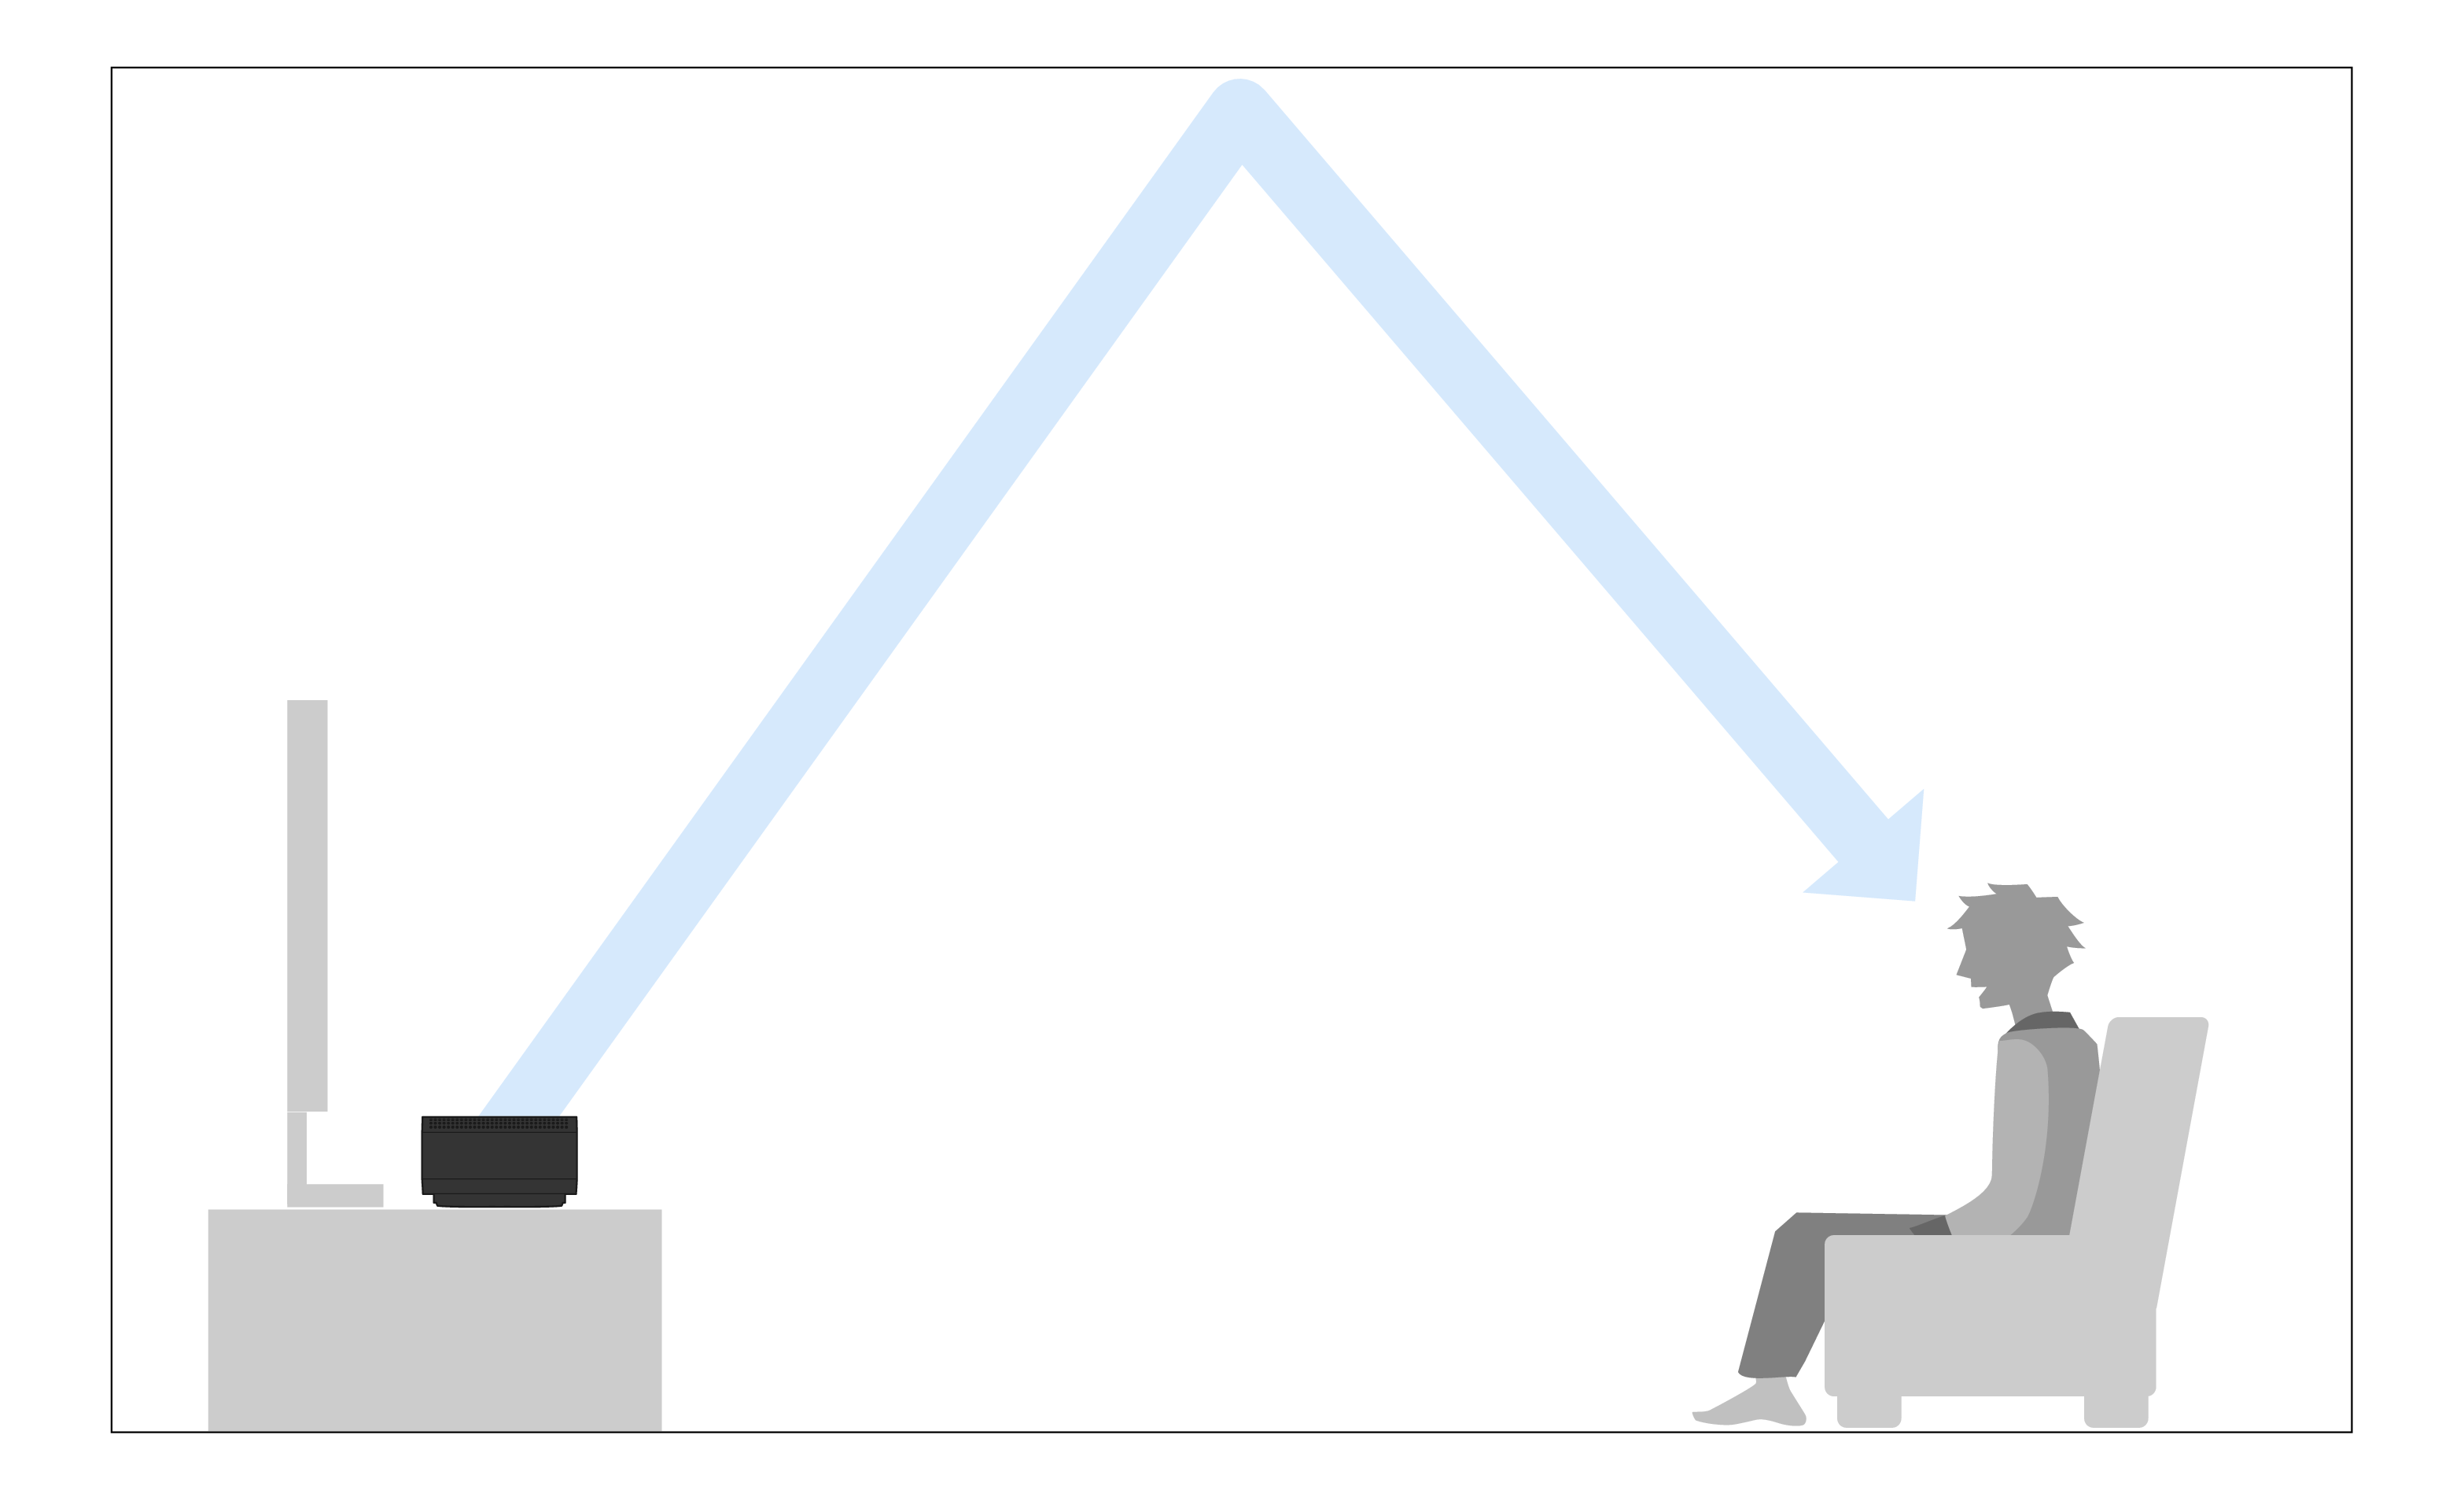
Angle
Adjusts the height beam output angle (vertical) for left and right respectively.
- Setup menu
“Speaker” > “Beam” > “Angle” > “Height L”/“Height R” - Settings
30° to 90° - 90° is straight up.
- Default setting
72°
Focal Length
Adjusts the height beam width (sweet spot) for left and right respectively.
Refer to the following illustration for the focal length.
- Setup menu
“Speaker” > “Beam” > “Focal Length” > “Height L”/“Height R” - Settings
1.0 m to 3.0 m - Default setting
1.8 m
Ceiling Height
Adjusts to suit the ceiling height of the used room.
- Setup menu
“Speaker” > “Beam” > “Ceiling Height” - Settings
1.0 m to 4.0 m - Default setting
2.5 m
- When “Angle”, “Focal Length” are selected, a test tone is automatically played.
- In “Focal Length” and “Ceiling Height”, under “Unit”, you can switch between “Meter” and “Feet”.
If the “Unit” setting is switched, the “Focal Length” setting will return to its default value. Then change the setting again.
- The beam can be used in the following sound modes.
- SURROUND:AI
- 3D MUSIC (“3D MUSIC Upmixer” > “Upmixer” is AURO-3D / DSurr (Dolby Surround) / Neural:X)
- STRAIGHT
- In AURO-3D or Dolby Surround playback, “Ceiling Height” cannot be adjusted.
Level
Adjusts the volume for each channel.
Test Tone
- Setup menu
“Speaker” > “Level” > “Test Tone” - Settings
Off | Test tone is not played. |
On | Test tone is played. |
- After turning “Test Tone” to “On”, press the - (Return) key to select the channel whose volume you want to adjust when returning to the “Level” screen and you can adjust the volume while playing a test tone from the selected channel.
- Closing the Setup menu while the “Test Tone” is still set to “On” will stop the test tone.
- When test tone is used, it is possible to check whether the wireless speakers are connected or whether sound is coming from the wireless speakers when TRUE X SURROUND is used.
Channel selection
- Setup menu
Under “Speaker” > “Level”, select the channel for which to adjust the level. - Settings
-20 to +20
- You can listen to the test tone from each channel by playing the test tone and applying the cursor to it. Adjust the volume by comparing the sound from the front and center with the sound from the subwoofer or wireless speakers.
- “Surround L”, “Surround R”, and “Surround” can also be adjusted with the SURROUND L/R keys on the remote control.
Registration
Turn on the subwoofer and the wireless speakers.
Setup menu
“Speaker” > “Registration”
Settings
Registration | Start registration. |
Clear | Clear registrations. |
- “Registered” is displayed on beside the name of a registered speaker.
- Selecting “Clear” removes all speaker registrations from the sound bar.
- If a wireless speaker firmware update fails three times, “ERROR XXXXXX” (”XXXXXX” is the error number) is displayed beside the name of the speaker.
Contact your dealer or service center if an error occurs.