

AUTOMIXER Screen
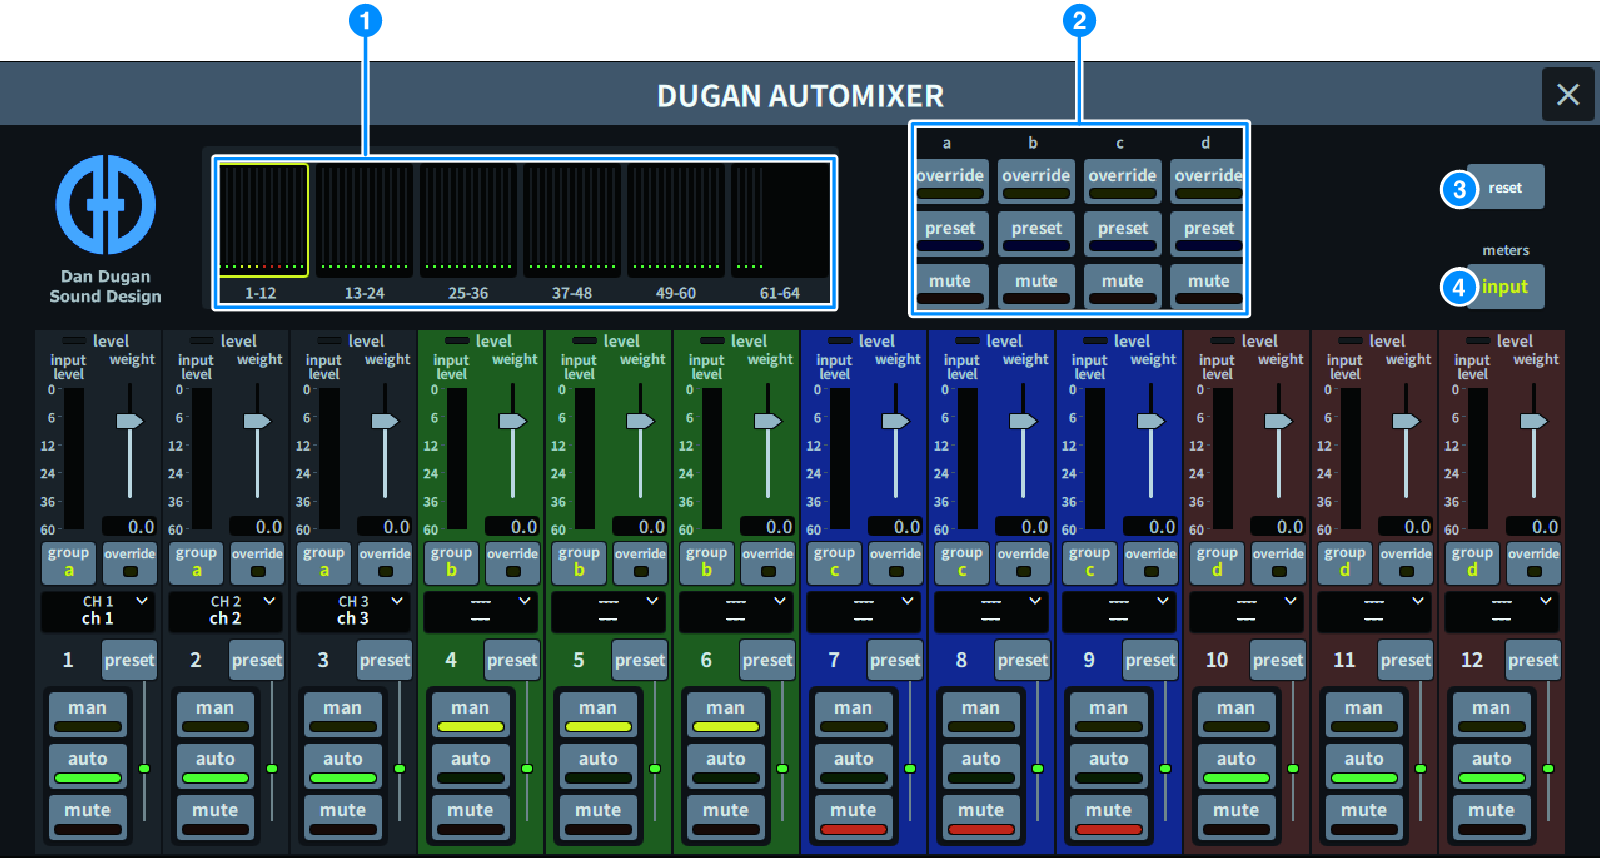
The screen contains the following items.
■ Master field
a | Channel display select buttons Displays the automix gain meters and mode indicators (manual (yellow), auto (green), or mute (red)) for each channel. Press one of these buttons to select channels to be displayed in the channel control field below. |
b | OVERRIDE/PRESET/MUTE buttons These buttons are used to set up each group (a/b/c/d/e) selected in the channel control field. Only the buttons for the selected groups will be displayed.
|
c | reset button Initializes the Automixer settings. |
d | meters button Switches the meter indicators displayed in the channel control field. Pressing the button repeatedly will switch among gain (automix gain), input (input level), and output (output level). NOTICE
|
■ Channel control field
Each channel is always in either man, auto, or mute mode. The indicators for the active channel mode will light up. To select a mode, press the corresponding mode button or the PRESET button in the master field.
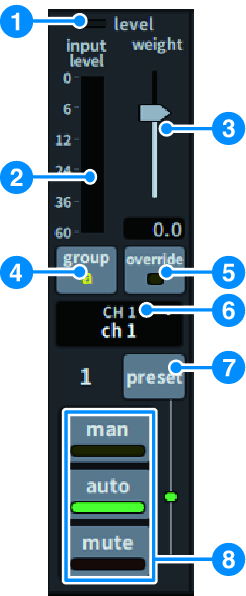
a | Level indicator Lights up green when the audio signal reaches the level appropriate for automatic mixing. NOTICE
|
b | Meter indicator The meter indicator features three display modes. The mode will change each time the meters button in the master field is pressed. gain (Green): Displays the Automixer gain input (Yellow): Displays the input level output (Blue): Displays the output level NOTICE
|
c | weight The weight adjusts the correlated sensitivity between input channels. Balance the weight controls so that the automix gain meters display approximately equal levels when no one is talking. For example, if there is ongoing noise near one microphone (e.g., computer fan or air vent), suppress it by reducing that channel’s weight. To change the channel’s weight setting, use the [TOUCH AND TURN] knob to adjust the weight slider. Automixer calculates the ratios of the input levels of a specific channel against all input channels within the group. The following example explains how the weight control works. ■ Raising the weight control for one channel:
■ Lowering the weight control for one channel:
|
d | group Each channel can be assigned to one of five groups (a/b/c/d/e). This group function is helpful in the following applications:
|
e | override Turning on the OVERRIDE button in the master field will place the corresponding channels into man mode or mute mode, depending on the override button status of the channel.
|
f | Channel number The channel number and channel name to be inserted are displayed. Press to set the channel to be inserted. |
g | preset button Press this button to select a channel mode (man, auto, or mute) that will be engaged if the PRESET button in the master field is turned on. The indicator will light up indicating when preset has been programmed for that channel. |
h | man/auto/mute buttons Switches between man/auto/mute. man: There is no automixing, and the audio signal passes through at unity gain. Use this mode for singing through a microphone. auto: Automixing is turned on. Use this mode for dialog or speeches. mute: The channel’s output is muted. |