Using the ASTFL
NOTICE
In order to prevent abrasion and scratches to the headjoint when attaching and detaching the ASTFL, make sure to attach the protective patch beforehand.
Attaching the protective patch
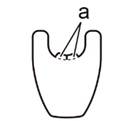
1. Attach the protective patch (large) along the embouchure hole of the flute, as shown in Fig. 1. Then, insert the fold (a) of the protective patch into the embouchure hole.
|
|
|
Protective patch (large) | Fig. 1 |
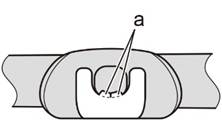
2. Attach the protective patch (small) to the headjoint on the reverse side of the flute’s lip plate as shown in Fig. 2.
|
|
|
Protective patch (small) | Fig. 2 |
Attaching the ASTFL
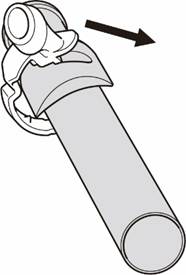
To attach the ASTFL onto the lip plate and headjoint, push the mouthpiece of the ASTFL in the direction shown by the arrow in the illustration until it clicks into place.
NOTICE
If the body has already been attached to the headjoint, hold the part of the body that does not have any keys. Do not let the flute bump into any surrounding objects.
Removing the ASTFL
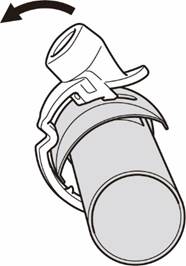
To remove the ASTFL from the lip plate and headjoint, pull the mouthpiece of the ASTFL in the direction shown by the arrow in the illustration above, and remove it from the headjoint. After using the ASTFL, store it in its mini case.
Maintenance
・ If the mouthpiece is covered with moisture, clean it with a swab or gauze. Alternatively, remove the ASTFL, and then blow the moisture away using your breath.
・ The ASTFL is washable with water. After washing it in cold water, wipe the surface with a soft cloth and let it dry naturally.
・ If the protective patch is torn or peeling, replace it with a spare protective patch. A new protective patch (ASTFLPA Flute Assist Attachment patch) can be purchased separately from your local Yamaha dealer.