CUSTOM FADER screen
CUSTOM FADER screen
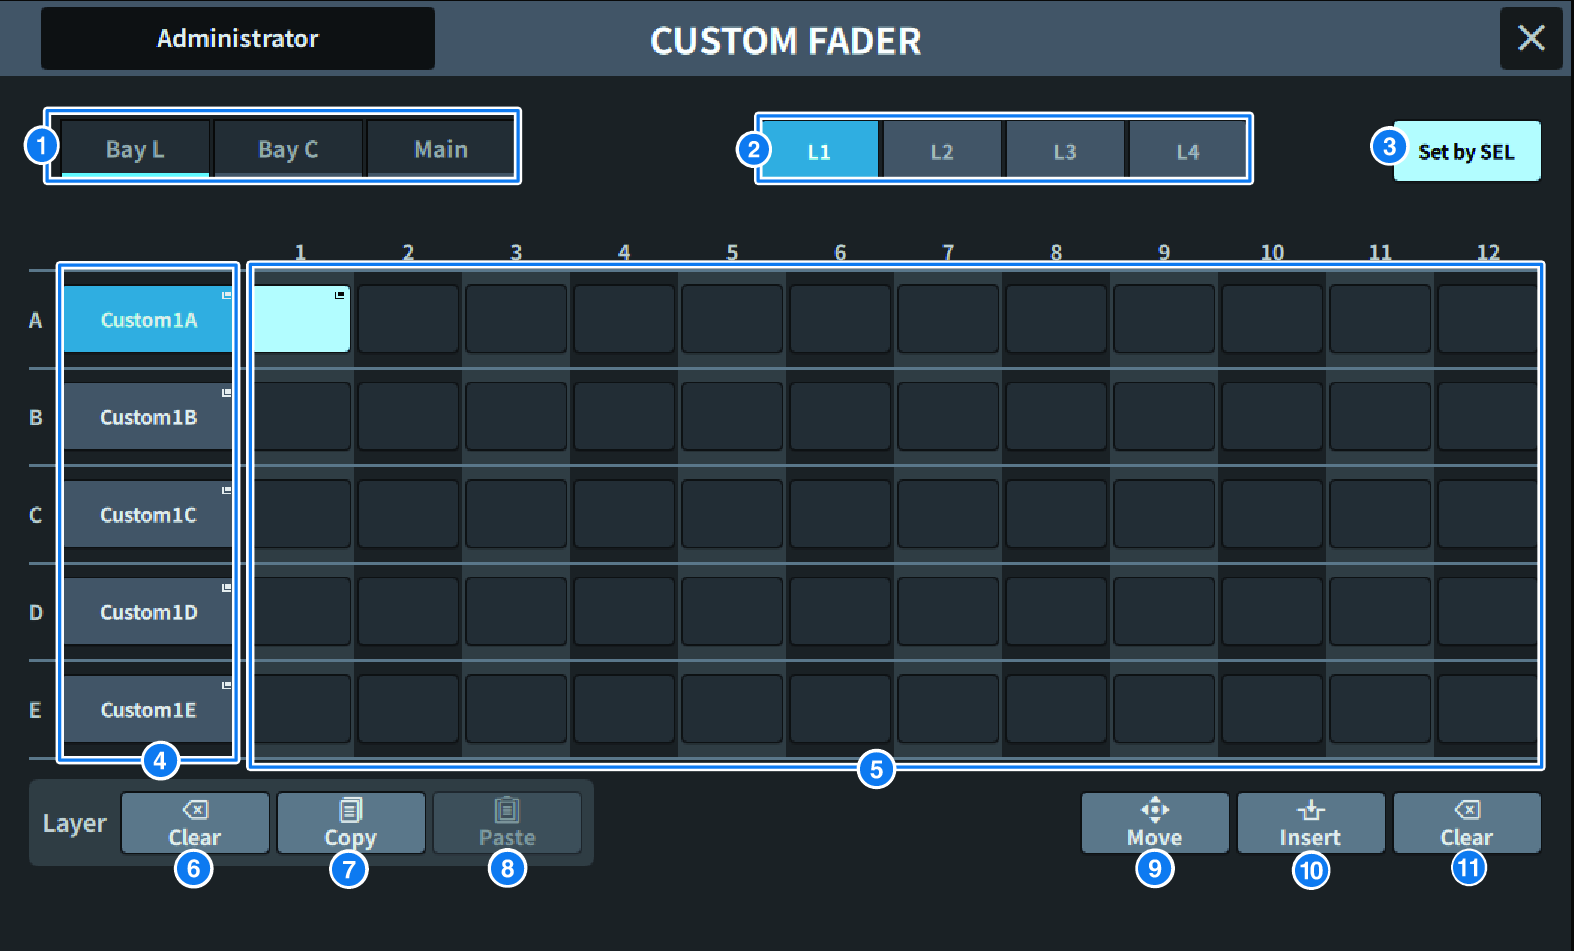
The screen contains the following items.
a | Bay select buttons This allows you to select a bay or main fader to which you want to assign a combination of channels. |
b | Bank select buttons This allows you to select a bank to set up. |
c | Set BY SEL button When this is on, channels can be assigned to the currently selected fader assign button using the [SEL] key. |
d | NAME popup button Press this to display the keyboard used to name layers. |
e | Fader assign button Selects the position to assign a custom fader. Press the selected fader assign button again to display the CH SELECT screen which will selecting the channel to assign. The assigned channels will be displayed. |
f | LAYER CLEAR button This button sets the settings for the currently selected layer to unassigned. Press this to open the confirmation screen, and press OK to execute. Otherwise, press CANCEL to return to the previous screen without changing anything. |
g | LAYER COPY button Copies the selected layer. |
h | LAYER PASTE button. Pastes to the selected layer. |
i | MOVE button
Press to enter MOVE mode to move the fader. After using the fader assign button to select the move source, press the TO button. Next, select the fader assign button for the move target, and press the MOVE button. |

j | INSERT button
Press to enter INSERT mode to add a fader. After selecting the position to be added using the Fader assign button, select the number of additions (1-4). Next, press the INSERT button. |

k | CLEAR button
Press to clear the assigned fader (no assignment). Press to enter CLEAR mode to delete the fader block. After using the fader assign button to select the fader to be deleted, press the CLEAR button. |