Procedure for creating a plan
This describes the workflow for using ProVisionaire Plan, from specifying room conditions to reviewing the generated plan.
When creating a plan for the first time, create a new plan starting with Step 1. Create New.
For details on specifying the room conditions, refer to “Specifying Room Conditions”.
Step 1 | Create New - Specifying room conditions by following the procedure guide
- Create New
-
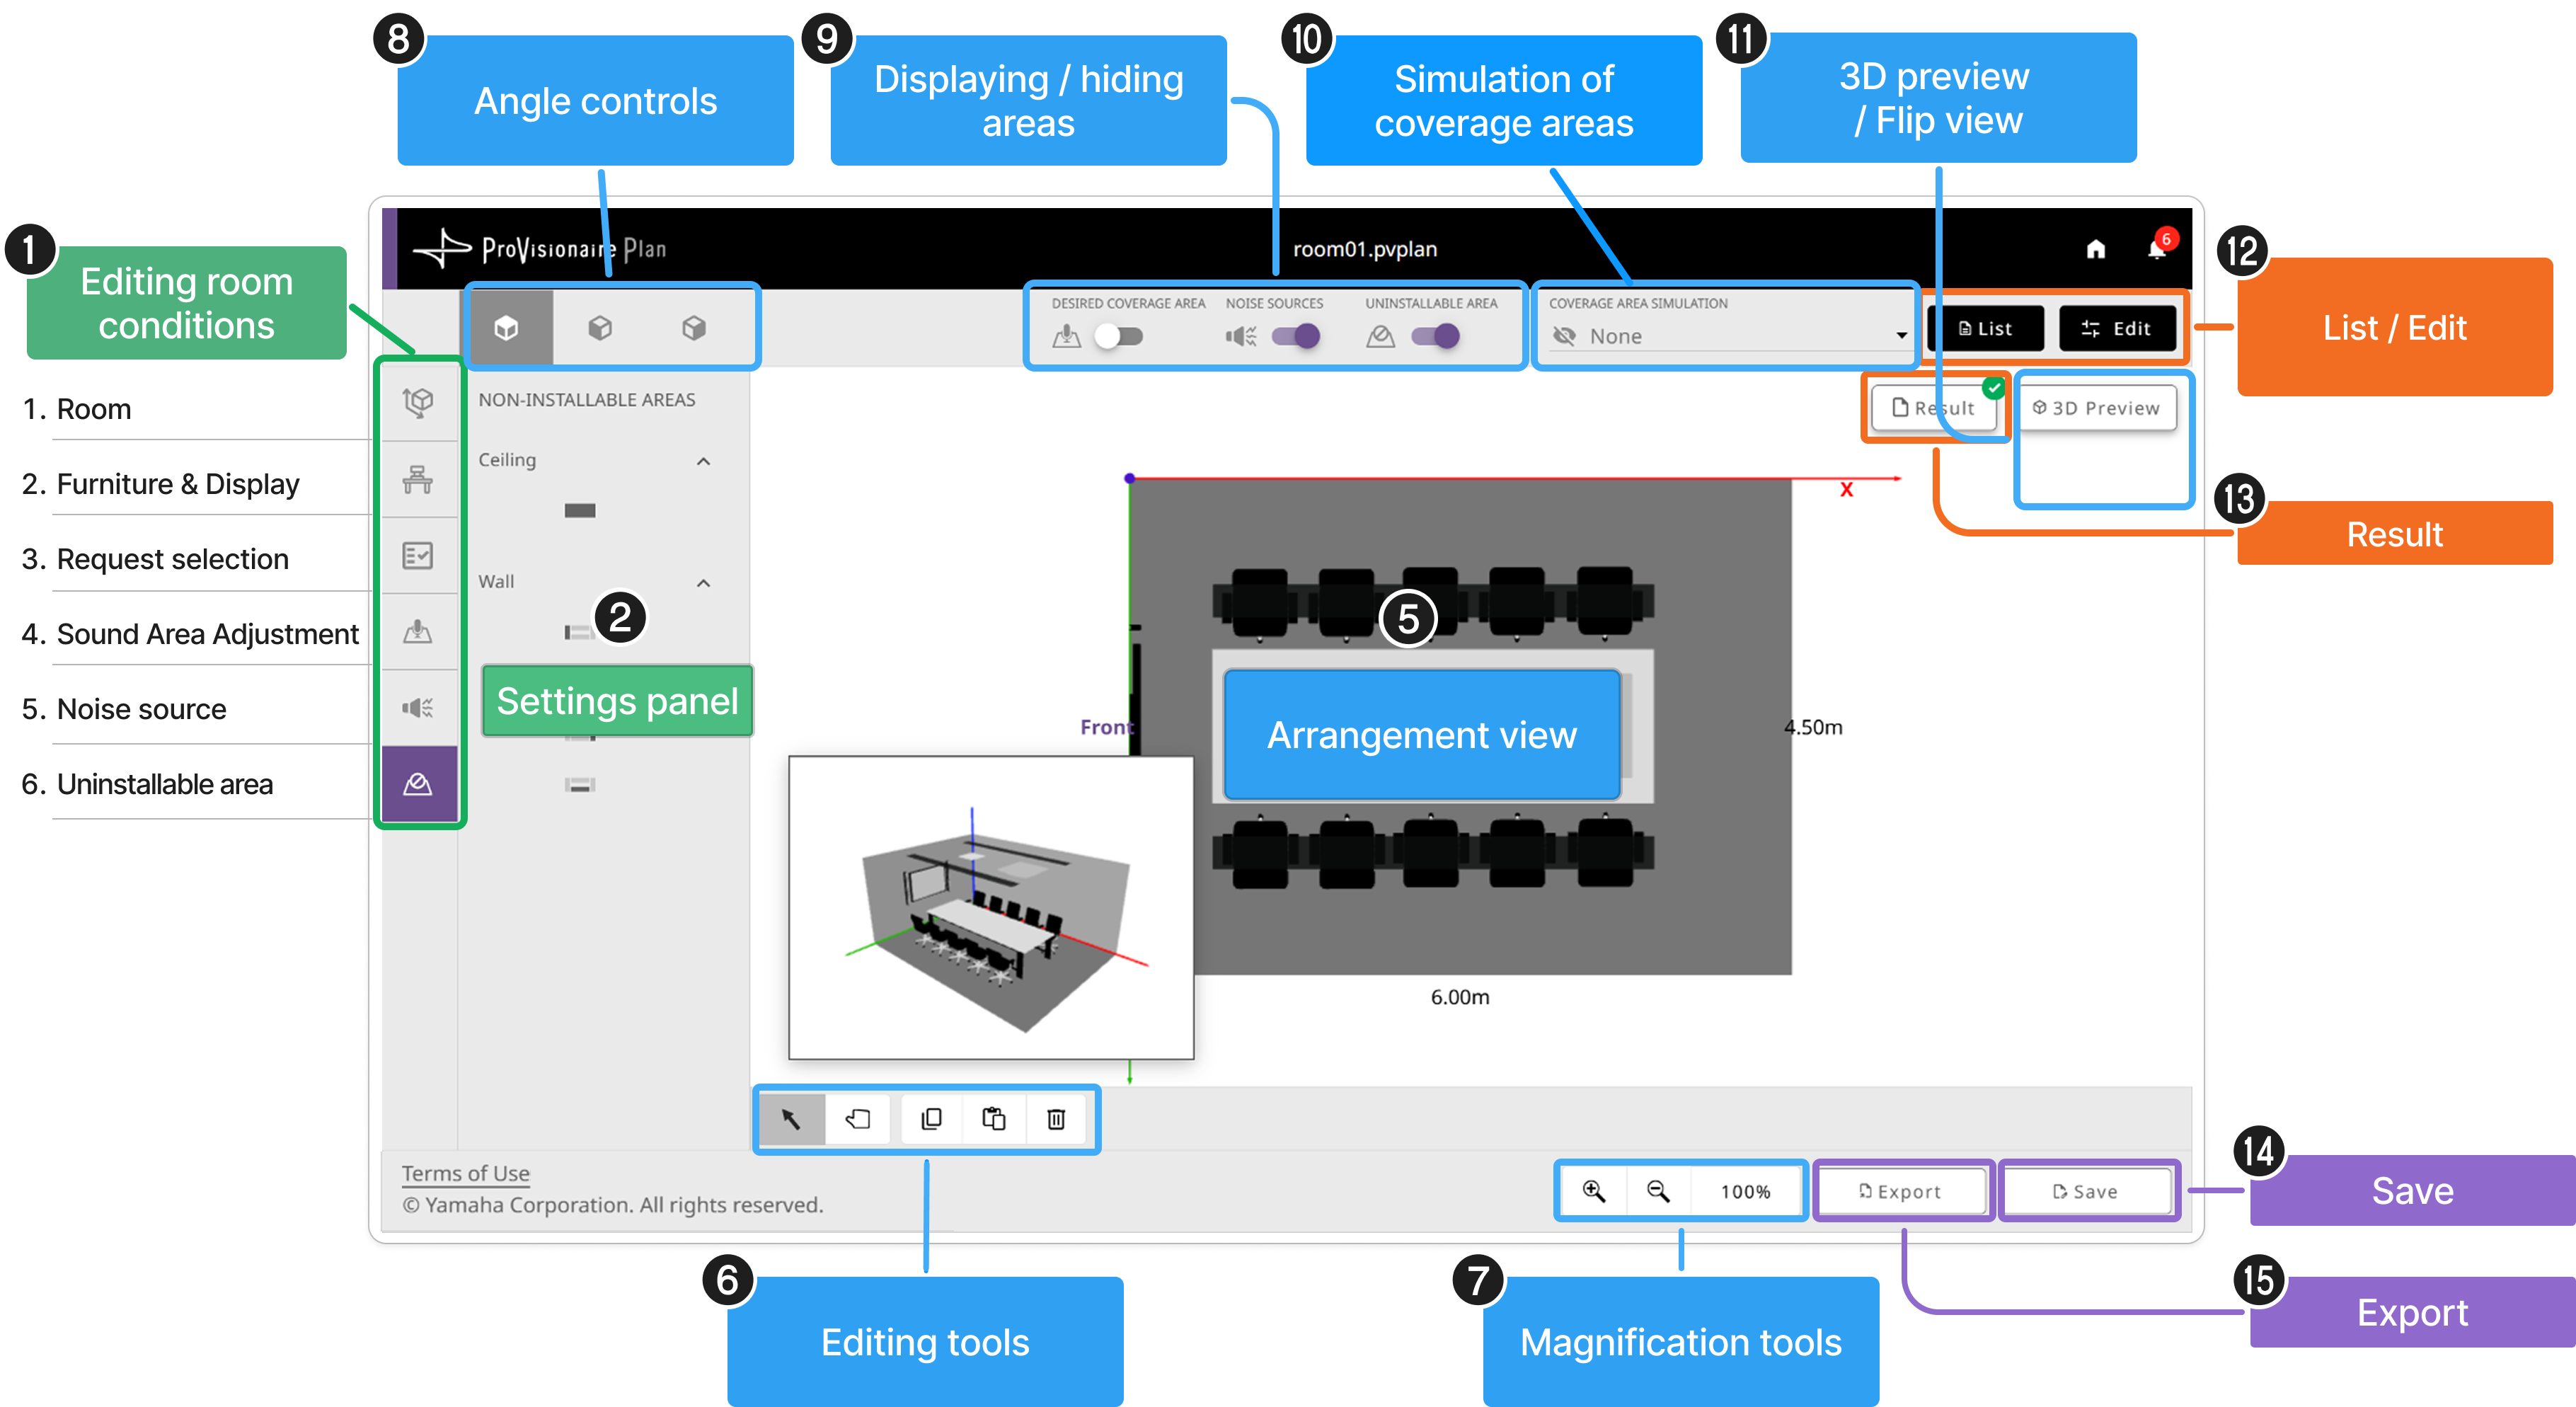
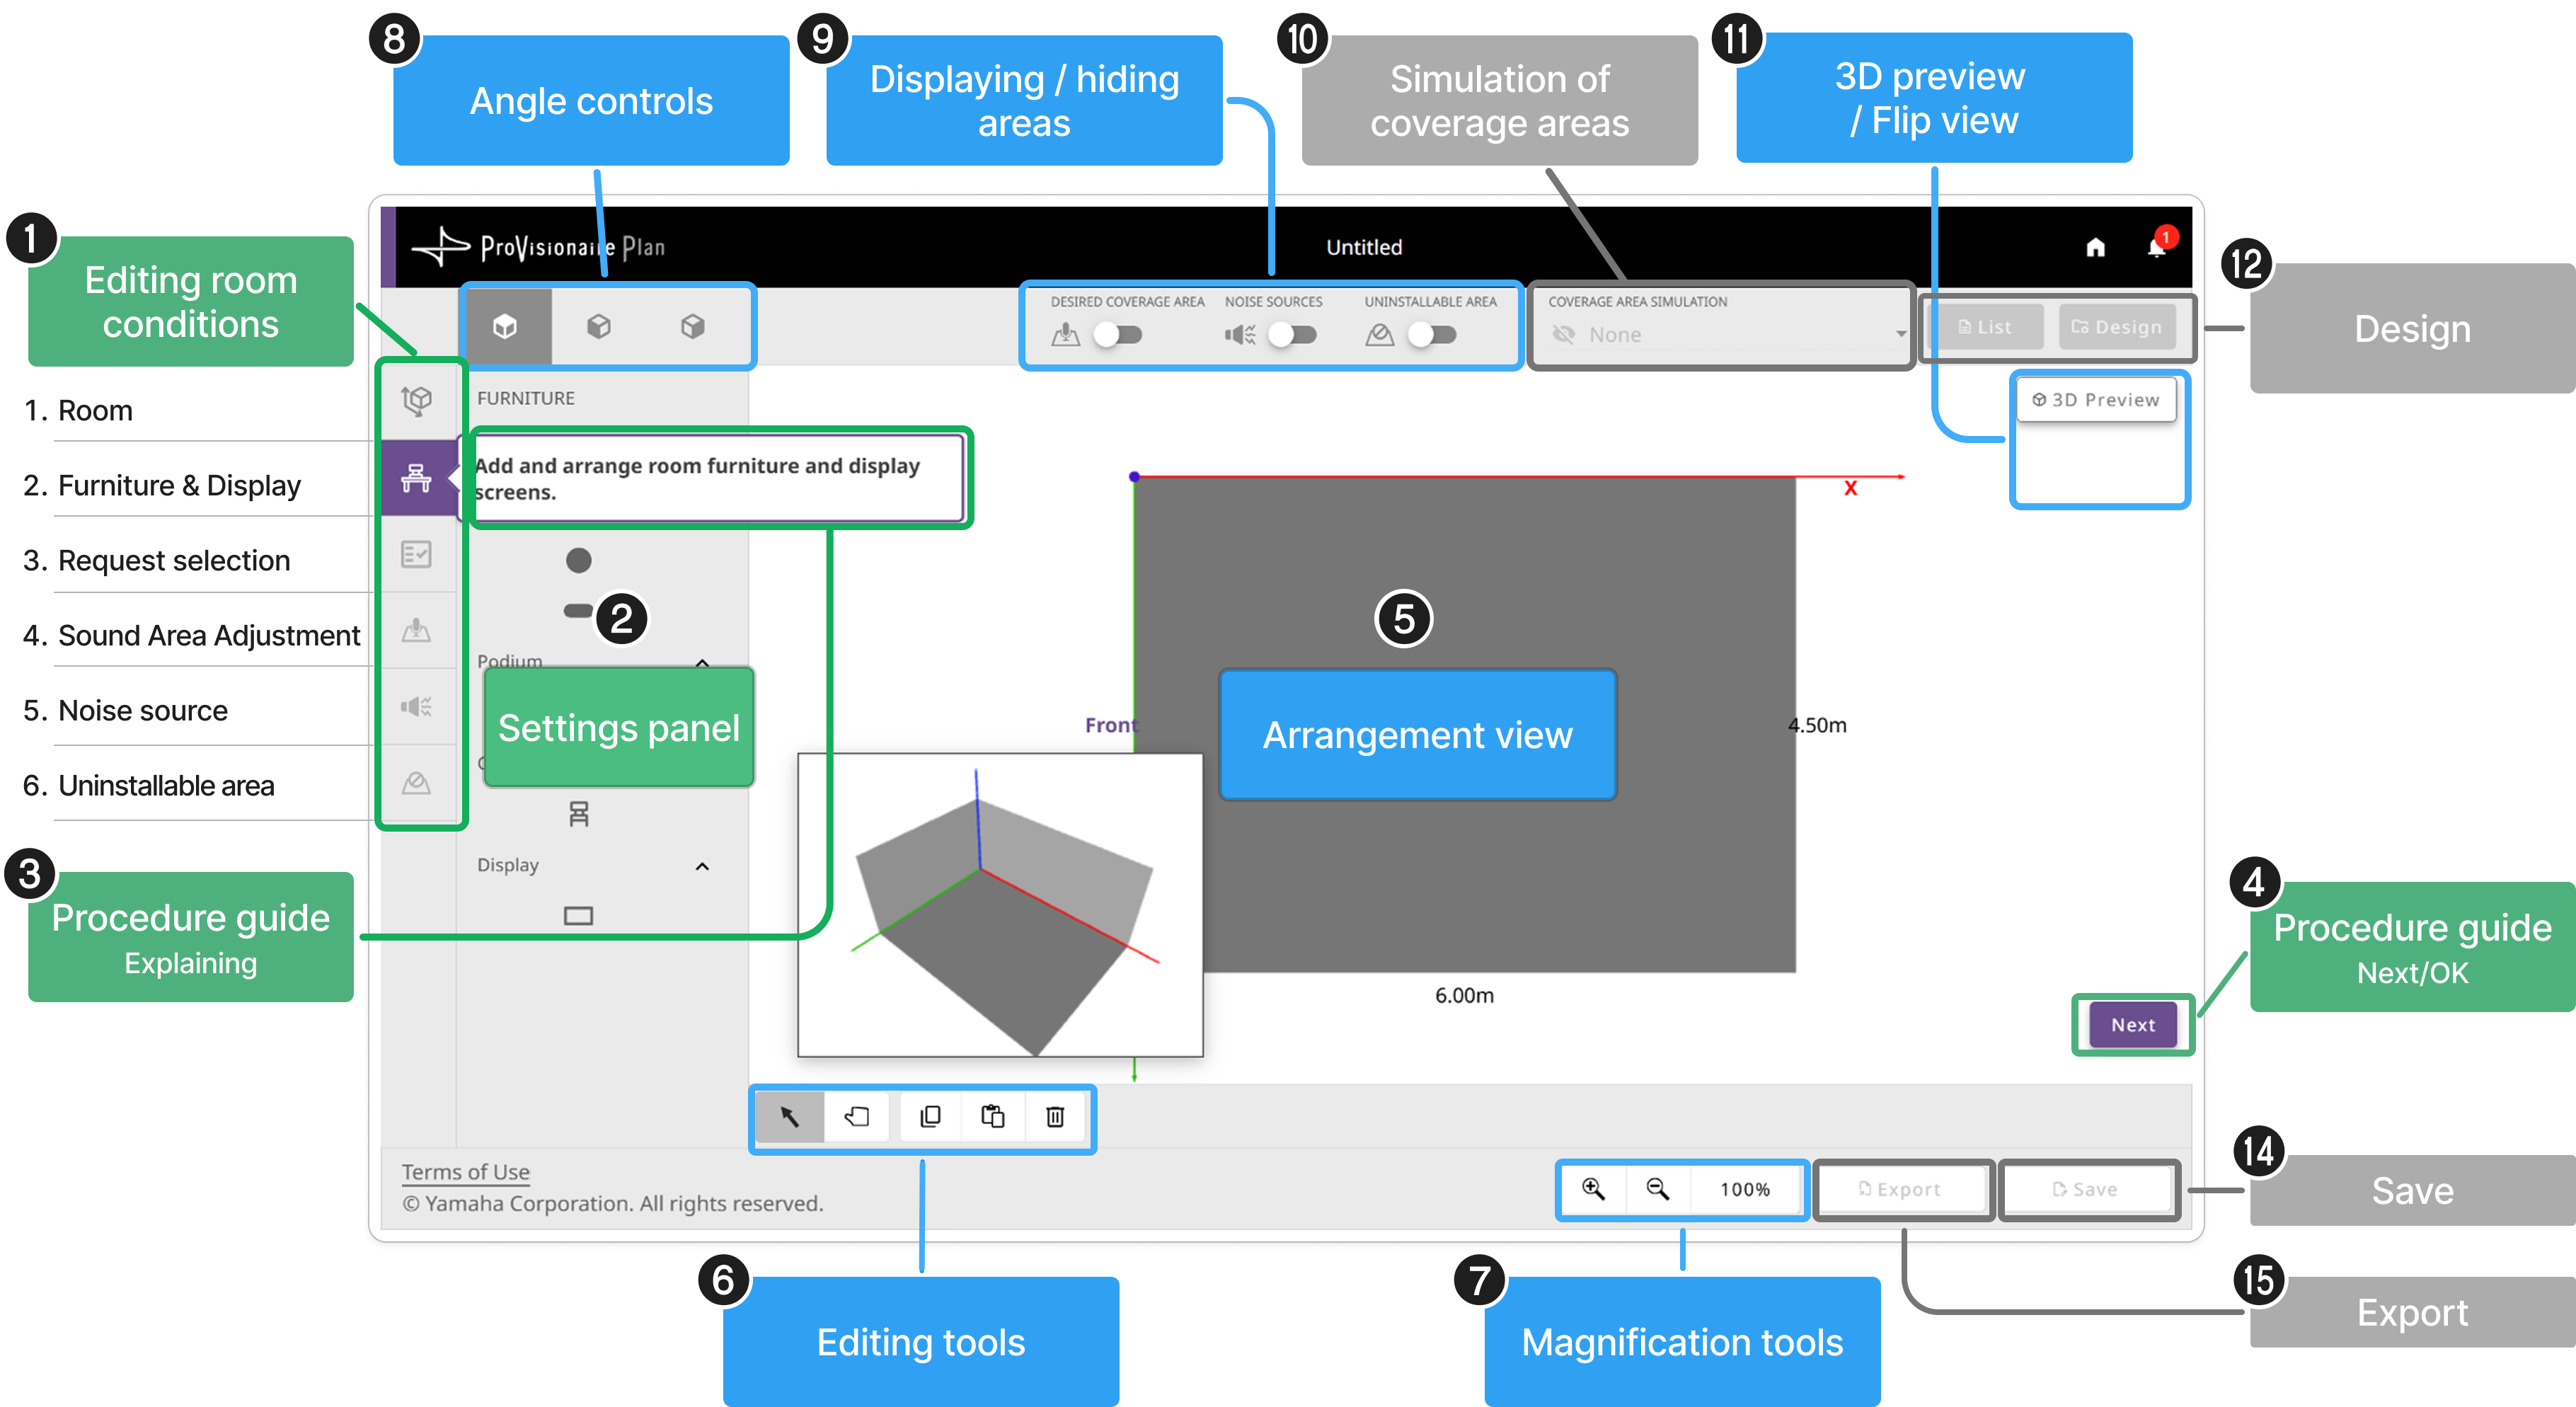
In the Create New step, follow the procedure guide to specify the room conditions (1) in the given order.Clicking the [Next] button (4) continues to the next condition specification screen. The specified information can be edited later in the Edit step.
No. |
Item |
Description |
1 2 |
Specify the room conditions in the given order. |
|
3 4 |
Clicking button 4 continues to the next condition specification screen. |
|
5 |
Arrangement view |
The conditions specified with 1 2 appear in the arrangement view. |
6 7 |
Use these buttons and tools to adjust the arrangement view. |
|
8 9 11 |
Use these buttons to switch the display of the arrangement view. |
|
12 |
Design (not available) |
A plan cannot be generated, exported or saved in the Create New step. |
14 |
Export (not available) |
|
15 |
Save (not available) |
-
After specifying all of the room conditions, click the [OK] button (2) to proceed to the Edit step.
Step 2 | Edit - Editing room conditions / arrangement
- Edit
-
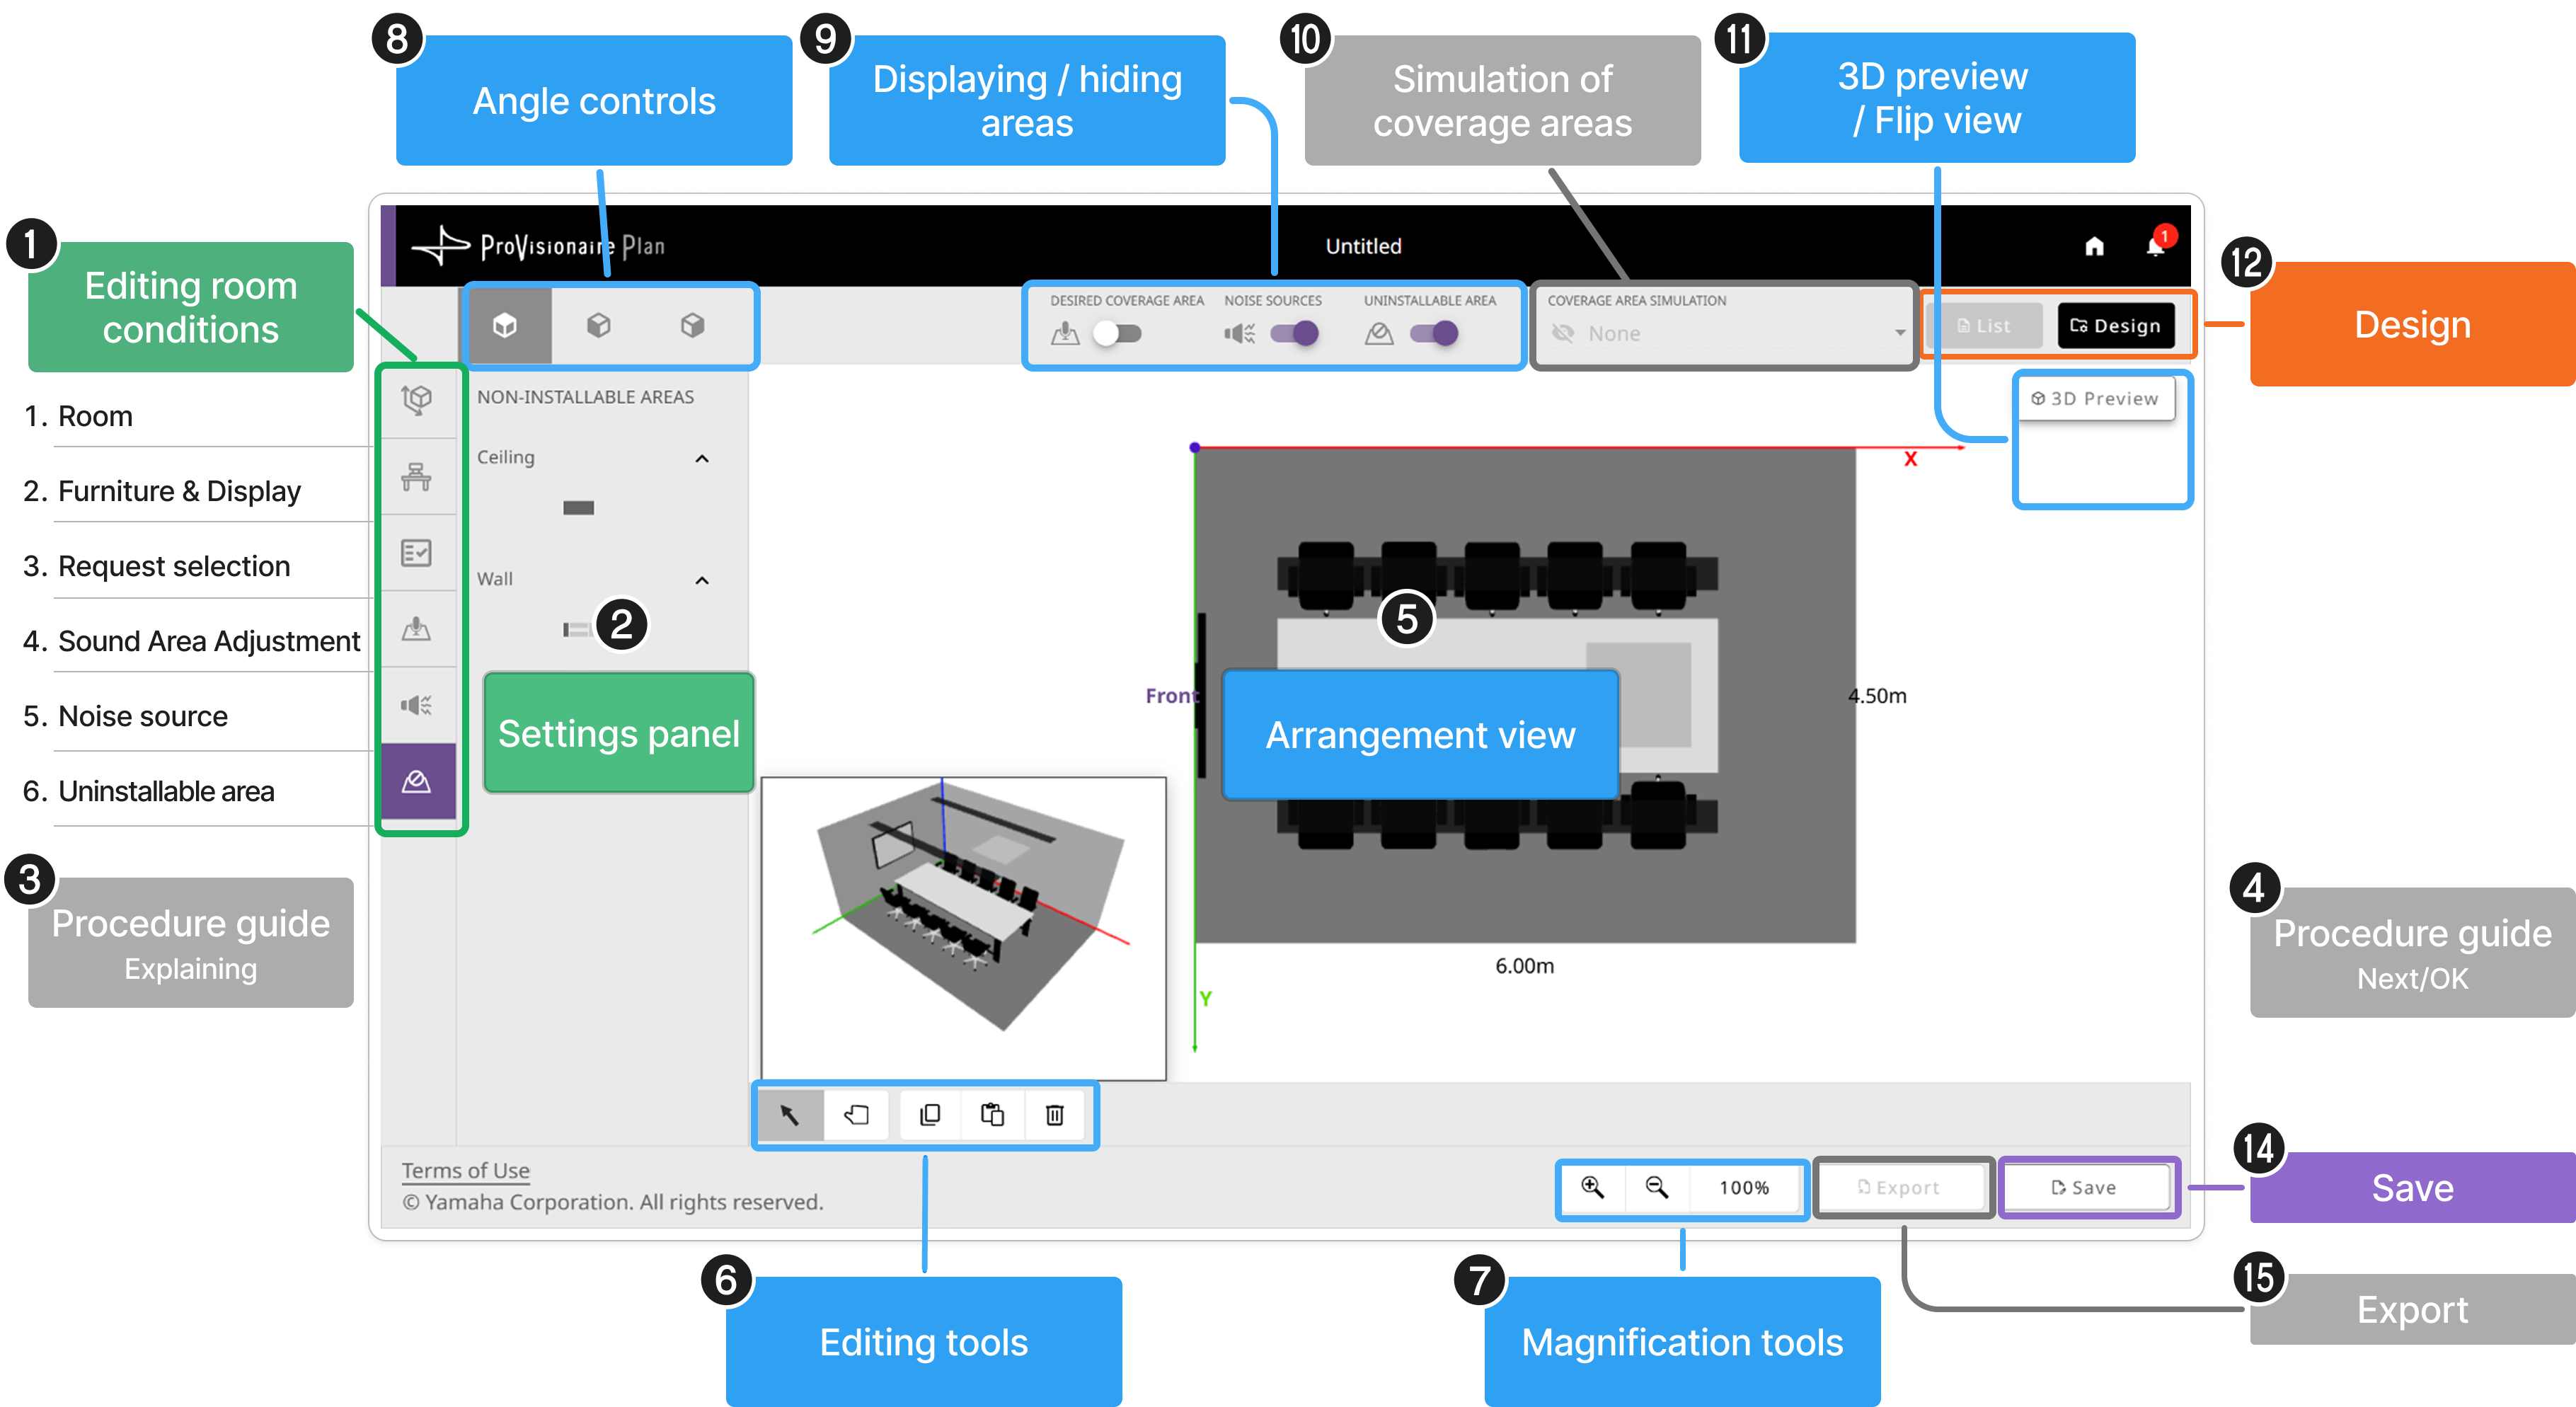
In the Edit step, select an item under Room conditions (1), and then edit the information as desired. If no editing is required, design (12) and save (14) the plan as is.
- The following operations can be performed
-
-
Generating the plan (12)
-
Saving a file (14)
-
No. |
Item |
Description |
1 2 |
Select the item to be edited, and then edit the information. |
|
3 4 |
Procedure guide (not displayed) |
The procedure guide does not appear in the Edit step. |
5 |
Arrangement view |
The conditions specified with 1 2 appear. |
6 7 |
Use these buttons and tools to adjust the arrangement view. |
|
8 9 11 |
Use these buttons to switch the display of the arrangement view. |
|
12 |
Automatically generates a plan. |
|
14 |
Saves the file. |
|
15 |
Export (not available) |
A plan cannot be exported (downloaded in the PDF format) before design. |
-
After specifying all of the room conditions, click the [Design] button (12).
Step 3 | Design - Generating the plan
- Design
-
Click the [Design] button to start automatically generating the plan.

|
Depending on the specified conditions, it may take more than 30 seconds for the plan to be generated. |
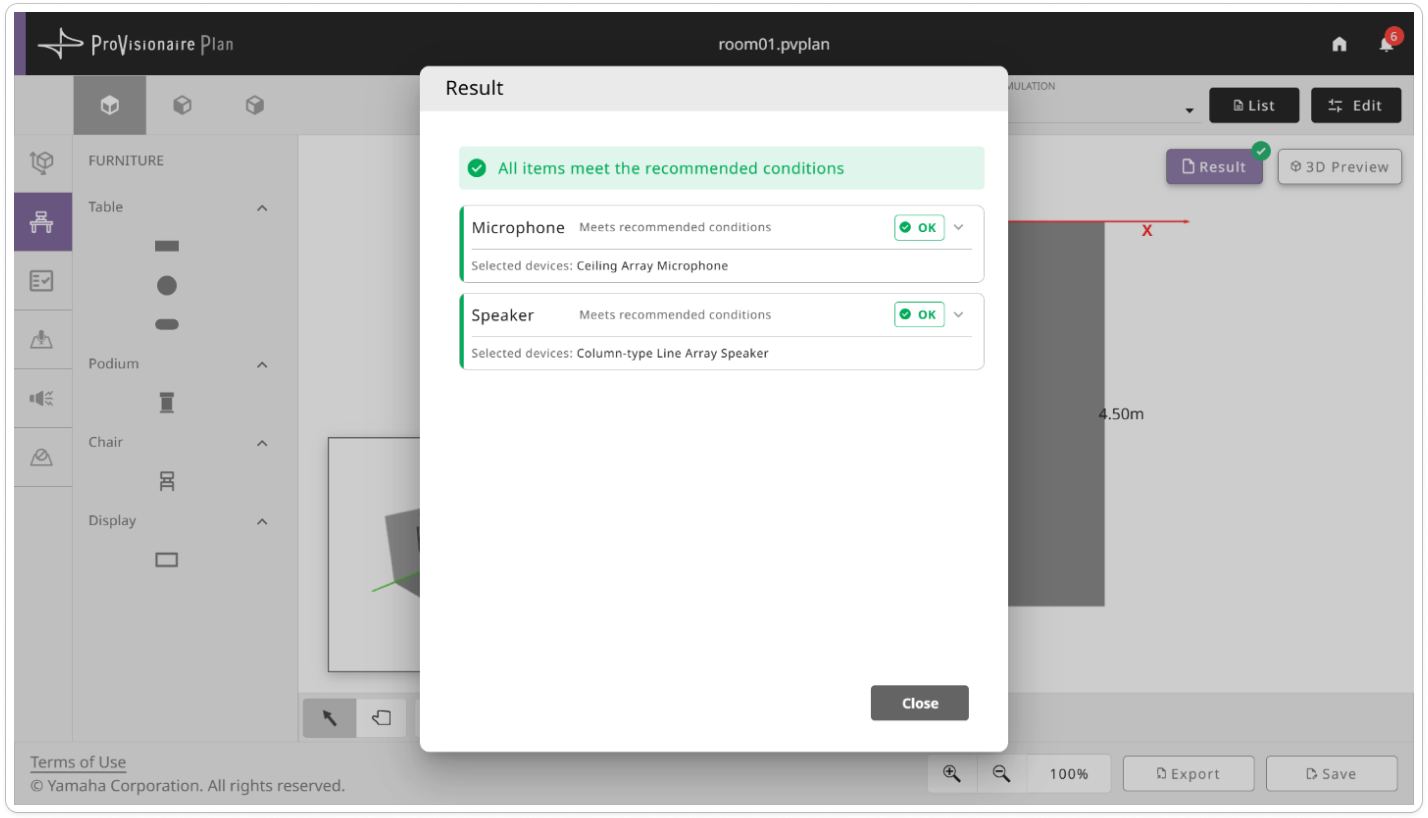
When the plan has been generated, the Results screen appears.
In the results screen, check if the devices that have been selected and positioned in the automatically generated plan (based on the room conditions specified in steps 1 and 2) meet the recommended conditions.
-
Click the [Close] button to proceed to the Results step.
|
If any item in results screen does not meet the recommended conditions, adjust the room conditions according to the information under “TIPS FOR IMPROVEMENT” in the results screen. |