
Specifying room conditions
This provides details on specifying the room conditions.
 Specifying the room size
Specify the size and front of the room.
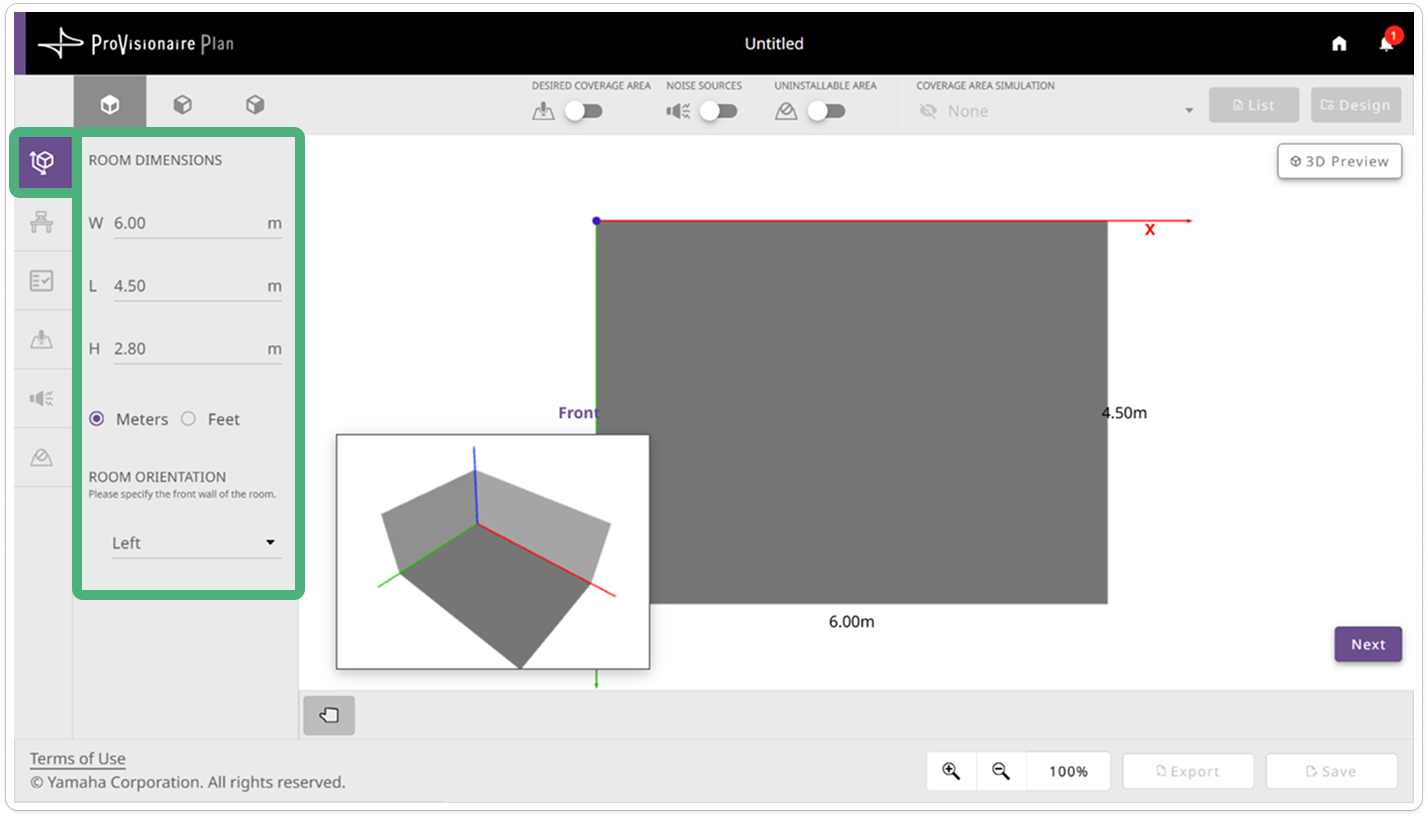
Room dimensions |
Specify the width, length and height. Select “Meters” or “Feet” as the units for the entered values. |
|---|---|
Room orientation |
Select which side of the arrangement view is the front (where the display, etc., is installed). What side is selected as the front affects the automatically generated plan for the microphones and speakers. |
 Specifying the furniture arrangement
Arrange the furniture as it is in the room. Specify the size and location of furniture.
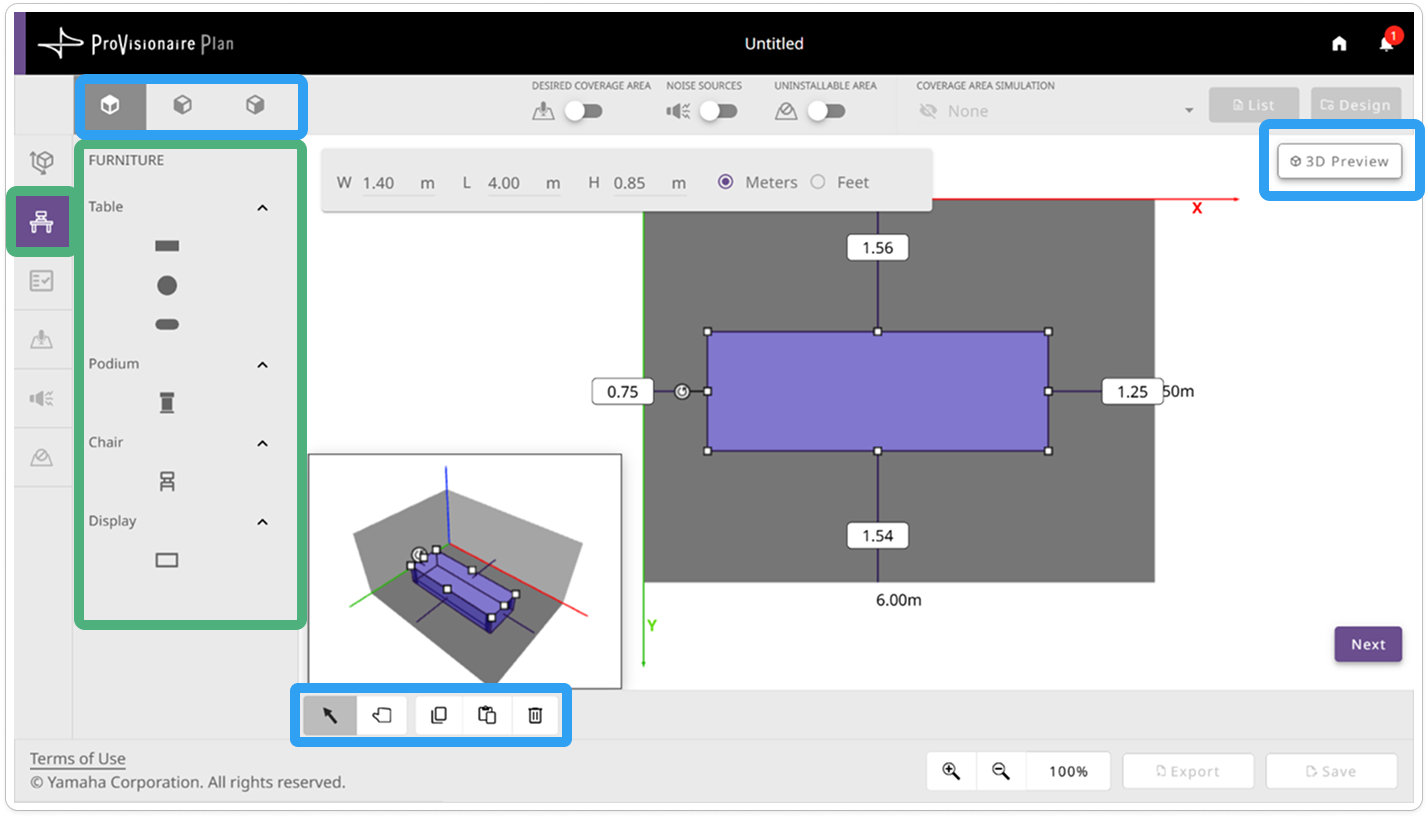
Table |
Click the icon that matches the shape of your table to add it. |
|---|---|
Chair |
Adds a chair. When automatically simulating the sound coverage area, the listeners’ positions are assumed according to the location and orientation of the chairs. |
Display |
Adds a display. The installation height will also need to be adjusted. |
Podium |
Adds a podium. When automatically simulating the sound coverage area, the presenter’s position is assumed to be at the podium. |
- Procedure for specifying the furniture arrangement
-
Clicking the icon for furniture to be arranged places the furniture in the floor corner of the room (origin of the X and Y axes in the arrangement view). Specify the size and location. If the device, for example, a display, is not installed on the floor, change the room view angle, and then specify the device’s installation height. For details, refer to “Working with Objects”.
|
Furniture can only be rearranged in the furniture screen. Furniture in the furniture screen can more easily be rearranged by hiding the various areas. 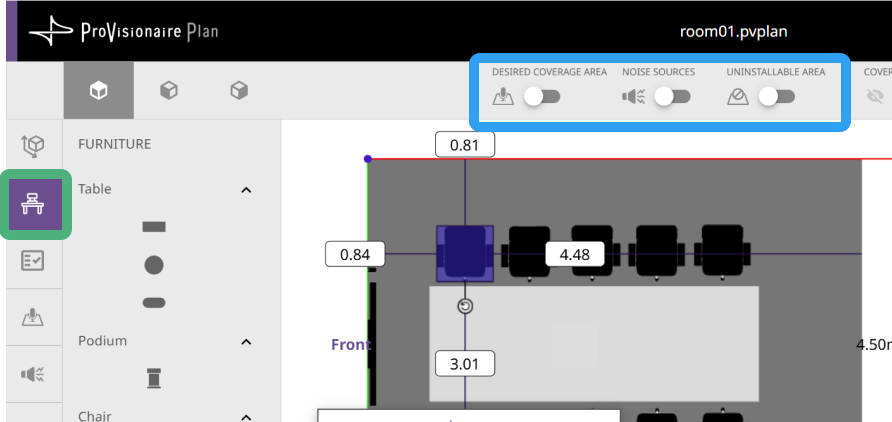
|
 Selecting room requirements
Select the requirements for arranging the devices. The application automatically selects the devices most suitable for the selected requirements. When designing a plan that supports Voice Lift, select the appropriate setting in this screen.
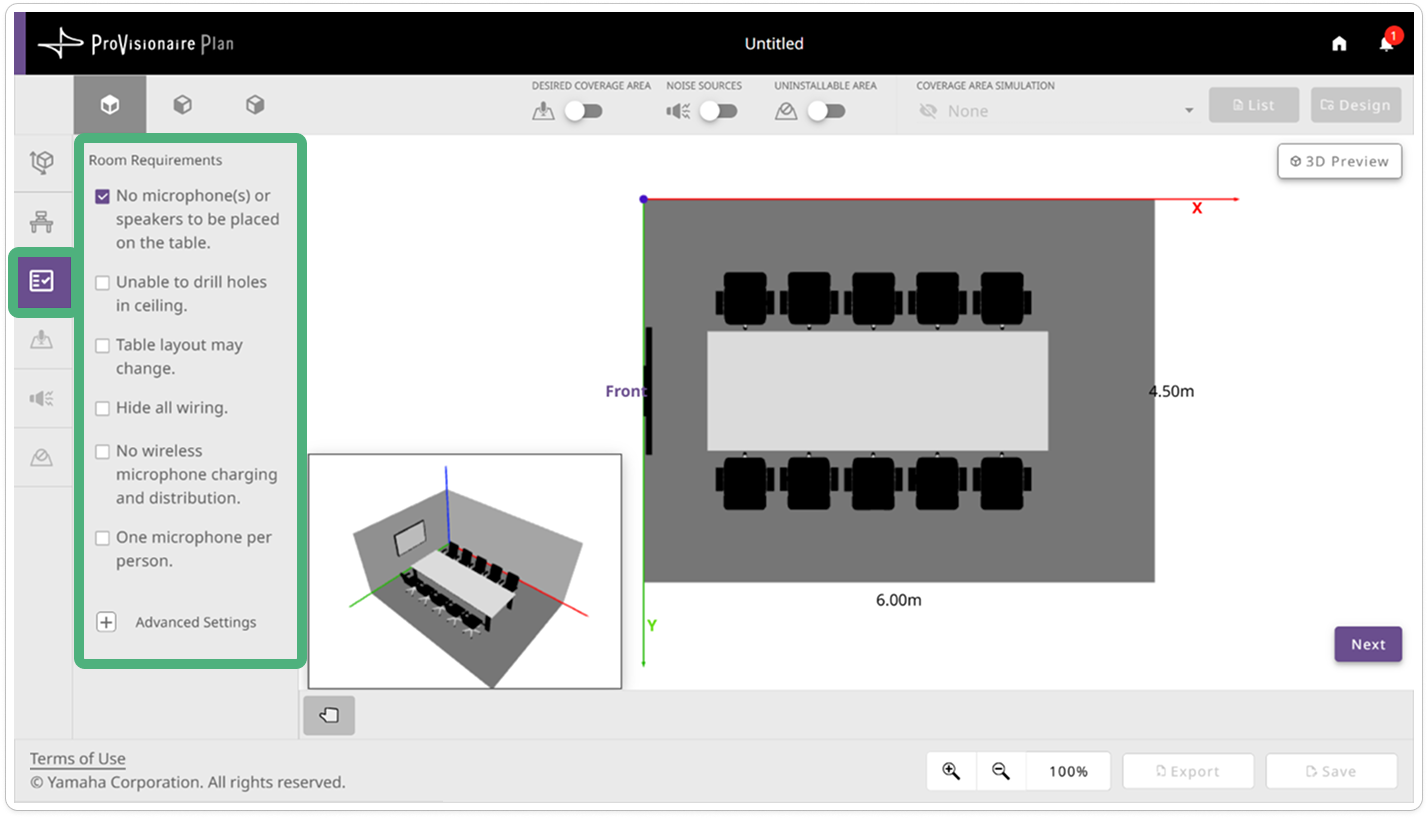
- Room Requirements
-
Select the check box for any additional requirements (multiple selections can be made).
|
The generated plan may not always be able to address all of the selected requirements. |
- Advanced Settings
-
Expand the “Advanced Settings” list to specify detailed settings.
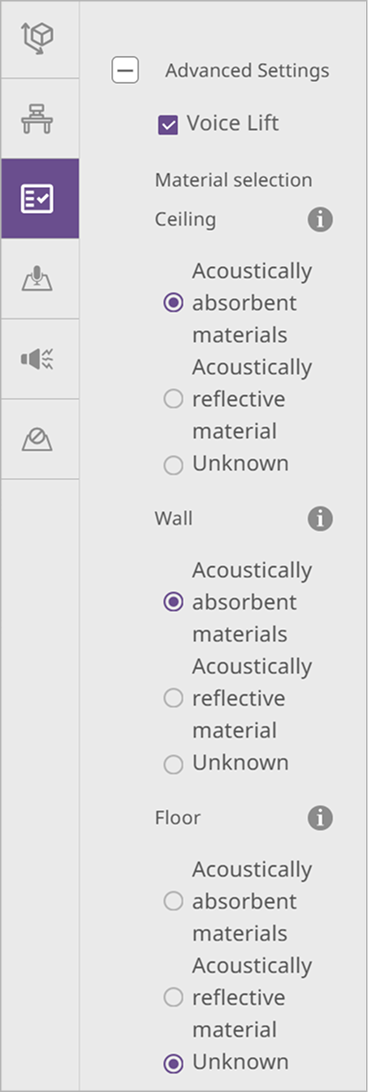
- Voice Lift
-
Select the “Voice Lift” check box in order to design a plan that supports Voice Lift.
- Material selection
-
This appears when the “Voice Lift” check box was selected.
-
Select whether the ceiling, walls and floors are made of sound-absorbing materials.
-
If the room image recognition feature was used, materials recognized by AI are selected.
-
Click the
 (information) mark to display material examples for each item.
-
 Specifying sound coverage areas
Specify the areas to be covered by the microphones and speakers.
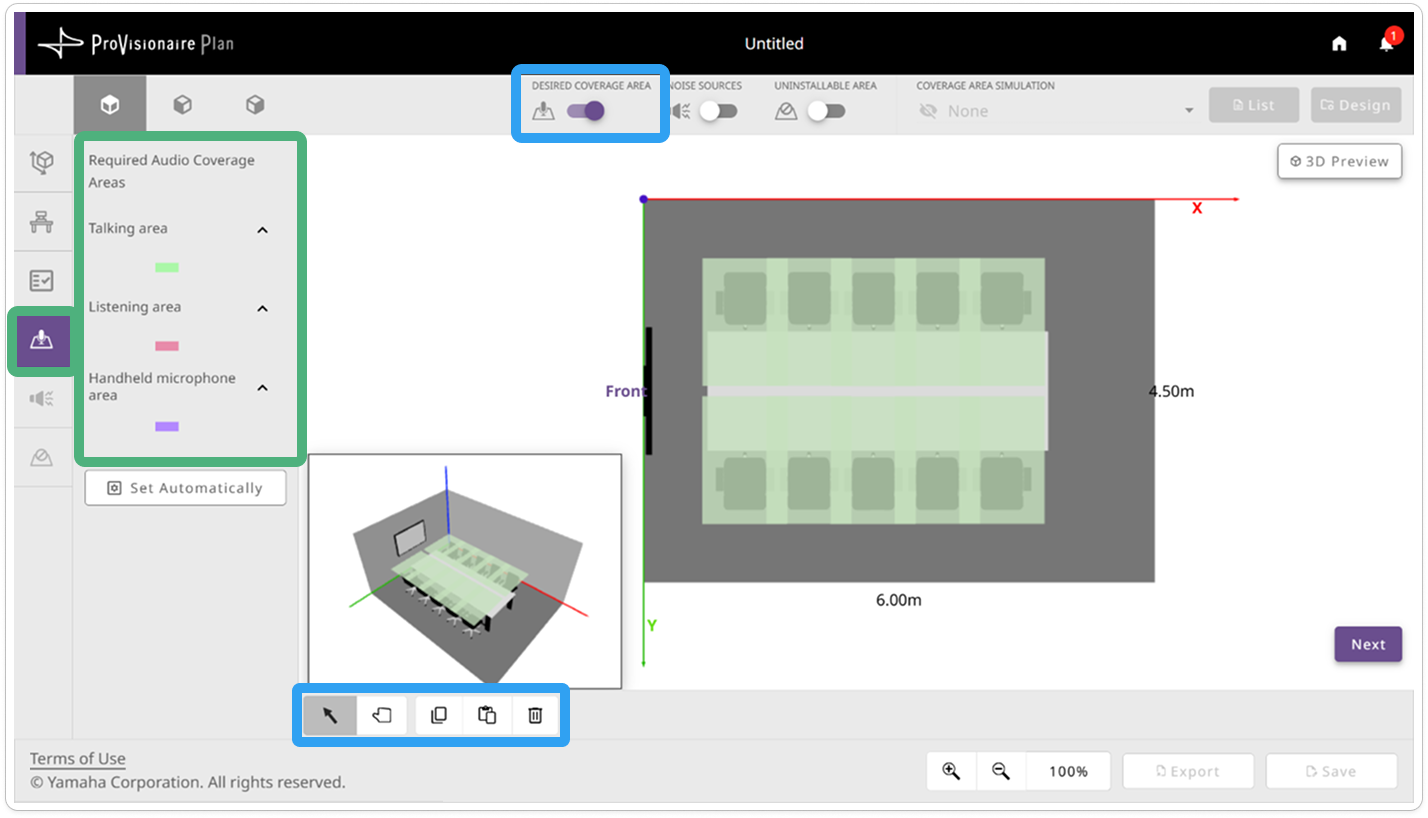
Discussion area |
Specifies the area where the speaker will be (area to be covered by the microphones and loudspeakers). |
|---|---|
Observer area |
Specifies the area where the listeners will be (area to be covered by the loudspeakers). |
Handheld microphone area |
Specifies the location where the handheld microphone is to be used. |
Set Automatically |
Click the [Set Automatically] button to automatically specify the coverage areas. |
- Procedure for specifying coverage areas
-
The first time that this screen is displayed the coverage areas are automatically arranged according to the chair locations. Change the areas to be covered by either modifying an automatically specified area or by deleting an area and specifying a new one in the desired location. For details, refer to “Working with Objects”.
 Specifying noise sources and their locations
If there is any noise-producing equipment in the room, specify its type and location. Specified noise sources affect the automatically generated plan for the microphones and speakers.
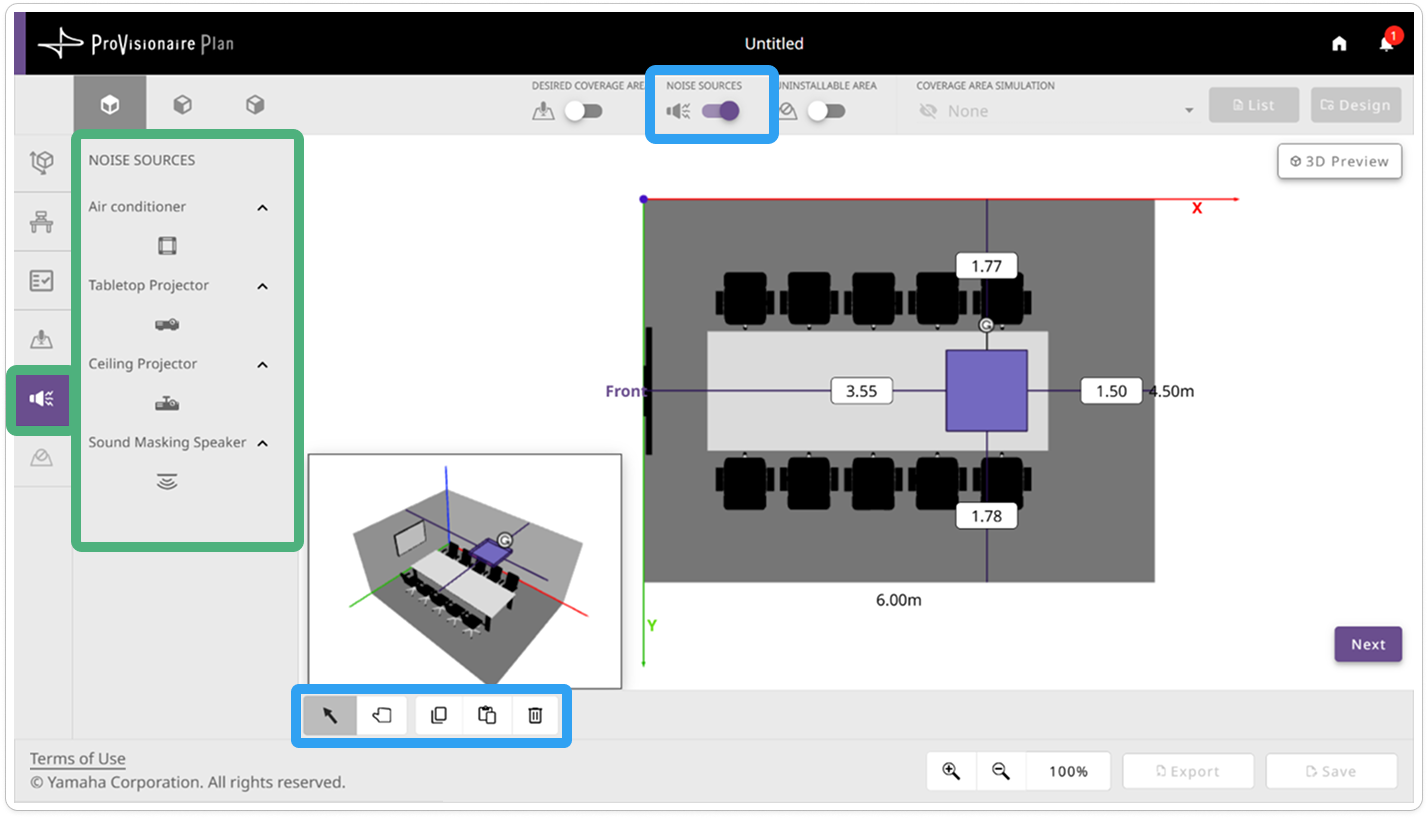
Air conditioner |
Arranges the object on the ceiling. |
|---|---|
Tabletop Projector |
Arranges the object on top of a desk. |
Ceiling Projector |
Arranges the object on the ceiling. |
Sound Masking Speaker |
Arranges the object on the ceiling. |
- Procedure for specifying the arrangement of noise sources
-
Clicking the icon for a noise source places it in the corner of the room (origin of the X and Y axes in the arrangement view). Specify the location.
For details, refer to “Working with Objects”.
 Specifying locations where devices cannot be installed
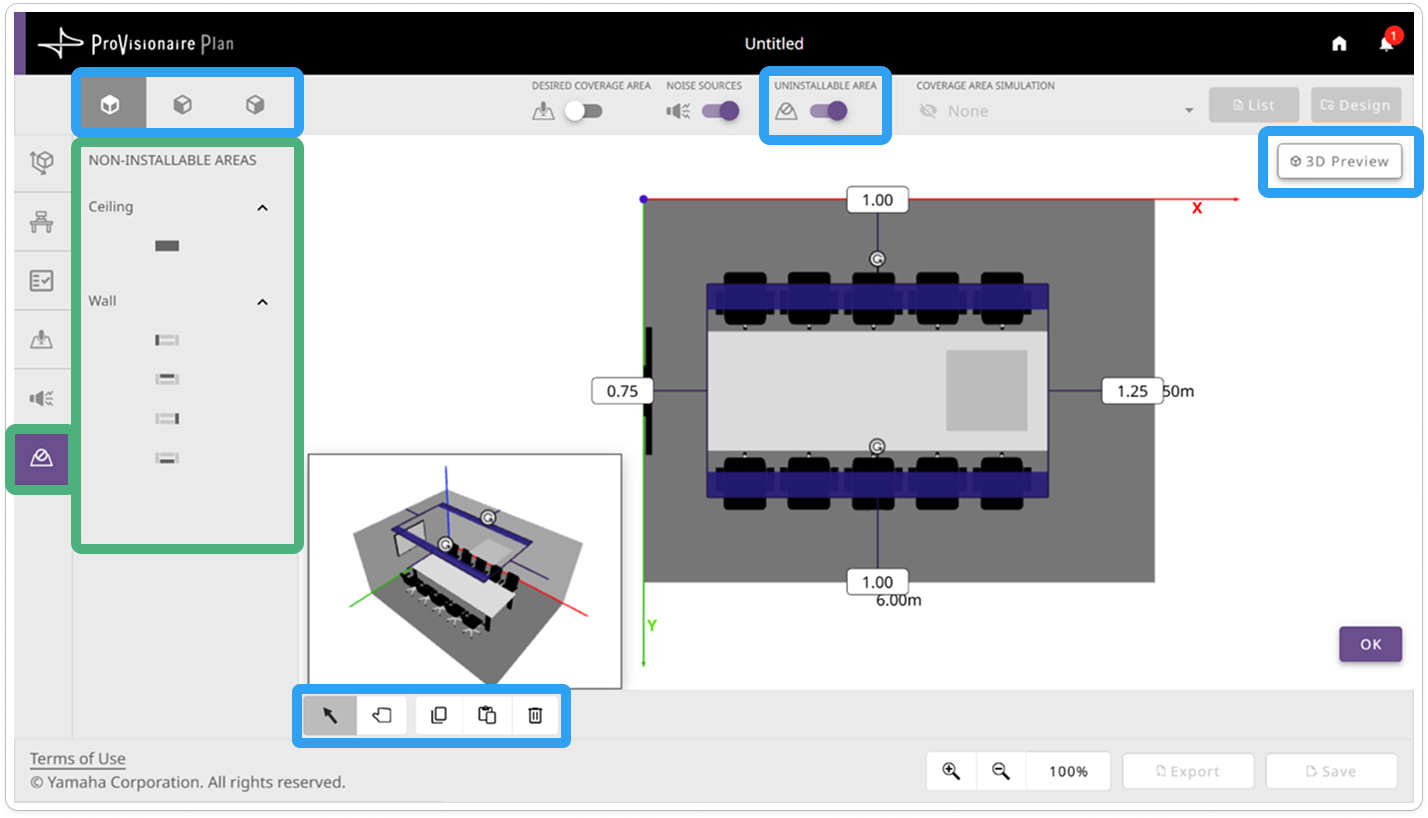
If there are locations on the ceiling or wall where microphones or speakers cannot be installed (because of lighting, air conditioning, windows, etc.), specify those locations as non-installable areas.
Ceiling |
Specifies a non-installable area on the ceiling. |
|---|---|
Wall |
Specifies a non-installable area on a wall. Click the icon for the wall where the area is to be specified. |
- Procedure for specifying non-installable areas
-
-
Clicking the [Ceiling] icon under “NON-INSTALLABLE AREAS” places the object in a ceiling corner of the room.
-
Clicking a [Wall] icon under “NON-INSTALLABLE AREAS” places the object in the corner of the selected wall (origin of the X and Y axes). These objects can only be viewed and modified while viewing them from the wall on which they are placed.
Use the (angle buttons) and the
  (flip view) button to view the object.
-
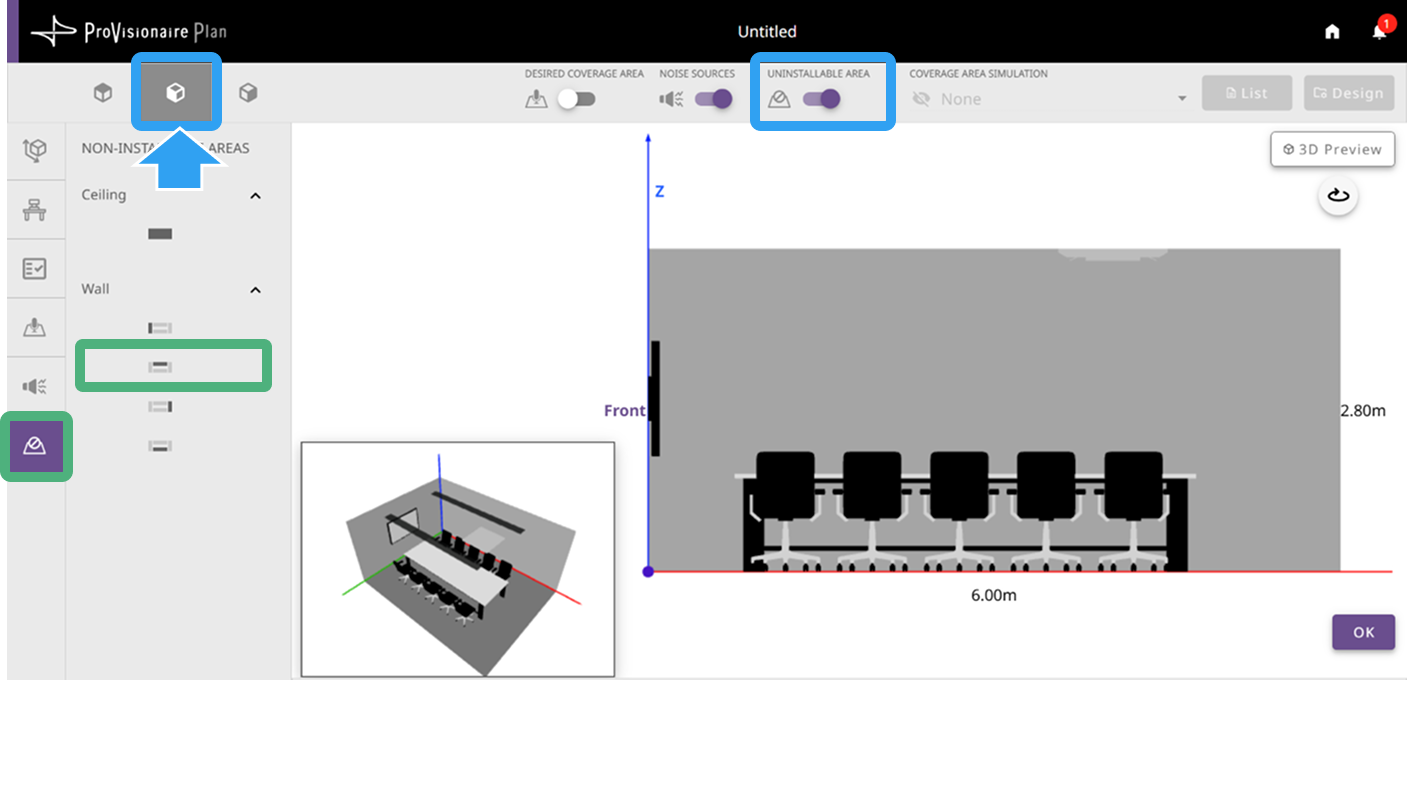
Select the side view angle (the wall facing you is displayed). |
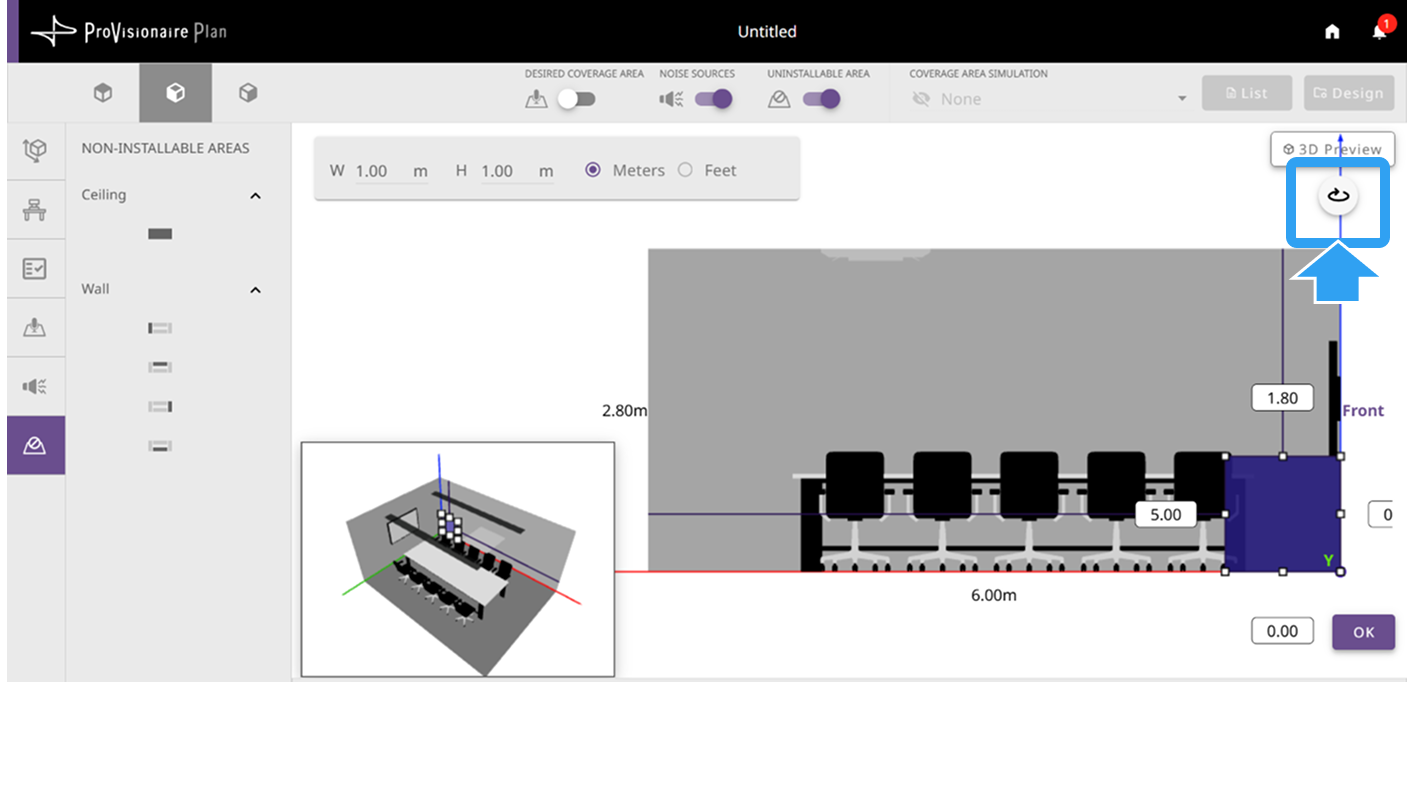
Click the |
For details on editing objects, refer to “Working with Objects”.