

Using this product with your computer
This explains how to use this product with your Windows PC or Mac to configure the settings and make the necessary operations to livestream your voice or your singing to 17LIVE, Twitch, YouTube Live or other such services. (17LIVE, Twitch and YouTube Live are the names of streaming apps.)
What you need
- This product
- Windows or Mac computer (on which the AG Controller and livestreaming apps are installed)
- Install the “AG Controller” app from the following website.
- AG03MK2: https://www.yamaha.com/2/ag03mk2/
- AG06MK2: https://www.yamaha.com/2/ag06mk2/
- Headphones or earphones with a stereo mini-plug cable
- USB cable (included)
Steps to follow
- Installing the driver (Windows only)
- If you are using a Mac, no driver installation is required. Start from step 2.
- If the driver hasn’t been installed yet, install by referring to “Getting ready to use this product” → “Connecting to your computer and configuring the settings (Windows)”.
- Connecting to your computer
- Connect by referring to “Getting ready to use this product” → “Connecting to your computer and configuring the settings (Windows)/(Mac)”.
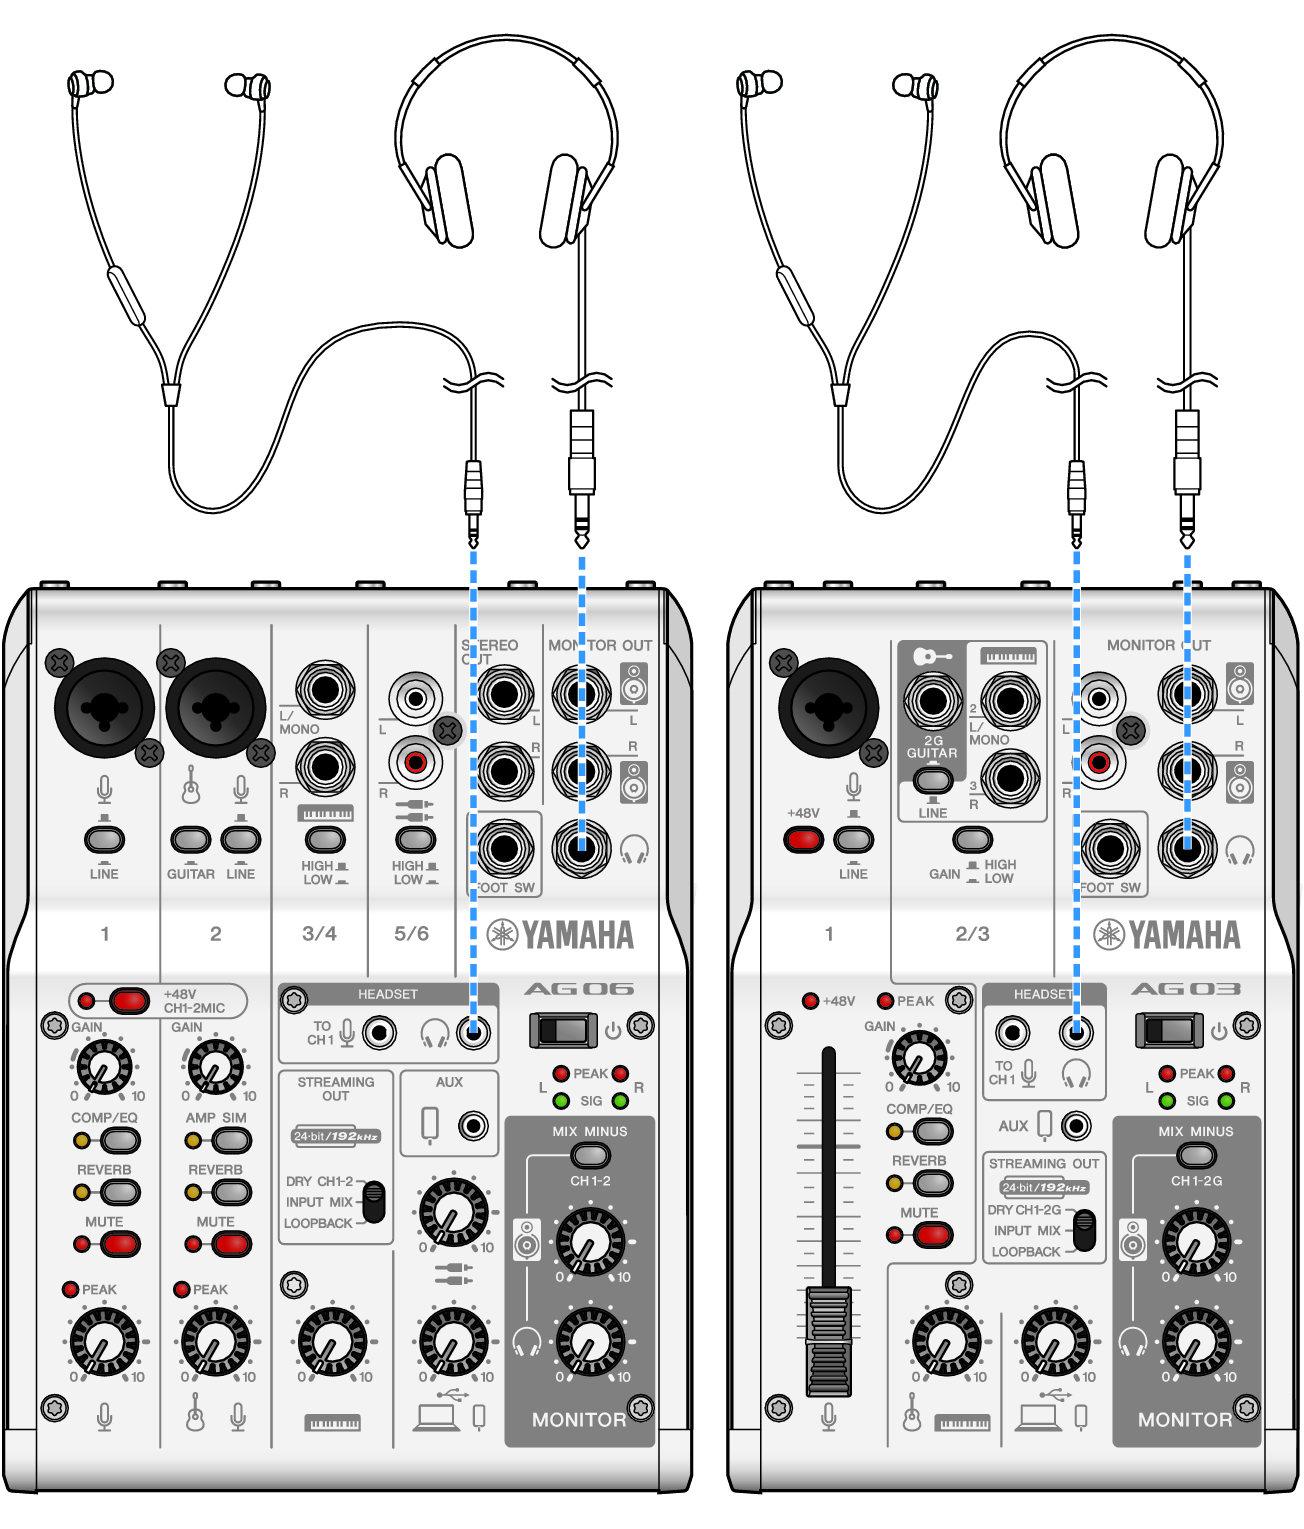
- Connect headphones or earphones
- Connect your headphones or earphones to the headphones output jack.
- Once you’ve made all the connections, let’s configure the settings for this product.
- Configure the settings for the AG
- Make the settings for each switch on the front panel as follows.
- Phantom [+48V] switch: on (when using a condenser mic)
- Channel 1 [GAIN] knob, level knob, fader: as appropriate (see illustration)
- [STREAMING OUT]: [INPUT MIX]
- [MIX MINUS]: off
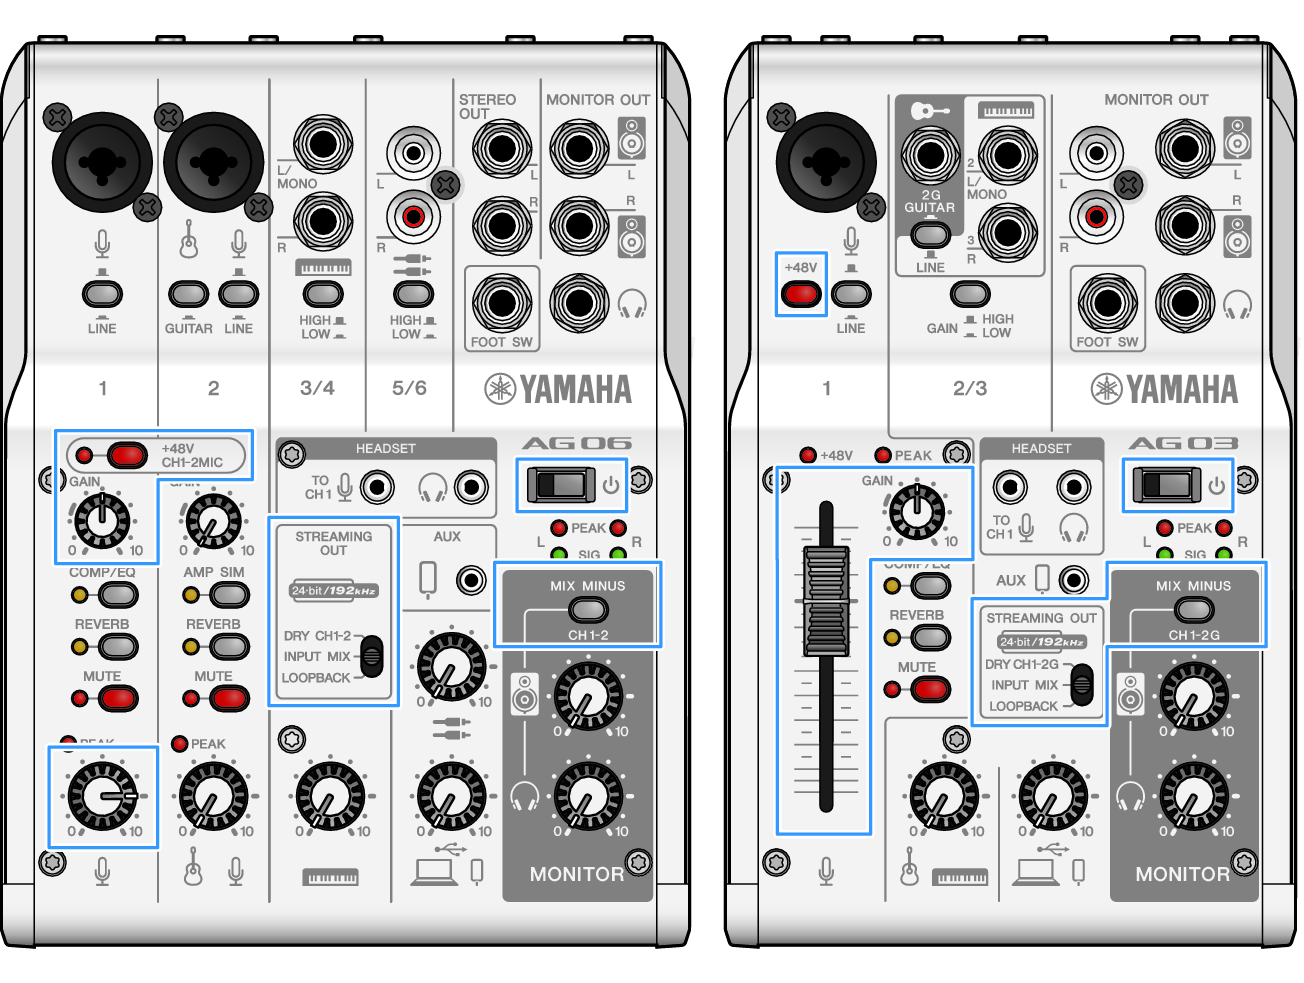
- Turn the [z] (standby/on) switch on.
- Turn the [z] (standby/on) switch on.
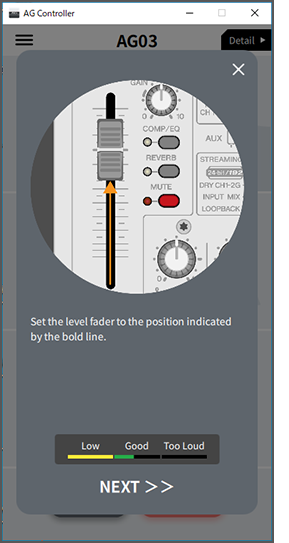
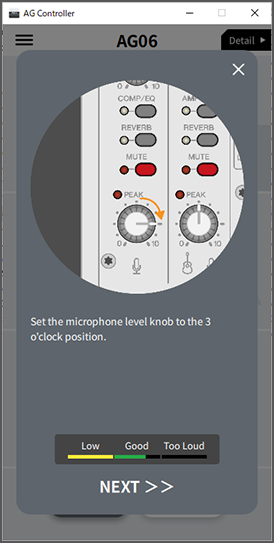
- Once you’ve made the settings on this product, launch the “AG Controller” app and click “Sound Check” at the bottom of the screen.
- Adjust the volume to check the sound on the Sound Check screen.
- Adjust the headphone/earphone volume
- Adjust the volume using the headphone [H] knob while speaking into the mic. Adjusting the volume using the headphone [H] knob has no effect on the volume of the livestreaming audio.
- Starting the livestream
- Use the fader (only on the AG03K2) or the level knob to adjust the respective volumes.
- Launch the livestreaming app and check the balance for the listeners.
NOTE
- See “Audio-related and other issues” if you don’t hear any sound.
Livestreaming with OBS
Here, we explain how to use OBS, as an example of how to use livestreaming software. To download and install OBS, see the official OBS website.
- Launch OBS, and open the “Settings” screen from “File”.
- On the left-hand navigation menu, click “Audio”.
- For the “Desktop Audio” settings in “Global Audio Devices”, use “Default” or “Disabled”.
- If you’ve set the [STREAMING OUT] selector switch on this product to [DRY CH 1-2] or to [INPUT MIX], set this to “Default”; and if you’ve set the selector switch to [LOOPBACK], set this to “Disabled”.
- Also, set the “Mic/Auxiliary Audio” setting in “Global Audio Devices” to the line setting, [Yamaha AG03MK2] or [Yamaha AG06MK2].
- On the left-hand navigation menu, click “Stream”.
- Select the streaming service to use, and input the stream key as necessary that you received from the service.
- Close the “Settings” screen.
- Start the livestream.