Connection
3. Connection
3.1. iOS/iPadOS
3.1.1. Wi-Fi access point settings
Specify the Wi-Fi access point as described in the owner’s manual of each device.
Although there is no need to make special settings, we recommend that you use security such as WPA in order to prevent unauthorized access to the network from outside.
Guidelines for settings are provided below.
-
Specify the name of the Wi-Fi network.
-
Specify the security mode (e.g., WPA2) and password.
-
Select the wireless mode. (such as 802.11n or 802.11g)
-
If possible, enable “Auto Channel Selection.”
The wireless channel with the least interference will be selected.
For the fastest communication between the iPad/iPhone and the Wi-Fi access point, we recommend that you select an 802.11n network. If you use multiple external antennas, it will be easier to connect to the Wi-Fi access point.
In addition, we recommend that you make stealth mode and MAC address filter settings to increase security.
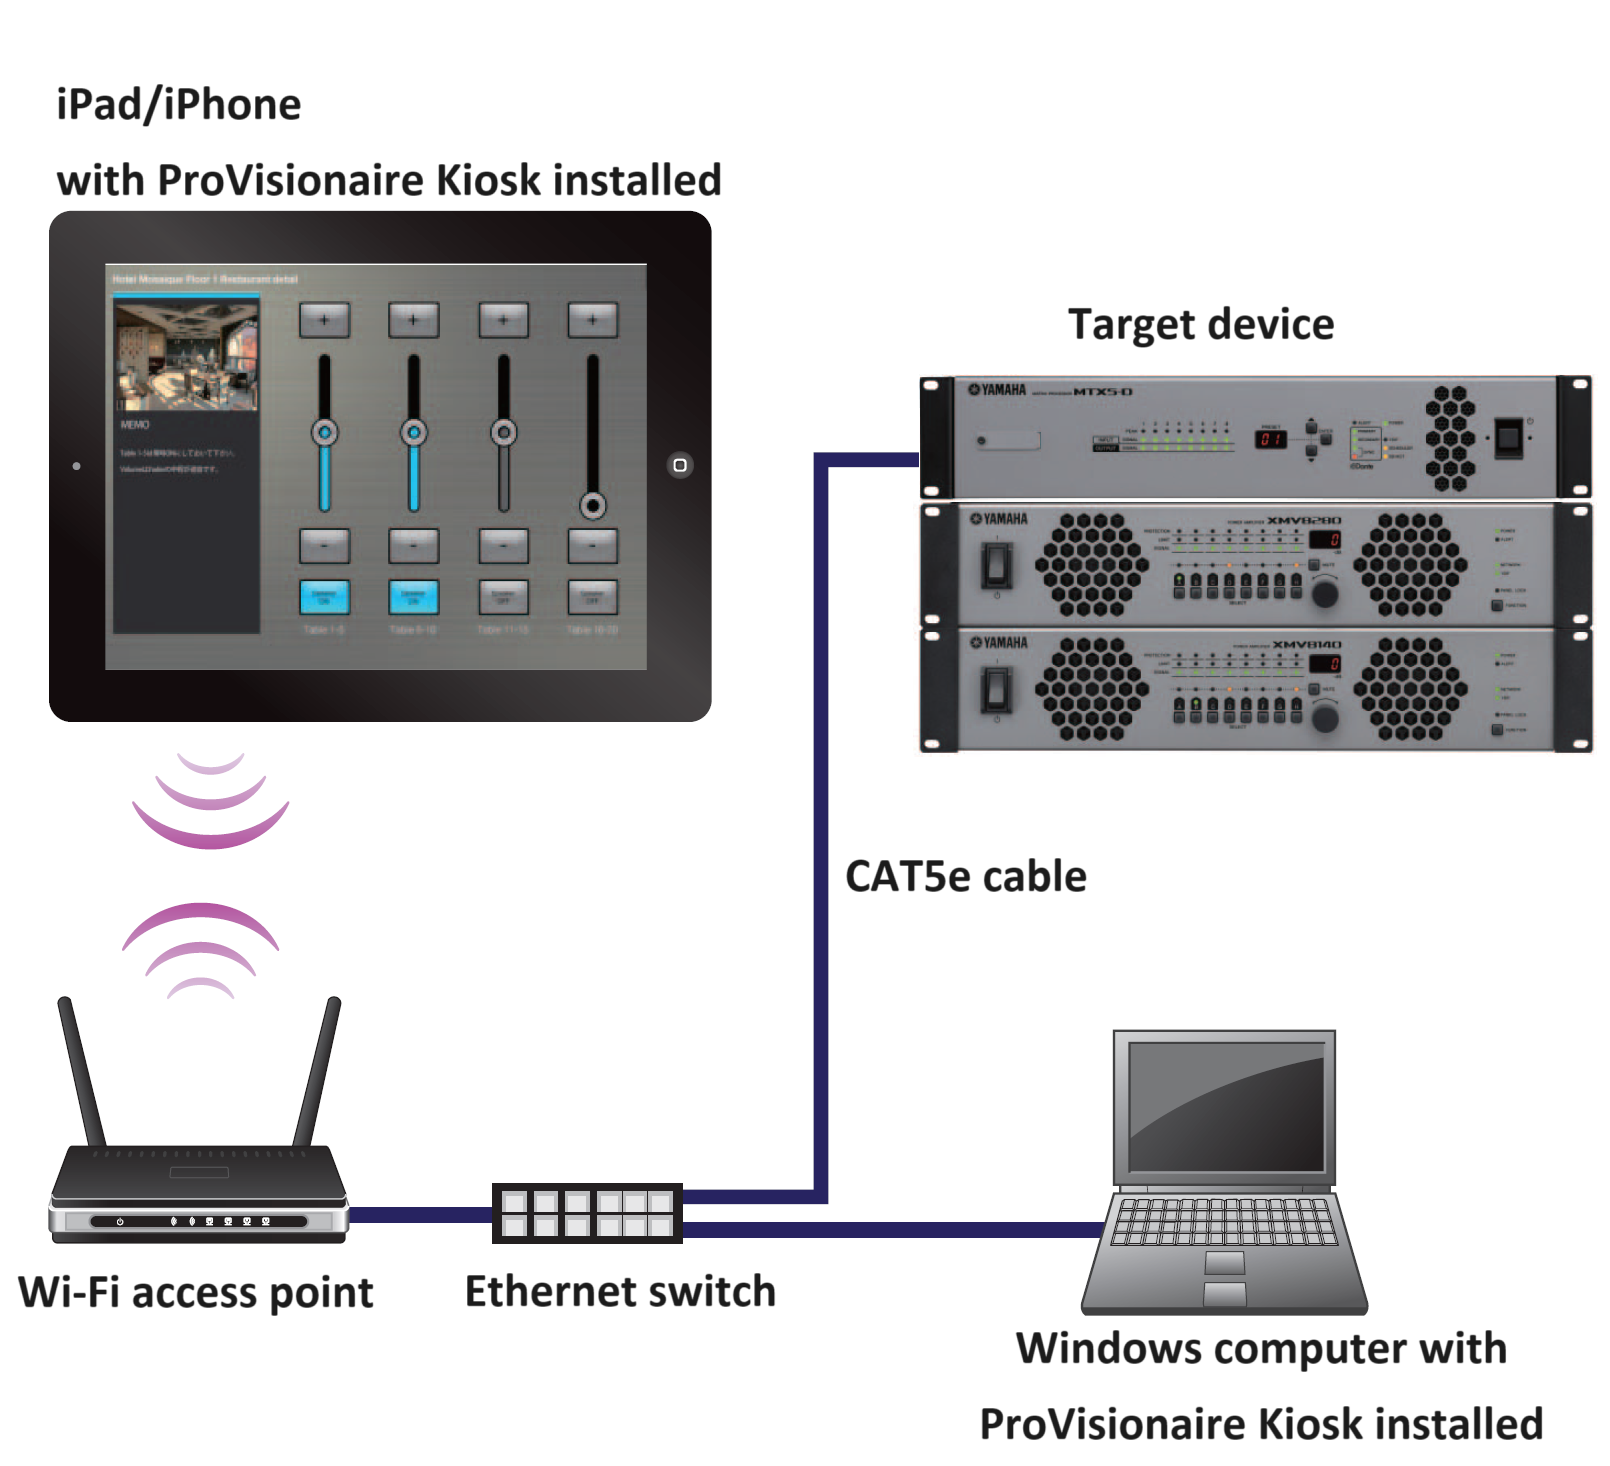
3.1.2. Connecting to the target system
Use CAT5e cables to connect the target system with the Wi-Fi access point.
Include an Ethernet switch in the system if necessary.
■ Example of network settings for target devices
-
Set the IP address of each device.
For setup instructions, refer to the instruction manual of each device.
In the following example, we assume that the IP address of the device is 192.168.0.1.
If there are multiple target devices, make sure that the IP addresses of the devices do not overlap. -
Change the IP address of the Wi-Fi access point.
Set the Wi-Fi access point to the same network (subnet) as the device.
Make sure that the IP address does not overlap with the IP addresses of the target devices.
Connect your computer to the Wi-Fi access point and change the IP address from the web browser of your computer.
For details on how to change the IP address, refer to the instruction manual of the Wi-Fi access point.The maximum number of ProVisionaire Kiosks that can be connected to a device varies depending on the device.
Refer to the instruction manual of each device.
● Example network settings for the iPad
-
In the home screen of the iPad, tap [Settings] → [Wi-Fi].
-
Turn the [Wi-Fi] switch On (
 ), and from the access point list that appears, select the access point of the target system.
-
Enter the password of the Wi-Fi access point.
-
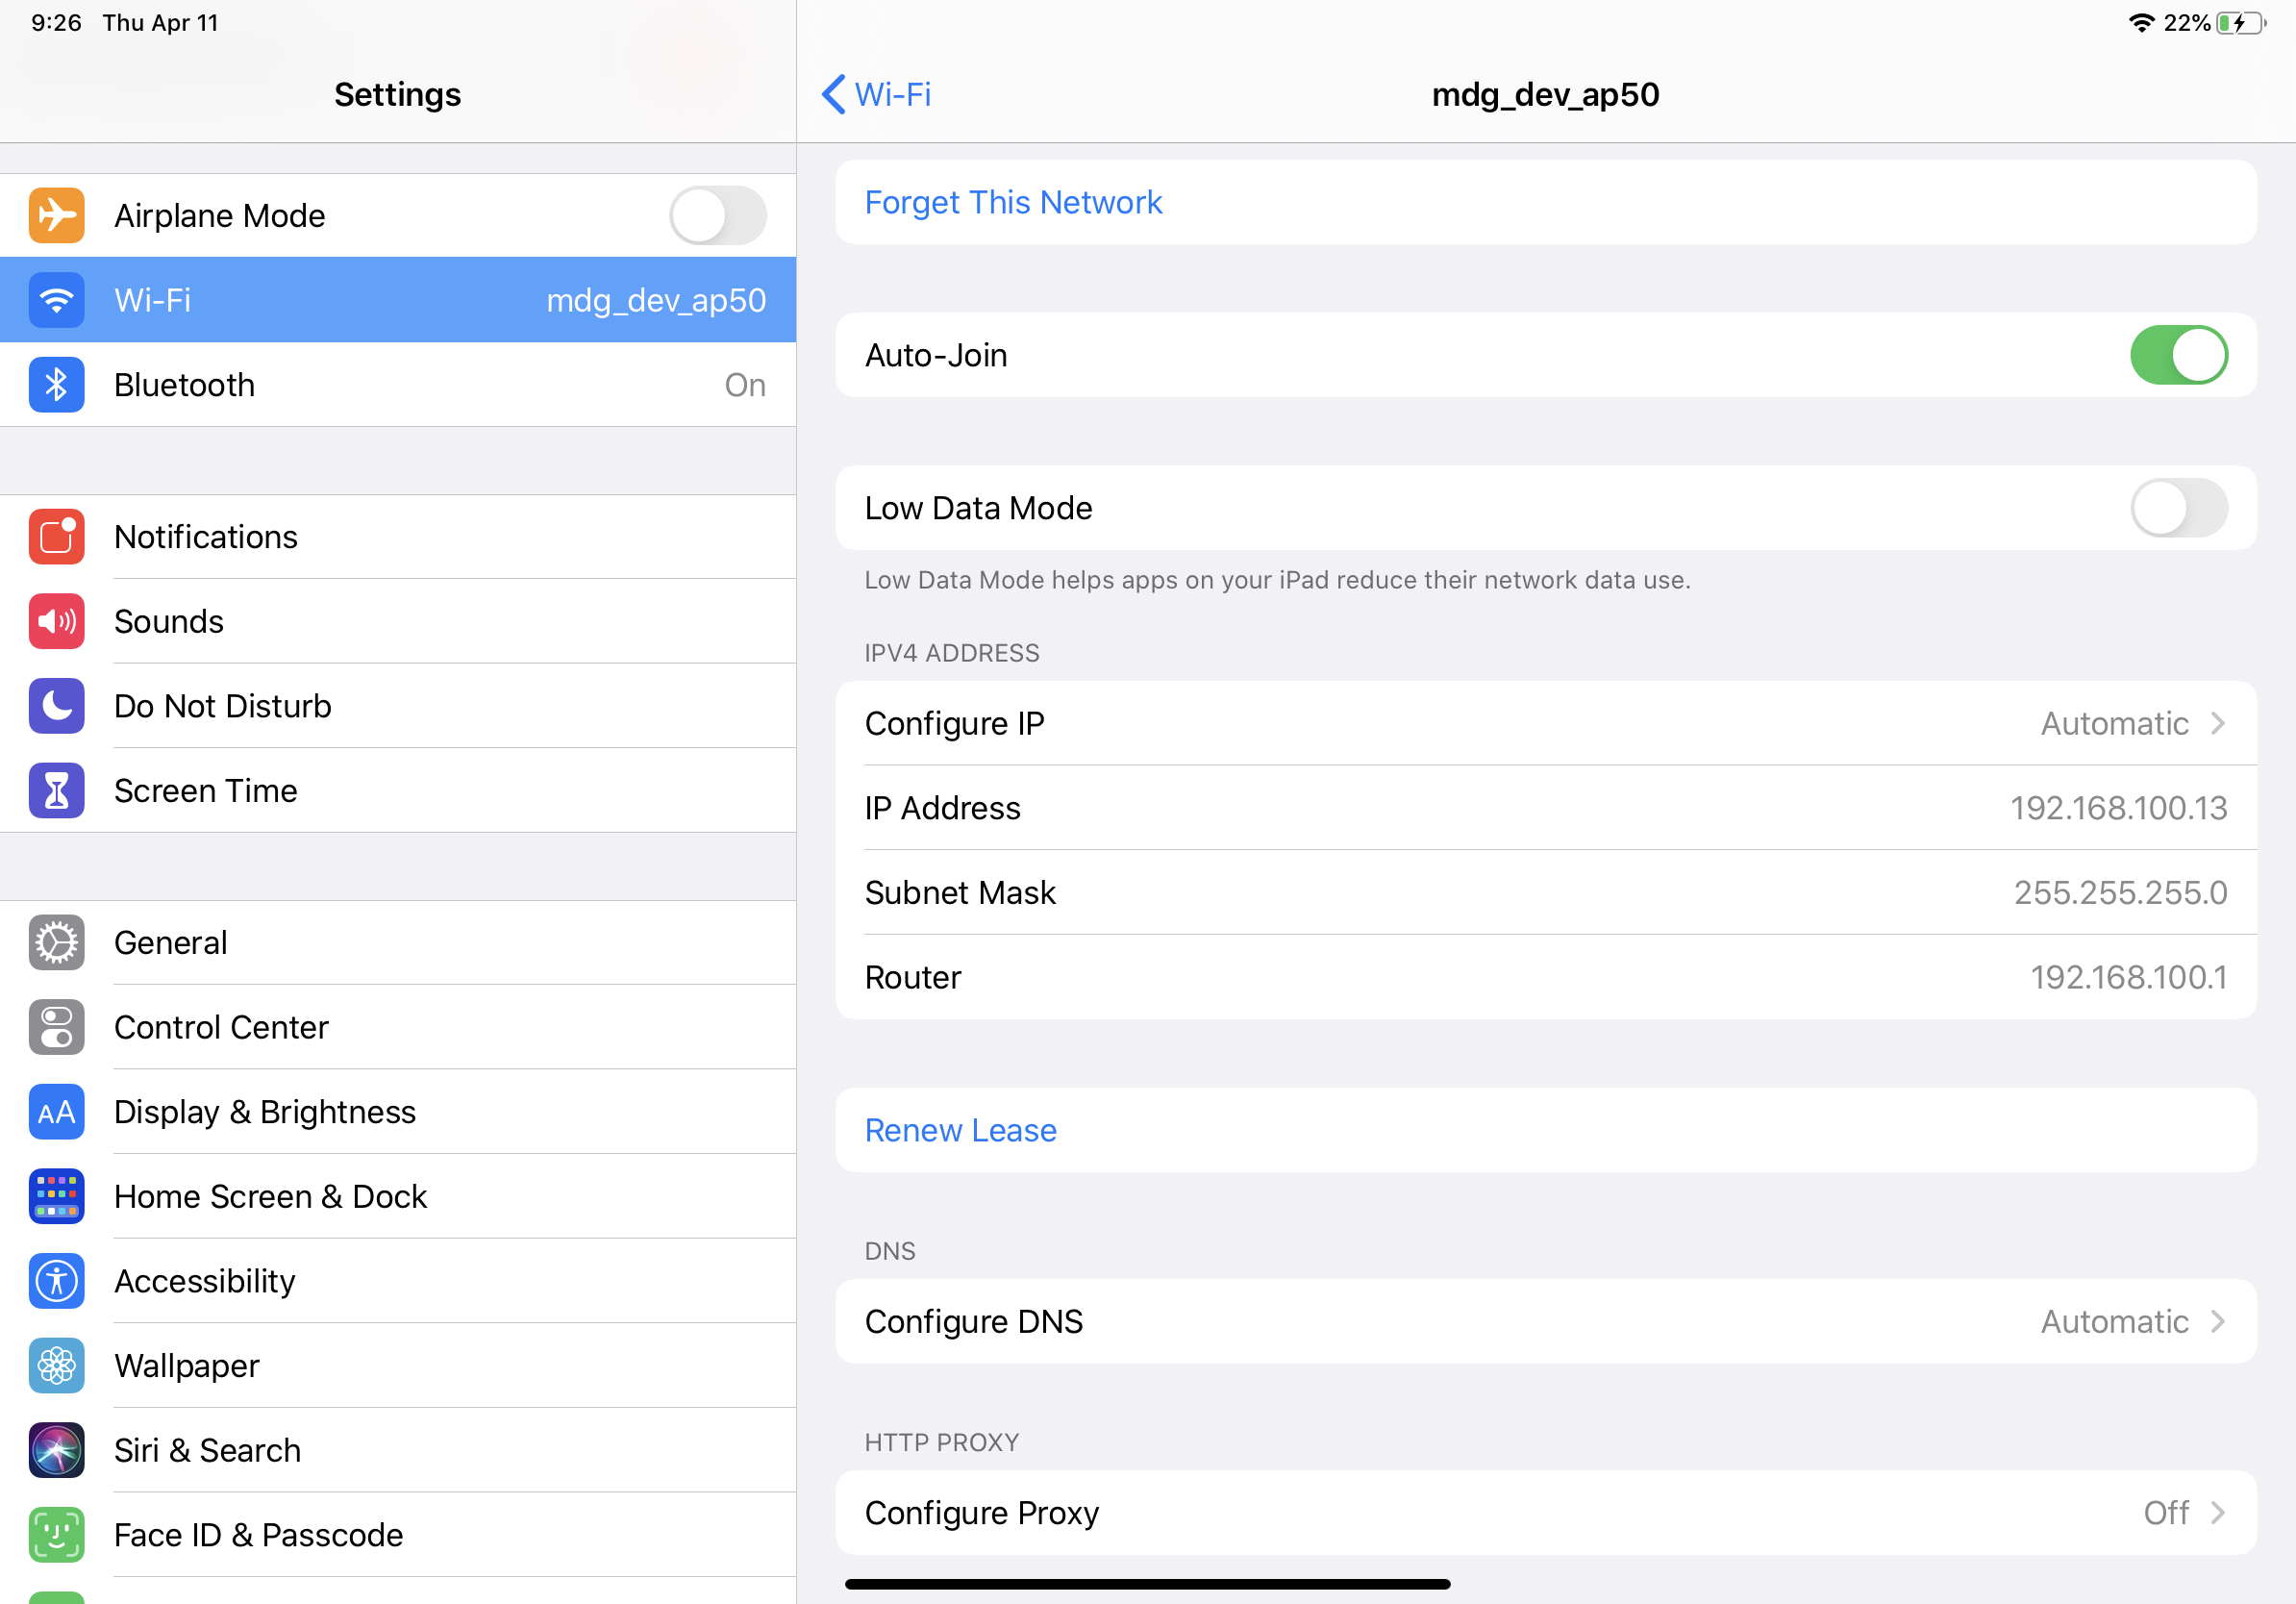
Make network settings.
●If obtaining the IP address automatically
-
Tap
 , and set [Configure IP] to [Automatic].
-
Verify that “IP Address,” “Subnet Mask,” “Router,” and “DNS” are set.
-
Click the home button to complete the settings.
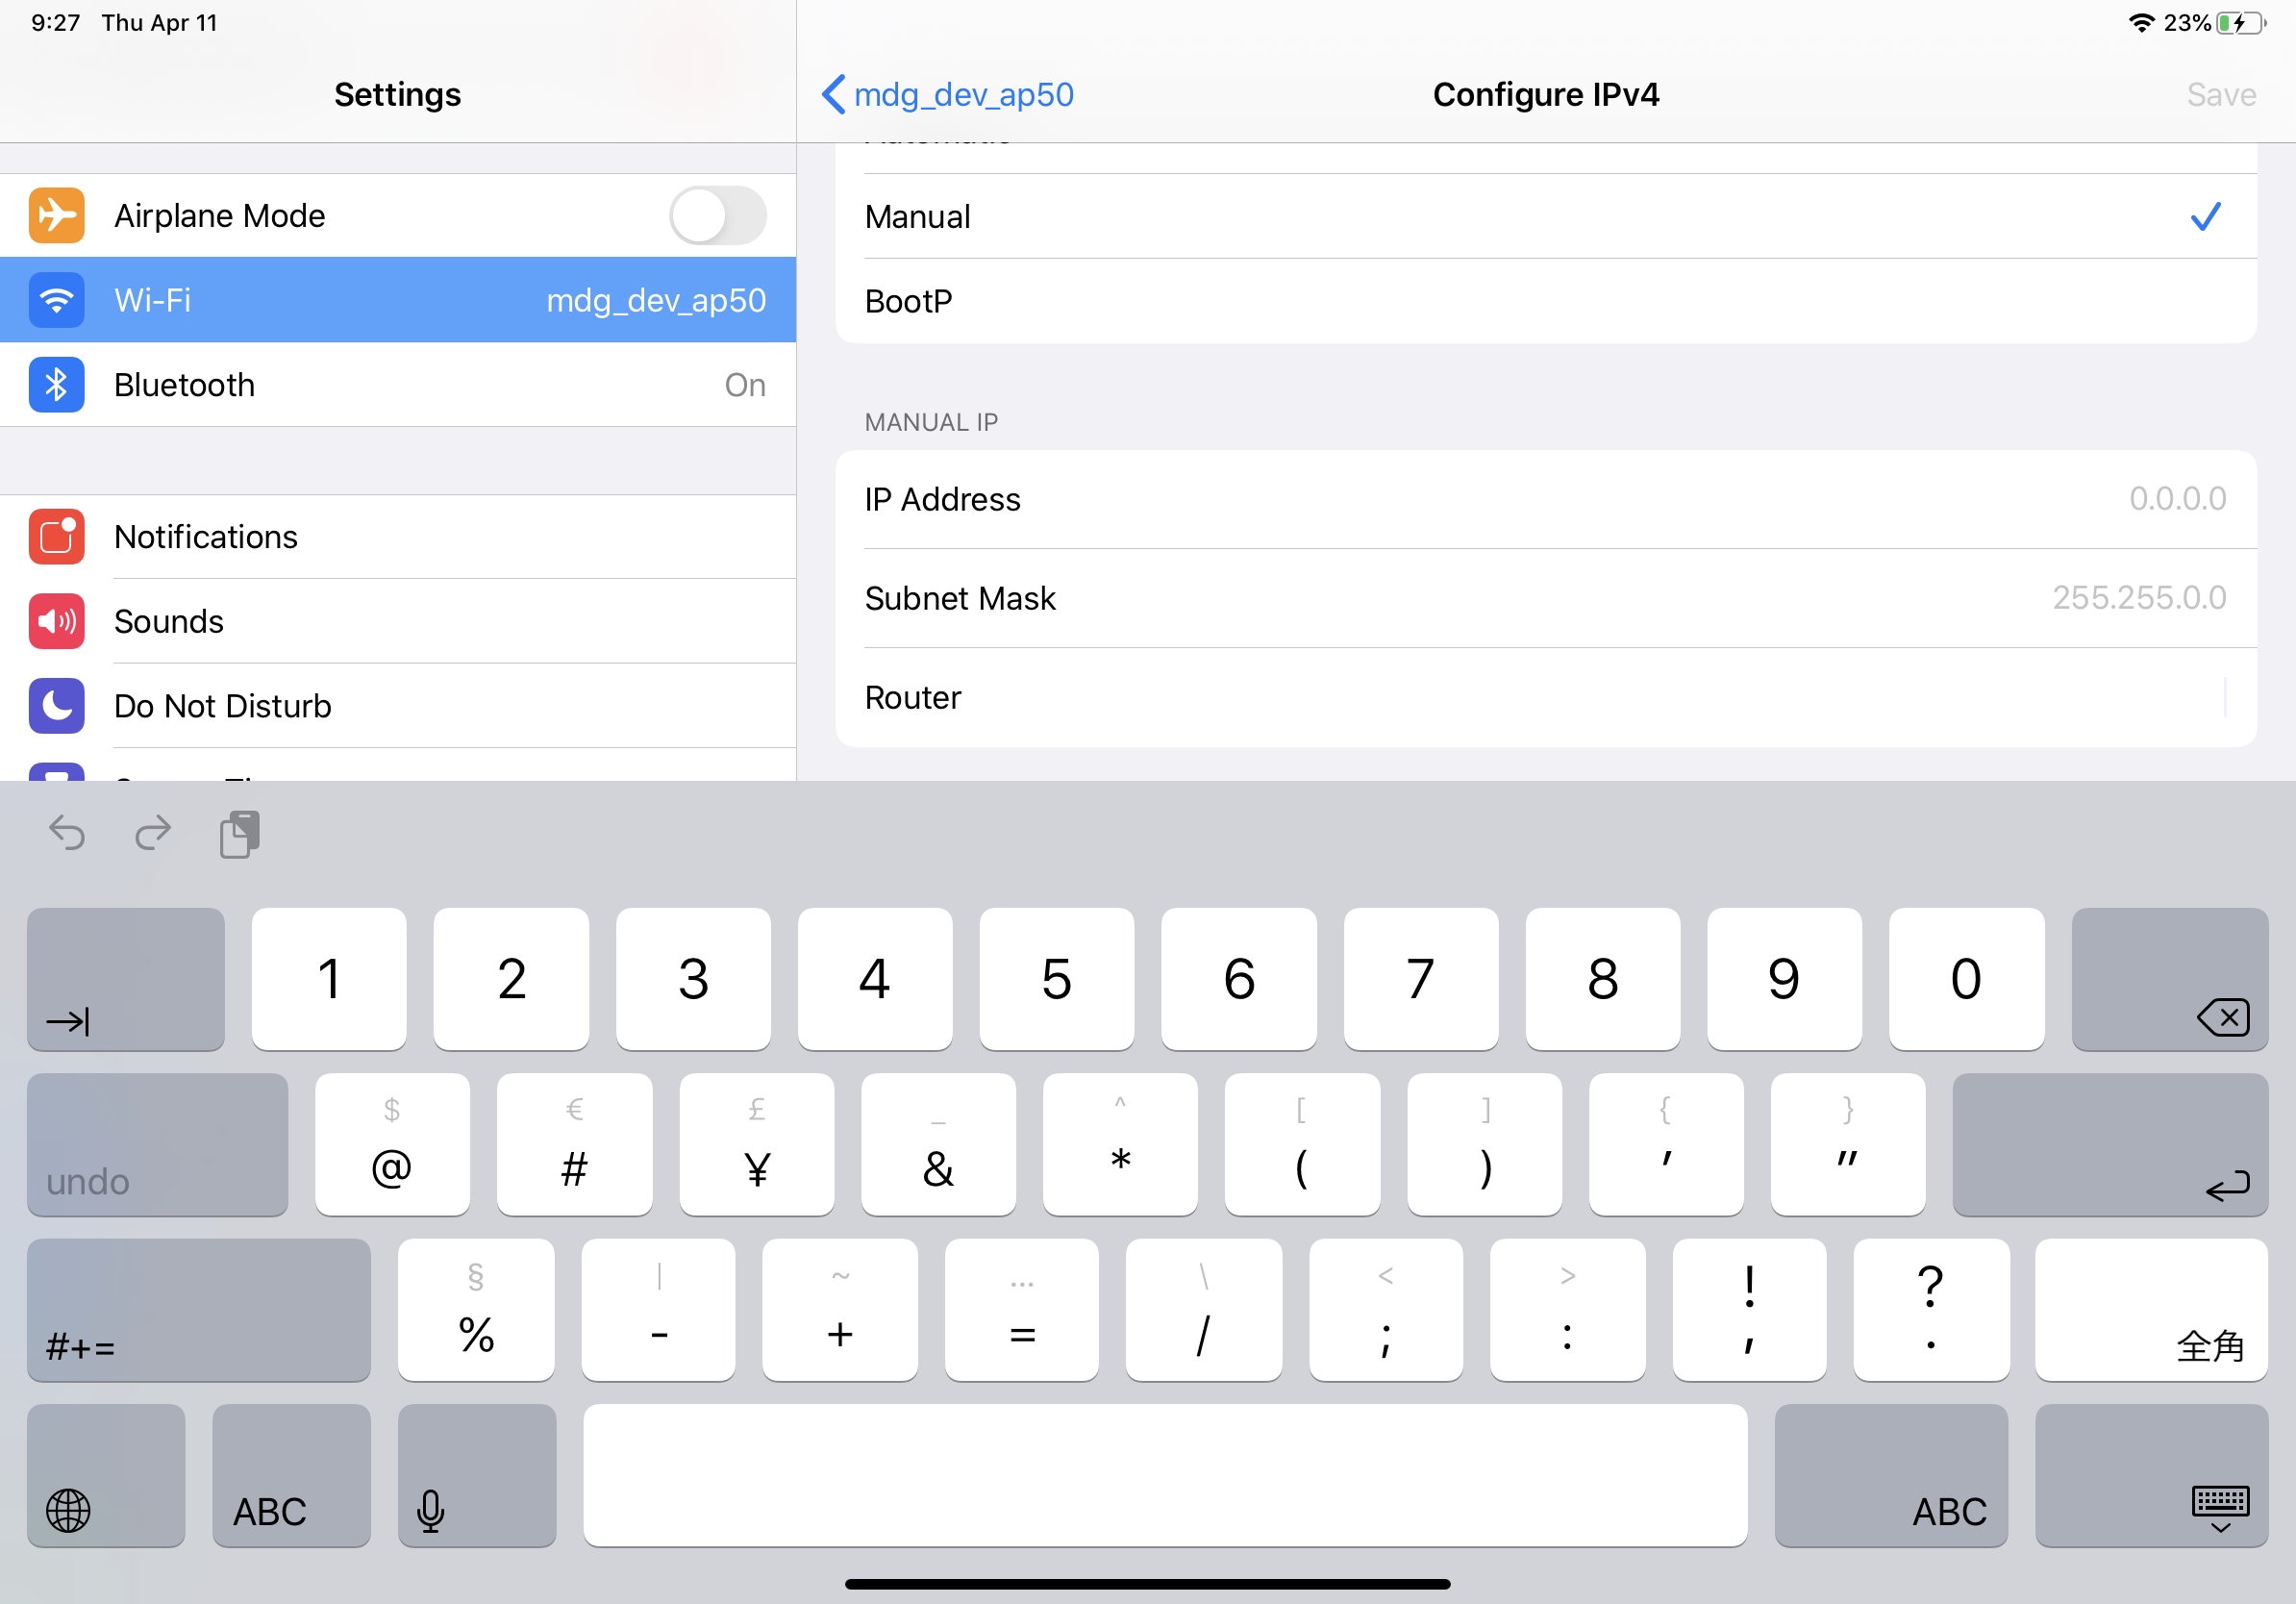
●If specifying the IP address manually (when it cannot be obtained automatically)
-
Tap
, and set [Configure IP] to [Manual].
-
In “IP Address,” enter the IP address of the target system, changing only the fourth octet (in the illustration above, “200”).
-
In “Subnet Mask,” enter “255.255.255.0.”
-
In “Router,” enter the IP address of the router or the IP address of the Wi-Fi access point.
-
In “DNS,” enter the IP address of the DNS or the IP address of the Wi-Fi access point.
-
Click the home button to complete the settings.
● Tips for network settings
-
The IP addresses of the devices you’re connecting must be set to the same subnetwork.
- Example of a correct combination of settings Example of an incorrect combination of settings The Wi-Fi access point device’s internal router and DNS *1
192.168.0.254
192.168. 11 .1
Target system
192.168.0.1
192.168.0.1
iPad
192.168.0.200
192.168. 11 .50
Computer
192.168.0.253
192.168. 11 .253
*1 If the Wi-Fi access point does not have router functionality, specify the IP address for accessing the Wi-Fi access point device.
-
Connect the target devices to a LAN port of the Wi-Fi access point.
If you connect it to the Ethernet port (WAN port), it will be impossible to communicate correctly between the smart device and the target devices. -
Start ProVisionaire Kiosk.
ProVisionaire Touch detects the target devices and connects automatically.When ProVisionaire Kiosk and the device are connected, the online indicator turns green.
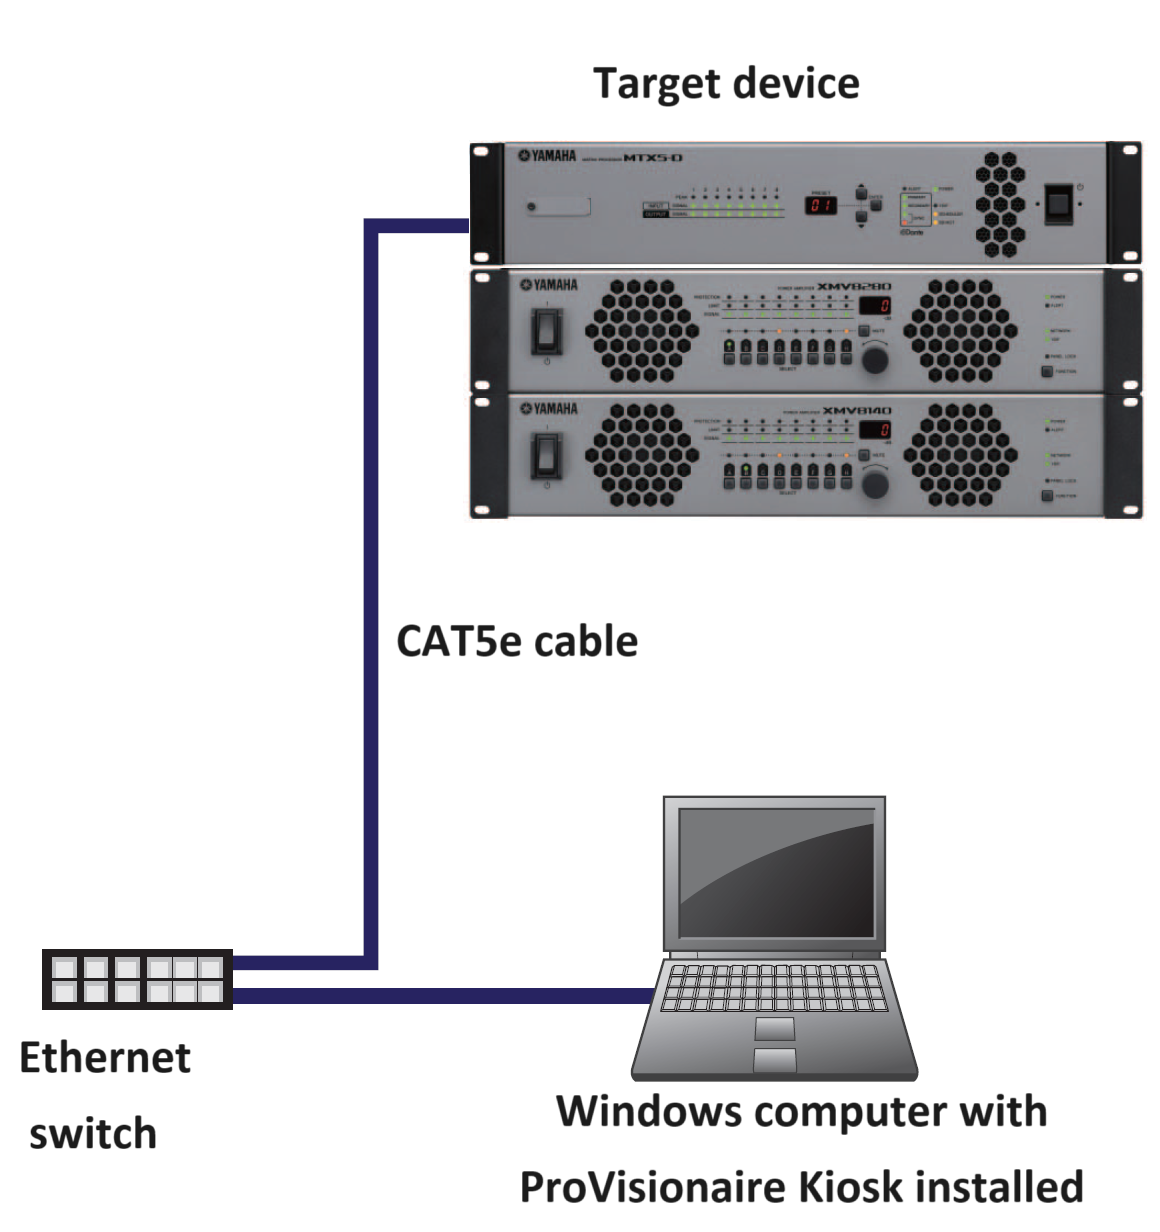
3.2. Windows
3.2.1. Connecting to target devices
Use a Cat5e cable to connect target devices to the switch.
■ Example of network settings for target devices
-
Set the IP address of each device.
For setup instructions, refer to the instruction manual of each device.
If there are multiple target devices, make sure that the IP addresses of the devices do not overlap. -
Set the IP address of your computer to the same network (subnet) as the device.
Make sure that the IP address does not overlap with the IP addresses of the target devices. -
Connect the computer and all the target devices to the switch.
The maximum number of ProVisionaire Kiosks that can be connected to a device varies depending on the device.
Refer to the instruction manual of each device.
■ Network settings for ProVisioniare Kiosk


-
Click the [Setup] button
 on the title bar and open the
Network tab
.
on the title bar and open the
Network tab
.
-
Select the network cards of the networks to which the devices are connected.
Click the [OK] button to confirm the selection.
|
You can select up to eight network cards. When multiple network cards are used, each network address must be independent.
If your devices are located across multiple sub-networks, select all network cards required for connection. When multiple network cards are used, each network address must be independent. |
When the connection to the devices is successful, the online indicator turns green.