“Setup” dialog box
6. “Setup” dialog box
Click the [Setup] button
![]() on the title bar to open this dialog box.
on the title bar to open this dialog box.
6.1. Network tab (Windows only)
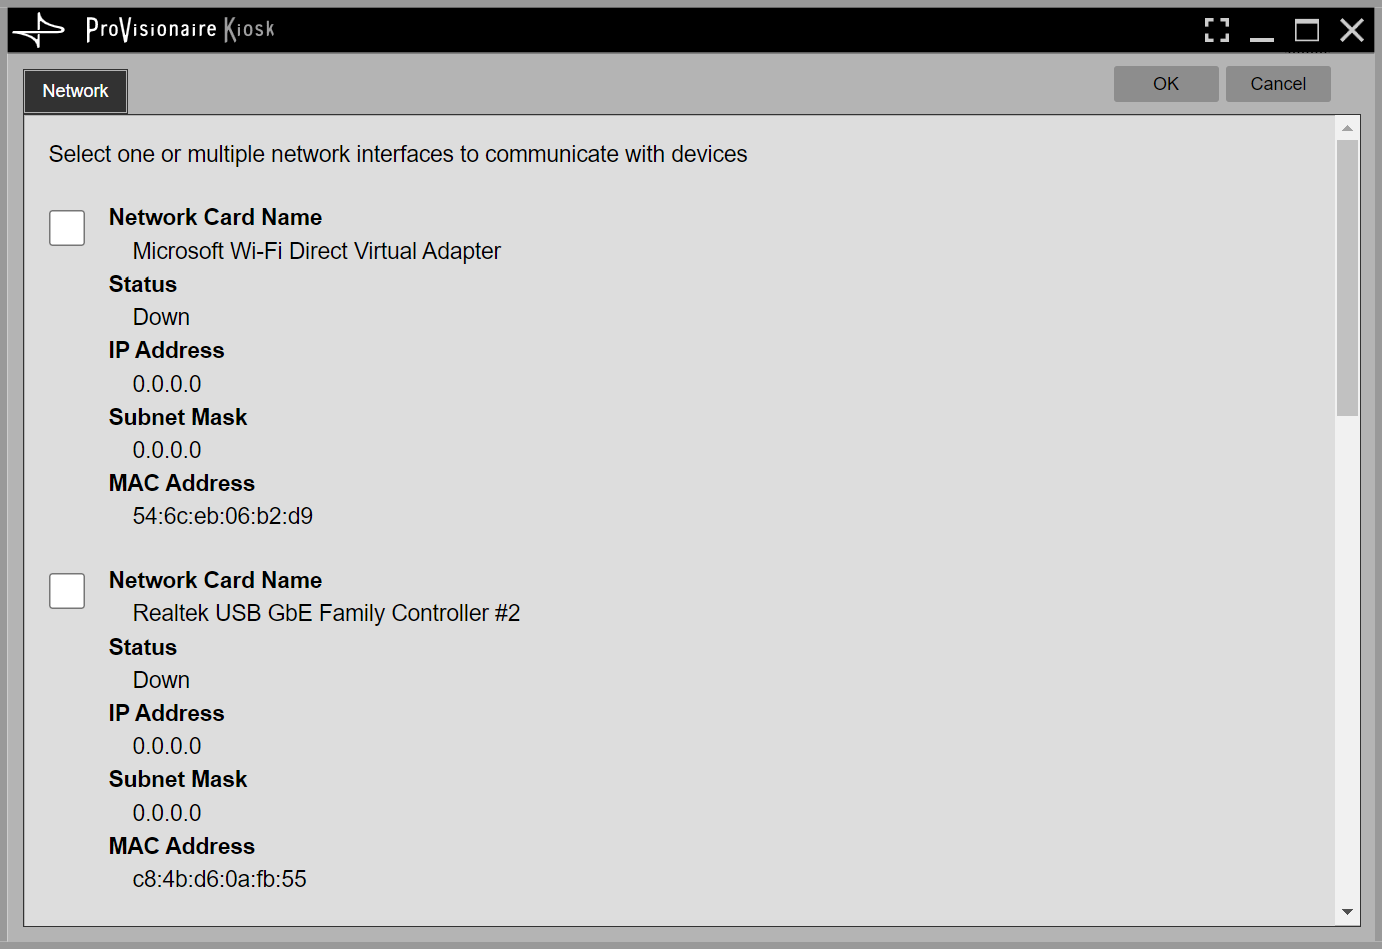
Select the network interface card to which the device is connected.
Press the [OK] button to confirm the change.
6.2. Security tab
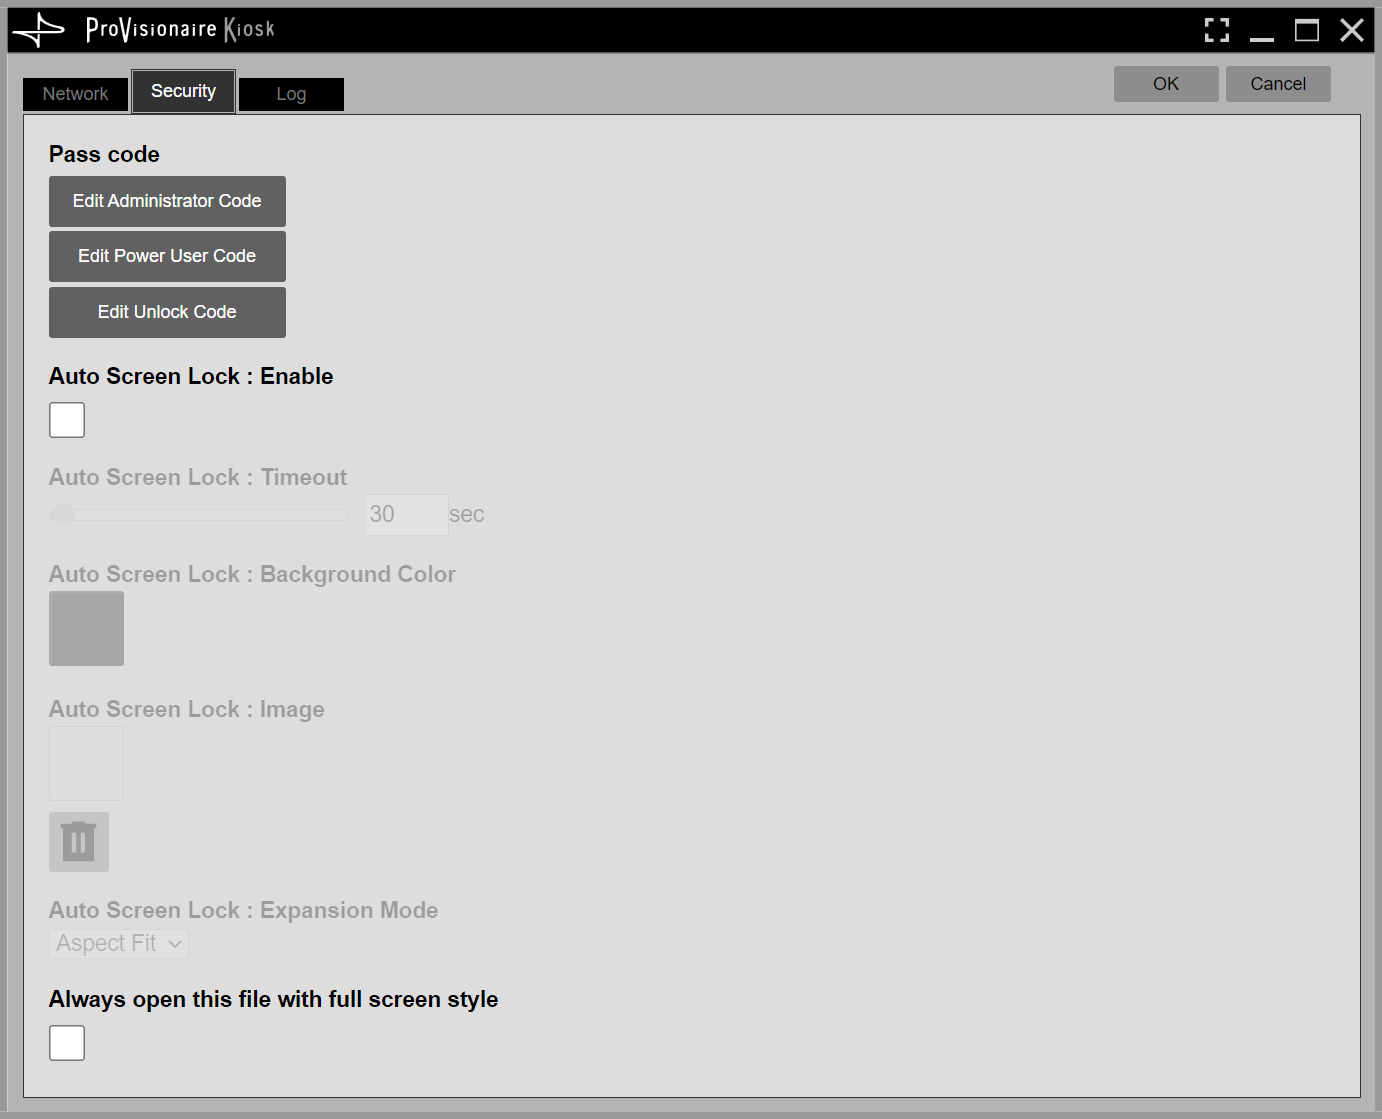
Pass Code
-
Edit Administrator Code
Changes the Administrator Code.
If you open the controller file as a Power User, this item will not be displayed. -
Edit Power User Code
Changes the Power User Code. -
Edit Unlock Code
Changes the Unlock Code.ProVisionaire Kiosk uses the following roles. -
Administrator
The person who designs and edits the control panel. (mainly the installation contractor) This is the person who performs the setup on ProVisionaire Control PLUS. This person knows the Administrator Code (4 digits) to remove the function restrictions. -
Power User
Someone such as a manager of the facility. This person knows the Power User Code (4 digits) to move to access-restricted pages and to change configuration files. -
Staff
A person who operates the parameters. This person knows the Unlock Code (4 digits) to unlock the screen. -
Guest
A person who has no operating privileges.Each role can perform the following actions.
-
| Administrator | Power User | Staff | Guest | |
|---|---|---|---|---|
|
Unlock the screen lock |
- |
- |
✔ |
- |
|
Operate parameters |
✔ |
✔ |
✔ |
- |
|
Edit controller files |
✔ |
✔ |
- |
- |
|
Edit design pages |
✔ |
- |
- |
- |
Auto Screen Lock
-
Auto Screen Lock : Enable
If this box is selected, the screen will be locked when the time specified in Time Out has elapsed since the last operation. -
Auto Screen Lock : Back Color
Specifies the color of the locked screen. -
Auto Screen Lock : Image
Specifies the image to be displayed on the locked screen.
Click the trash icon to delete the selected image file. -
Auto Screen Lock : Expansion Mode
[Image Expansion Mode] is located under [Image] in the “Properties” area, and [Expansion Mode] is located on the [Security] tab of the “Setup” dialog box. This item allows you to select how the image is positioned in the display area.-
None
The image is placed in the center of the area without any changes in size.
-
Full
The displayed image is scaled to fit the entire display area in both height and width, while its aspect ratio is ignored.
-
Aspect Fill
The displayed image is scaled to fill as much of the display area as possible, while its aspect ratio is maintained.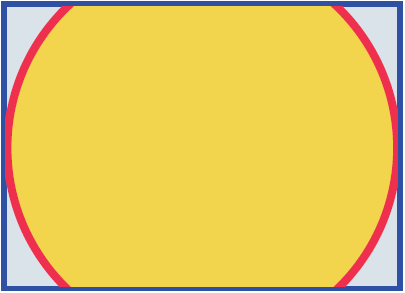
-
Aspect Fit
The displayed image is scaled to the maximum size that fits the entire image in the display area, while its aspect ratio is maintained.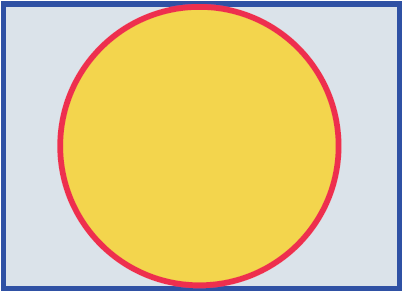
-
Scaling
You can set the image reduction ratio in relation to the widget. When 100% is selected, the displayed image will fill the entire area.
-
Always open this file with full screen (Windows only)
Select this box to display the file in full screen when it is opened.
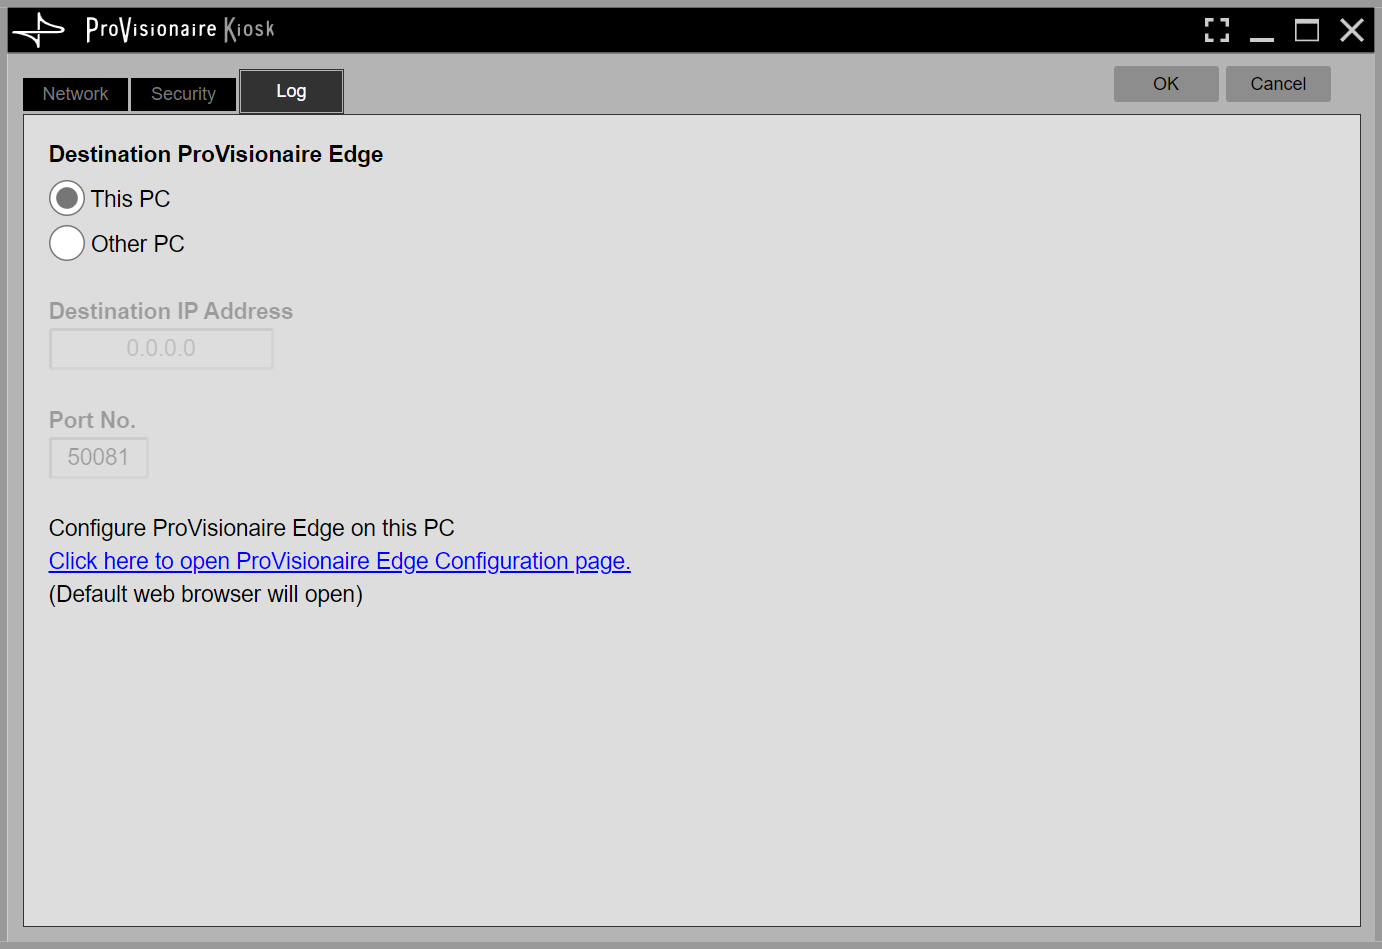
6.3. Log tab
-
Destination ProVisionaire Edge
Specifies the source of ProVisioniare Edge information to be displayed in the System Monitor widget.
“This PC” is available only for Windows. -
Click here to open ProVisionaire Edge Configuration page.
Clicking here opens the Setting screen of ProVisionaire Edge installed on the computer running KIOSK.