Menu bar
This section provides descriptions of each menu on the menu bar: [File], [Setup] and [Help].
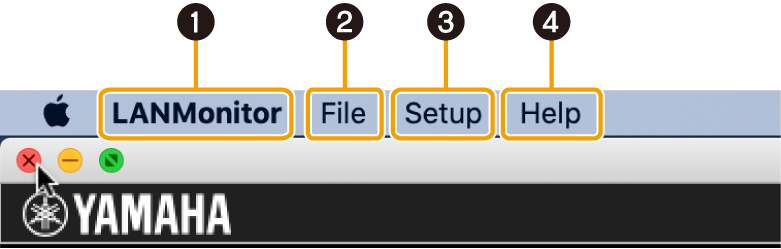
2. [File] menu
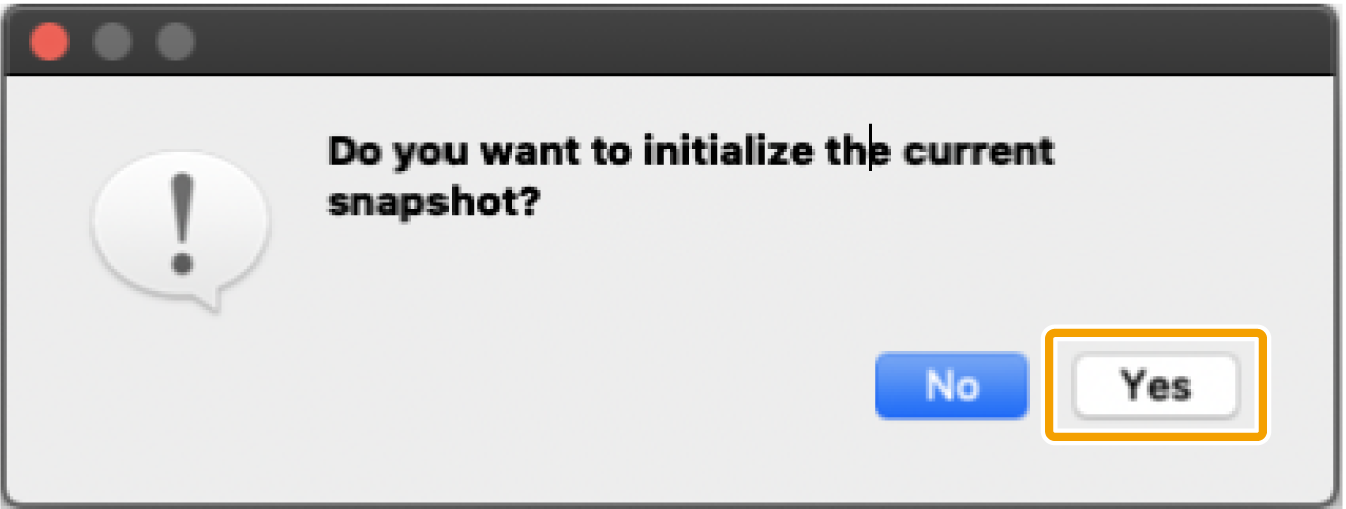
2.1. [New]
Initializes the current snapshot held by Yamaha LAN Monitor.
If a snapshot is already held, a confirm initialization message appears. Click [Yes] to initialize the current snapshot.
2.2. [Open Snapshot File]
Displays the “Open Snapshot File” dialog box.
In the “Open Snapshot File” dialog box, select a snapshot file saved to the computer or external memory device, then click [Open] to replace the snapshot currently held by Yamaha LAN Monitor with the selected snapshot.
At the same time, Yamaha LAN Monitor will compare the current network status with the snapshot and display the comparison results on the Map screen.
2.3. [Save As]
Displays the “Save As” dialog box. Saves the snapshot held by Yamaha LAN Monitor to the computer or an external memory device. The saved file has a filename extension of “.nms.”
2.4. [Exit]
Exits Yamaha LAN Monitor.
3. [Setup] menu
3.1. [Import Label Settings]
Opens the “Import Label Settings” dialog box.
Loads device labels displayed in the “Connected Devices” view from a file.
3.2. [Export Label Settings]
Opens the “Export Label Settings” dialog box.
Saves device labels specified in the “Connected Devices” view as a file. The saved file has a filename extension of “.nml.”
3.3. [Basic Settings]
Opens the “Basic Settings” dialog box.
Displays a dialog box in which you can make basic settings for Yamaha LAN Monitor.
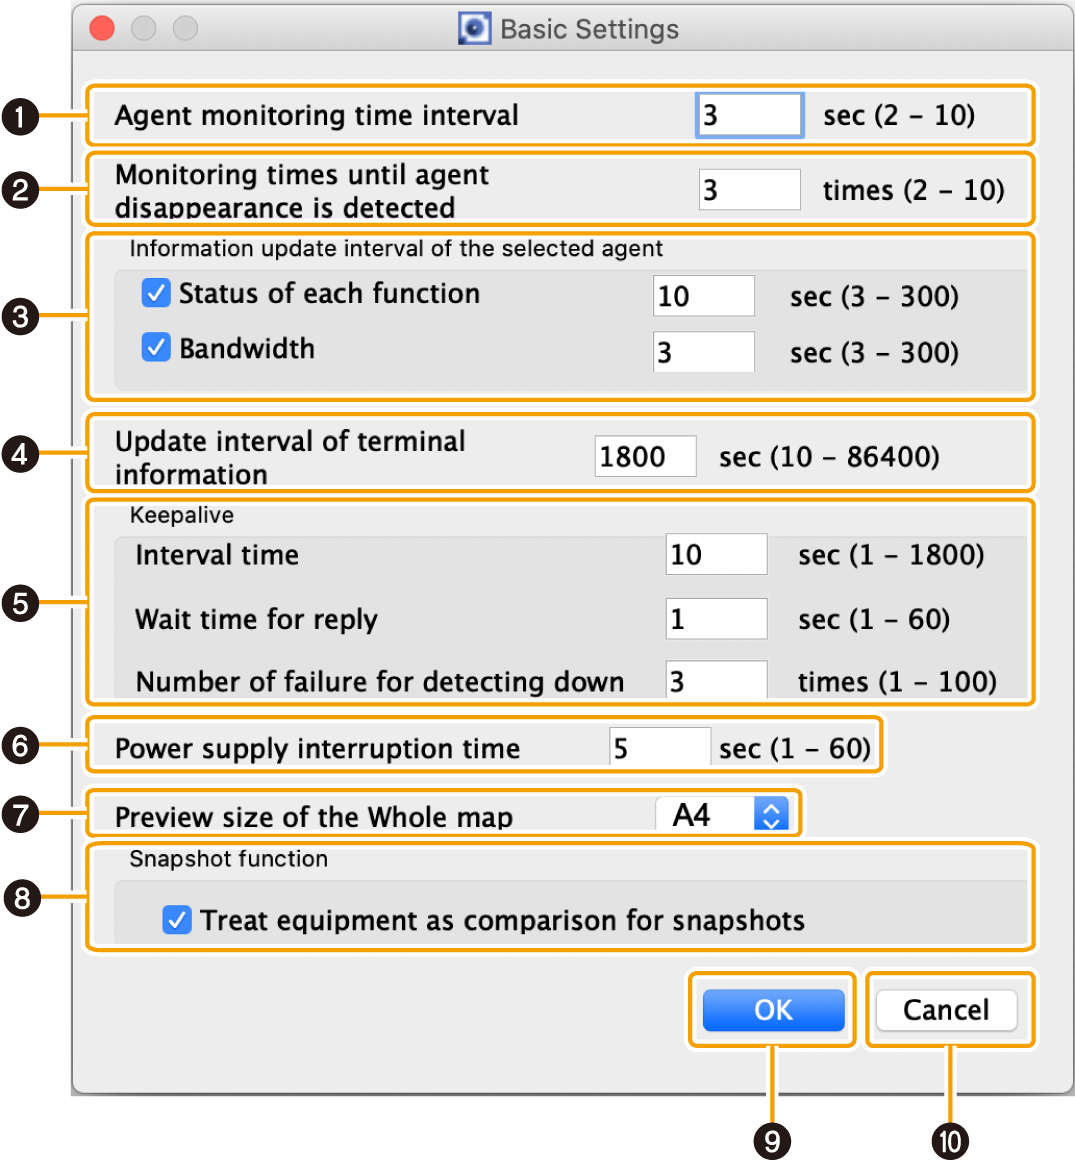
- ❶ Agent monitoring time interval
-
Set the agent monitoring time interval in seconds.
-
Setting range: 2 – 10 sec
-
Default: 3 sec
This will detect the agent and update the Map screen every time the set amount of seconds elapses.
-
- ❷ Monitoring times until agent disappearance is detected
-
Set the monitoring times until agent disappearance is detected.
-
Setting range: 2 – 10 times
-
Default: 3 times
If the search packets have been sent for the set number of times without receiving a response packet from the agent, the corresponding agent is assumed lost.
-
- ❸ Information update interval of the selected agent
-
Set the interval used when retrieving information for the currently selected agent in the tree view.
Whenever the number of seconds set here elapses, various information will be retrieved from the currently selected agent in the tree view.
You can reduce Yamaha LAN Monitor’s processing load by setting the update interval to a longer value.-
Status of each function:
Sets the interval in seconds at which information other than bandwidth usage is retrieved.-
Setting range: 3 – 300 sec
-
Default: Check box selected, 10 sec
-
-
Bandwidth:
Sets the interval in seconds at which bandwidth usage information is retrieved.-
Setting range: 3 – 300 sec
-
Default: Check box selected, 3 sec
-
-
- ❹ Update interval of device information
-
Set the device monitoring time interval in seconds.
-
Setting range: 10 – 86400 sec
-
Default: 1800 sec
This will detect devices connected to an agent every time the set amount of time elapses.
-
- ❺ Keepalive
-
This pings agents and devices with an IP address to confirm their existence. This is used to set the ping interval, the wait time for reply, and the number of failed attempts before a connection is assumed to be down.
-
Interval time:
Set the ping interval in seconds.-
Setting range: 1 – 1800 sec
-
Default: 10 sec
-
-
Wait time for reply:
Set the wait time for reply to pings in seconds.-
Setting range: 1 – 60 sec
-
Default: 1 sec
-
-
Number of failure for detecting down:
Set the number of failures before a connection is detected as being down.-
Setting range: 1 – 100 times
-
Default: 3 times
-
-
- ❻ Power supply interruption time
-
Suspends the power supply when a disrupted or inactive connection is detected. Set the power supply interruption time in seconds in case of interruption.
-
Setting range: 1 – 60 sec
-
Default: 5 sec
-
- ❼ Preview size of the Whole map
-
Select the size of the preview image of the “Whole map” generated for print preview and printing.
If printing or previewing the “Whole map” has failed, the failure may be avoided by setting the preview size to A6. - ❽ Snapshot function
-
-
“Treat equipment as comparison for snapshots” check box:
Clear this check box to exclude devices as targets for comparisons.-
Default: Selected
-
-
- ❾ [OK] button
-
Applies the configured settings.
-
The [OK] button is only available when acceptable input values have been input.
-
Click the [OK] button to reset the monitoring timer and begin counting from 0 seconds again.
-
- ❿ [Cancel] button
-
Closes the dialog box without applying setting changes.
3.4. [VLAN registration]
Open the “VLAN registration” dialog box.
Register the VLAN to use with the Yamaha LAN Monitor.
The VLAN you register here will be used when configuring the tagged VLAN for the switch.
Also, as the registered VLAN information is saved in the label settings file, you can export the file from the “Export Label Settings” in the Setup menu.
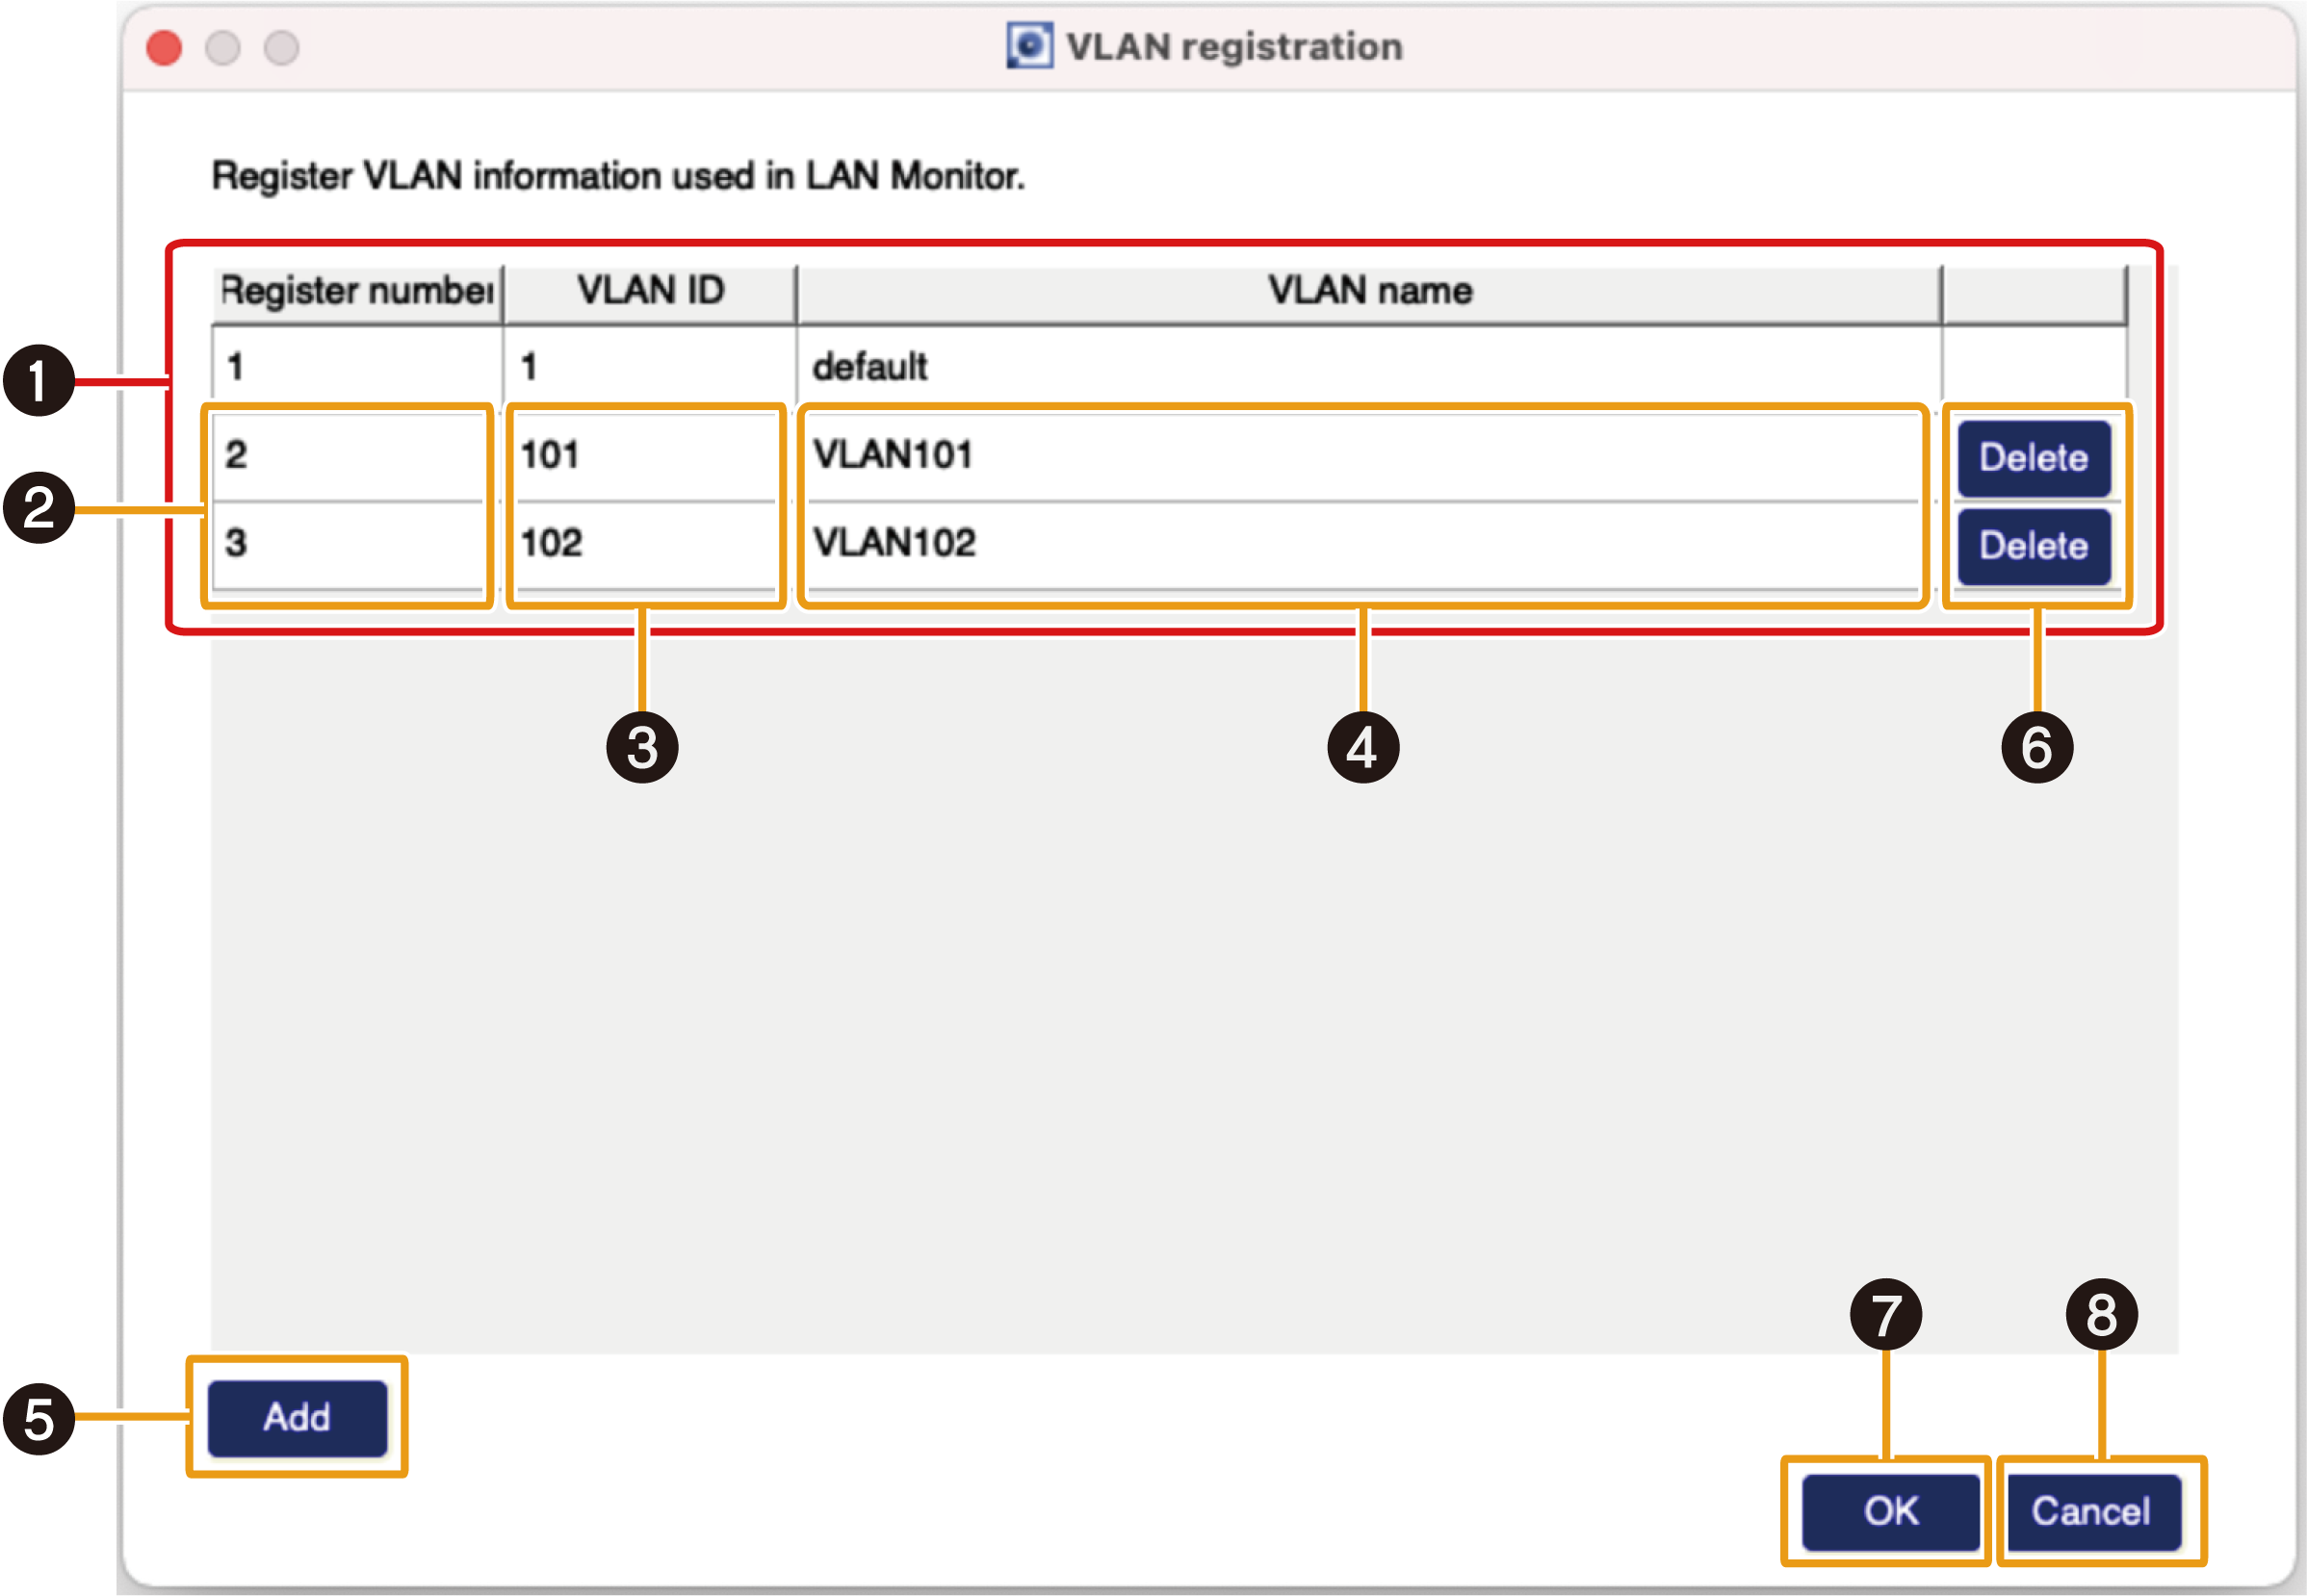
- ❶ List of registered VLAN
-
Displays the list of the VLAN registered with the Yamaha LAN Monitor.
“VLAN ID:1” is registered as the default VLAN and cannot be changed. - ❷ “Register number” input area
-
Input the VLAN registration number here.
This number is only used as the ID number on the Yamaha LAN Monitor, and has no relation to the switch’s VLAN settings.
From two to 255 single-byte characters can be used for this value.
You cannot set the same number twice. - ❸ “VLAN ID” input area
-
Input the VLAN ID here.
From two to 4094 single-byte characters can be used for this value.
You cannot set the same VLAN ID twice. - ❹ “VLAN name” input area
-
Input the VLAN name here.
The VLAN name you input here is only shown on the Yamaha LAN Monitor display, and is not applied to the agent.
Up to 32 single-byte characters can be used for this value. - ❺ [Add] button
-
Press this to add a VLAN.
Up to 32 VLANs can be registered. - ❻ [Delete] button
-
Press this button for the row corresponding to the VLAN registration you wish to delete.
- ❼ [OK] button
-
Press this to apply the setting contents.
- ❽ [Cancel] button
-
Press this to close the dialog box without applying the changes you made to the settings.
4. [Help] menu
4.1. [User Guide]
Access the Yamaha website and open the User Guide.
4.2. [Legal]
Displays license information for open source software used by Yamaha LAN Monitor.