Analyzer Plug-ins
Analyzer Plug-ins
SuperVision
SuperVision is a professional tool suite for monitoring and analyzing your audio. The plug-in comes with several different modules for level, spectral, phase, or waveform analysis. Up to nine module slots allow you to create custom layouts for better overview.
SuperVision features two different processing modes: Maximum Audio Performance and Sample-Accurate Display. You can choose which mode to use for each module independently.
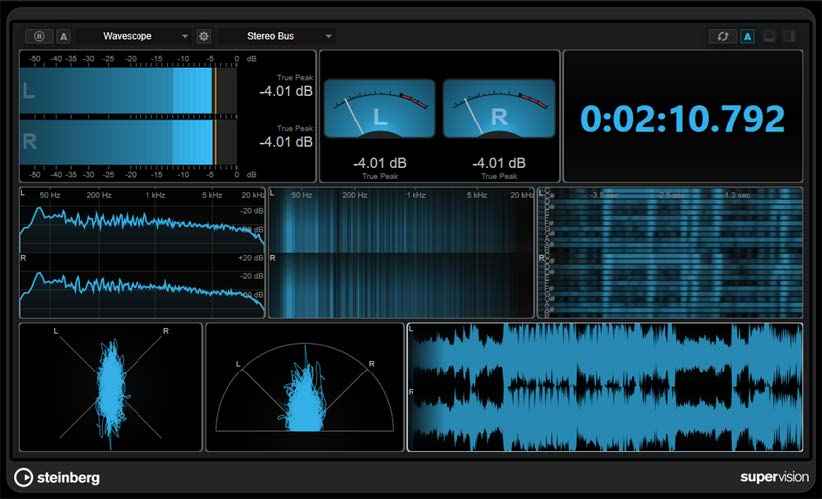
Toolbar
- Pause Measurement
-

Pauses/Continues the measurement for the selected module. Alt/Opt -click this button to pause/continue all modules at the same time.
NOTE
・You can also pause/continue the measurement for the selected module by rightclicking it.
・If a module is paused, you can still adjust the graphical display that holds the last measured values.
・For all modules that show a playback cursor, you can click on the paused display to set the project cursor to this position. This is not possible during recording.
- Hold Current Values on Stop
-

If this button is activated, the last measured values remain on the display when
playback is stopped.
- Module selector
-

Allows you to select a module for the selected slot.
- Open Module Settings
-

Opens the Module Settings window. It provides the settings for the selected module.
- Reset Module Values
-

Resets the measured values of the selected module. Alt/Opt -click to reset all modules at the same time.
NOTE
You can also reset the measured values of a module by Ctrl/Cmd -clicking it.
- Reset Module Values on Start
-

If this button is activated, all values are automatically reset when you start playback.
- Split Horizontally
-

Splits the selected module slot horizontally.
NOTE
This button is not available if a module is maximized.
- Split Vertically
-

Splits the selected module slot vertically.
NOTE
This button is not available if a module is maximized.
Module Slot Controls
Each module slot shows the following controls in the top right corner if you move the mouse over it:
- Remove module slot
-

Removes the module slot from the current plug-in layout. - Split horizontally
-

Splits the module slot horizontally. - Split vertically
-

Splits the module slot vertically.
You can maximize a module by double-clicking it. To downsize it, double-click it again or click the standard view button
![]() .
.
If your layout shows more than one module, you can change the focus by clicking a module or pressing Tab.
In some modules, for example, Level, Loudness, or Time, you can press Ctrl/Cmd - S to copy parameter values as text from the selected module to the clipboard for further use in other applications.
You can show the current frames per second (fps) for all modules by pressing Alt/Opt - F.
- Module Settings Window
-
In the Module Settings window, you can make individual settings for the selected module.
・To open the Module Settings window, click Open Module Settings on the plug-in toolbar.
The settings on the Module Settings window toolbar are available for all modules: - Reset Settings
-

Resets all parameter settings to the default values of the selected module. - Maximum Audio Performance/Sample-Accurate Display
-

Sets the processing mode for the selected module.
If this button is activated, Maximum Audio Performance is selected. In this mode, the plug-in has no impact on the audio performance, but the analysis might not be sample-accurate.
If this button is deactivated, Sample-Accurate Display is selected. In this mode, no audio sample gets lost for analysis, but the audio performance might be slightly reduced.
NOTE
Sample-Accurate Display is not available for all modules. - Enable Warnings
-

If this button is activated, a red border around the affected module indicates that the displayed analysis result might not be completely sample-accurate.
NOTE
This setting is only available in Maximum Audio Performance mode. - Force Horizontal Display
-

If this button is activated, the module is always displayed horizontally when you resize it.
NOTE
This setting is not available for all modules. - Force Vertical Display
-

If this button is activated, the module is always displayed vertically when you resize it.
NOTE
This setting is not available for all modules.
For the specific settings of a module, see the corresponding module description.
- Signal Modules
-
The modules in this category allow you to visualize the level of the audio signal.
The following modules and module-specific settings are available:
Level
This module shows the level of your audio. It provides a multi-channel level meter and a maximum level value display.
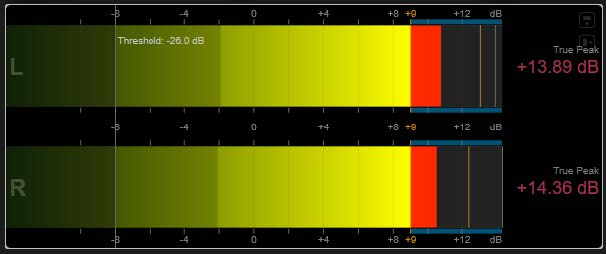
The following module-specific settings are available in the Module Settings window:
- Scale
-
Allows you to select a scale according to different broadcast standards (Internal, Digital, DIN, EBU, British, Nordic, K-20, K-14, K-12, +3 dB Digital, +6 dB Digital, or +12 dB Digital).
- Peak Hold
-
Specifies for how long the peak levels are held on the display.
- Peak Fallback
-
Sets the speed of release for the level meters and peak indicators.
NOTE
・Alternatively, you can move the mouse pointer over the selected module, hold Ctrl/Cmd , and use the mouse wheel to adjust this parameter.
・If this control is turned all the way to the left, the peak indicators are disabled. - Threshold
-
Sets a threshold level below which the display is masked.
NOTE
Alternatively, you can move the mouse pointer over the selected module and use the mouse wheel to adjust this parameter. - Offset
-
Sets the offset between measured and displayed value in dB.
This parameter is only available for the DIN, EBU, British, and Nordic scale. - Clipping
-
Sets the clipping value for the Internal scale.
- Minimum
-
Sets the minimum value for the Internal scale.
- Maximum
-
Sets the maximum value for the Internal scale.
- Color
-
Sets the color of the meters. You can choose between the Scale color and the Track color.
- RMS AES17
-
Shows the level in accordance with AES17 (RMS +3 dB).
- RMS Resolution
-
Sets the RMS resolution for the level display in milliseconds.
- Max. Value
-
Sets the measurement mode for the maximum level value display. The following modes are available:
・True Peak shows estimated real peak value for each channel.
・Peak Max. shows maximum sample value for each channel.
・RMS Max. shows the maximum RMS value for each channel.
・RMS Max. + True Peak shows the highest maximum RMS and the highest estimated real peak value of all channels.
・RMS Max. + Peak Max. shows the highest maximum RMS and the highest maximum sample value of all channels.
VU
This module shows the level of your audio on a classic VU meter. In addition to the VU meter needle and the LED peak indicator, it provides a peak level indicator needle and a numeric maximum level value display.

The following module-specific settings are available in the Module Settings window:
- Scale
-
Allows you to select a scale according to different broadcast standards (Internal, Digital, DIN, EBU, British, Nordic, K-20, K-14, K-12, +3 dB Digital, +6 dB Digital, +12 dB Digital, VU dB, and VU dBFS).
- Peak Hold
-
Specifies for how long the peak levels are held on the display.
- Peak Fallback
-
Sets the speed of release for the level meters and peak indicators.
NOTE
・Alternatively, you can move the mouse pointer over the selected module, hold Ctrl/Cmd , and use the mouse wheel to adjust this parameter.
・If this control is turned all the way to the left, the peak indicators are disabled. - Meter Mode
-
Sets the behavior of the needle.
・VU mode imitates the physical behavior of an analog VU meter that shows the current peak value.
・Peak mode shows the current peak value.
・RMS mode shows the current RMS value. - Offset
-
Sets the offset between measured and displayed value in dB.
This parameter is only available for the DIN, EBU, British, and Nordic scale. - Clipping
-
Sets the clipping value for the Internal scale.
- Minimum
-
Sets the minimum value for the Internal scale.
- Maximum
-
Sets the maximum value for the Internal scale.
- Color
-
Sets the color of the meters. You can choose between the Track color and a Dark or Light scheme.
- RMS AES17
-
Shows the level in accordance with AES17 (RMS + 3 dB).
- RMS Resolution
-
Sets the RMS resolution for the level display in milliseconds.
- Max. Value
-
Sets the measurement mode for the maximum level value display. The following
modes are available:
・True Peak shows the estimated real peak value for each channel.
・Peak Max. shows the maximum sample value for each channel.
・RMS Max. shows the maximum RMS value for each channel.
・RMS Max. + True Peak shows the highest maximum RMS and the highest estimated real peak value of all channels.
・RMS Max. + Peak Max. shows the highest maximum RMS and the highest maximum sample value of all channels.
Level Histogram
This module shows a histogram for the peak or RMS value of the input level.
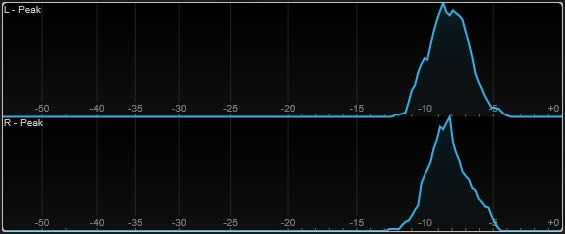
The following module-specific settings are available in the Module Settings window:
- Scale
-
Allows you to select a scale according to different broadcast standards (Internal, Digital, DIN, EBU, British, Nordic, K-20, K-14, K-12, +3 dB Digital, +6 dB Digital, or +12 dB Digital).
- Meter Mode
-
Sets the displayed level value.
・Peak mode shows a histogram of the peak value.
・RMS mode shows a histogram of the RMS value. - Peak Fallback
-
Sets the speed of release for the level meters and peak indicators.
NOTE
・If you change this parameter during playback, you must click Reset Module Values to update the display.
・Alternatively, you can move the mouse pointer over the selected module, hold Ctrl/Cmd , and use the mouse wheel to adjust this parameter.
・If this control is turned all the way to the left, the peak indicators are disabled. - Offset
-
Sets the offset between measured and displayed value in dB.
This parameter is only available for the DIN, EBU, British, and Nordic scale. - Clipping
-
Sets the clipping value for the Internal scale.
- Minimum
-
Sets the minimum value for the Internal scale.
- Maximum
-
Sets the maximum value for the Internal scale.
- RMS AES17
-
Shows the level in accordance with AES17 (RMS +3 dB).
- RMS Resolution
-
Sets the RMS resolution for the level display in milliseconds.
- Smooth
-
Smoothes the display of the level curve.
NOTE
Alternatively, you can move the mouse pointer over the selected module and use the mouse wheel to adjust this parameter.
Measurement Modules
The modules in this category allow you to measure the loudness and intelligibility of the audio signal.
The following modules and module-specific settings are available:
Loudness
This module shows the loudness of your audio in LU (Loudness Units) or LUFS (Loudness Units
referenced to Full Scale) according to EBU R 128.
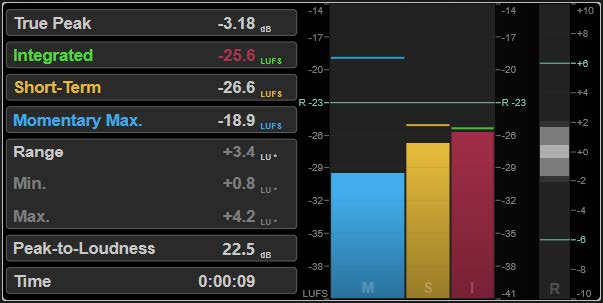
- TP (True Peak)
-
Shows the maximum true peak level in dB.
- I (Integrated)
-
Shows the integrated loudness value. This is the average loudness value that is measured over the whole audio range in LU or LUFS.
- S (Short-Term)
-
Shows the short-term loudness value that is measured every second on an audio block of 3 seconds in LU or LUFS. This gives information about the loudest audio passages.
- M Max.(Momentary Max.)
-
Shows the maximum value of all momentary loudness values that are measured every 100 ms in an audio range of 400 ms in LU or LUFS.
- R (Range)
-
Shows the loudness range (LRA) that is measured over the whole audio range in LU.
The loudness range reports the ratio between the loudest and the quietest non-silent sections. The audio is divided into small blocks. There is one audio block every second and each block lasts 3 seconds, so that the analyzed blocks overlap. The top 10 % of the quiet blocks and the top 5 % of the loud blocks are excluded from the final analysis. The calculated loudness range is the ratio between the loudest and quietest remaining audio blocks. This measurement helps you to decide how much compression or expansion must be applied to the audio.
An asterisk ( ) after a loudness range value indicates that less than 1 minute of audio was analyzed.
Min. shows the minimum loudness range value in LU. Max. shows the maximum loudness range value in LU.
*NOTE
EBU R 128 does not recommend loudness range measurement for audio shorter than 1 minute due to too few data points. - PLR (Peak-to-Loudness)
-
Shows the peak-to-loudness ratio (PLR), also referred to as the crest factor, which is the difference between the maximum true peak level value and the integrated loudness value.
- Time
-
Shows the overall duration of the loudness measurement.
The following module-specific settings are available in the Module Settings window:
- Unit
-
Allows you to switch the meter scale between LUFS (absolute values) and LU (relative values).
- Scale
-
Allows you to set the meter to either EBU +9 scale (linear), EBU +18 scale (linear), or +23 scale (logarithmic).
- Ref.Integrated
-
Sets a reference value for the integrated loudness. If higher values are detected, the loudness meter indicates clipping.
- Tol.Integrated
-
Sets a tolerance value for the integrated loudness.
- Ref.True Peak
-
Sets a reference value for the true peak level. If higher values are detected, the loudness meter indicates clipping.
- Tol.True Peak
-
Sets a tolerance value for the true peak level.
- Ref.Short-Term
-
Sets a reference value for the short-term loudness. If higher values are detected, the loudness meter indicates clipping.
- Tol.Short-Term
-
Sets a tolerance value for the short-term loudness.
- Ref.Momentary
-
Sets a reference value for the maximum momentary loudness. If higher values are detected, the loudness meter indicates clipping.
- Tol.Momentary
-
Sets a tolerance value for the maximum momentary loudness.
- Ref.Range
-
Sets a reference value for the loudness range. If higher values are detected, the loudness meter indicates clipping.
- Tol.Range
-
Sets a tolerance value for the loudness range.
Loudness Curve
This module shows loudness values as a time curve.

The following module-specific settings are available in the Module Settings window:
- Duration
-
Sets the duration of the audio stream that is displayed.
NOTE
Alternatively, you can move the mouse pointer over the selected module, hold Ctrl/Cmd , and use the mouse wheel to adjust this parameter. - Unit
-
Allows you to switch the meter scale between LUFS (absolute values) and LU (relative values).
- Scale
-
Allows you to set the meter to either EBU +9 scale (linear), EBU +18 scale (linear), or +23 scale (logarithmic).
- Smooth
-
Smoothes the display of the loudness curve.
- Momentary
-
Shows/Hides the maximum momentary loudness curve.
- Short-Term
-
Shows/Hides the short-term loudness curve.
- Integrated
-
Shows/Hides the integrated loudness curve.
- Range
-
Shows/Hides a gray area around the integrated loudness curve that represents the loudness range.
- Ref.Integrated
-
Sets a reference value for the integrated loudness.
Loudness Histogram
This module shows a histogram for the loudness or the loudness ratio value.
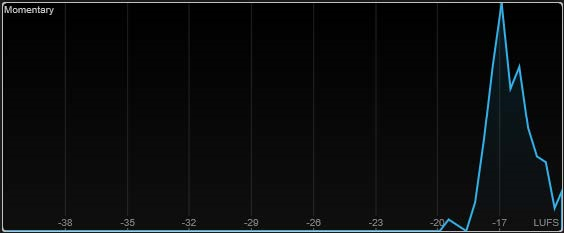
The following module-specific settings are available in the Module Settings window:
- Unit
-
Allows you to switch the meter scale between LUFS (absolute values) and LU (relative values).
- Scale
-
Allows you to set the meter to either EBU +9 scale (linear), EBU +18 scale (linear), or +23 scale (logarithmic).
- Meter Mode
-
Sets the displayed loudness or loudness ratio value.
・Momentary mode shows a histogram of the maximum value of all momentary loudness values that are measured every 100 ms in an audio range of 400 ms.
・Short-Term shows a histogram of the short-term loudness value that is measured every second on an audio block of 3 seconds.
・Integrated shows a histogram of the integrated loudness value.
・PLR shows a histogram of the peak-to-loudness ratio, also referred to as the crest factor, which is the difference between the maximum true peak level value and integrated loudness value.
・PSR shows a histogram of the peak-to-short-term-loudness ratio according to AES Convention e-Brief 373. - Smooth
-
Smoothes the display of the loudness curve.
NOTE
Alternatively, you can move the mouse pointer over the selected module and use the mouse wheel to adjust this parameter.
Loudness Ratio
This module shows the peak-to-loudness ratio (PLR) and the peak-to-short-term-loudness ratio (PSR) values according to AES specifications.
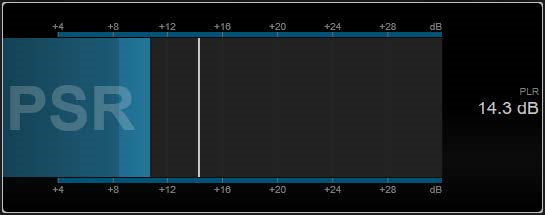
- PSR
-
Shows the peak-to-short-term-loudness ratio according to AES Convention e-Brief 373.
The darker area of the meter indicates the minimum PSR value. - PLR
-
Shows the peak-to-loudness ratio, also referred to as the crest factor, which is the difference between the maximum true peak level value and integrated loudness value.
The current PLR value is displayed numerically and also indicated by a thin bar on the meter.
The following module-specific setting is available in the Module Settings window:
- Ref.Level
-
Sets the reference level below which the PSR display turns red.
- Time Smooth
-
Smoothes the temporal display of the PSR value.
NOTE
Alternatively, you can move the mouse pointer over the selected module, hold Alt , and use the mouse wheel to adjust this parameter.
Spectral Domain Modules
The modules in this category allow you to visualize spectral information about the audio signal.
The following modules and module-specific settings are available:
Spectrum Curve
This module uses FFT (Fast Fourier Transform) techniques to show a frequency graph, providing a precise and detailed real-time frequency analysis.
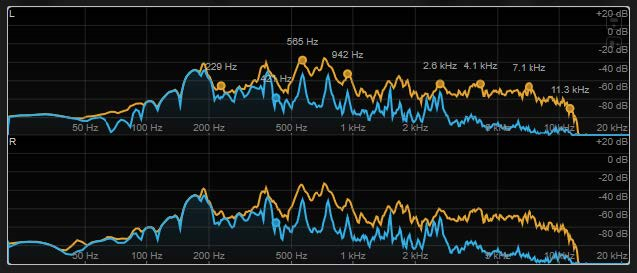
The display shows the frequency spectrum as a linear graph. If you move the mouse pointer over the display, a peak curve is shown in orange. Move the mouse pointer over the curves to show the local maximum values in Hz. Press Ctrl/Cmd to show the maximum values in dB or press Shift to show their pitch.
The following module-specific settings are available in the Module Settings window:
- Time Smooth
-
Smoothes the temporal display.
NOTE
Alternatively, you can move the mouse pointer over the selected module, hold Alt , and use the mouse wheel to adjust this parameter. - Peak Fallback
-
Sets the speed of release for the spectrum curve and the peak curve.
NOTE
・Alternatively, you can move the mouse pointer over the selected module, hold Ctrl/Cmd , and use the mouse wheel to adjust this parameter.
・If this control is turned all the way to the left, the peak curve is disabled. - Freq.Smooth
-
Smoothes the frequency display of the spectrum curve.
NOTE
Alternatively, you can move the mouse pointer over the selected module and use the mouse wheel to adjust this parameter. - FFT Window
-
Sets the block size of the window that is used for the analysis. If Multi is selected, 3 different block sizes are used at the same time.
- Minimum
-
Sets the minimum value of the scale.
- Maximum
-
Sets the maximum value of the scale.
- Slope
-
Adds a slope to the frequency spectrum.
- Masking
-
If this button is activated, frequency ranges that are affected by a side-chain signal are displayed.
NOTE
VST Rack does not support side-chaining. Consequently, this plug-in does not accept side-chain input.
Spectrum Bar
This module shows a graphical representation of the frequency spectrum, analyzed into separate frequency bands, represented as vertical bars.
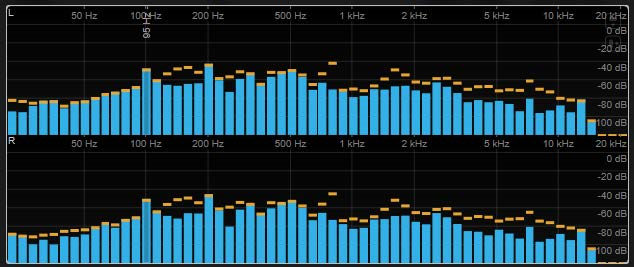
Move the mouse pointer over a bar to show the frequency range in Hz. Press Ctrl/Cmd to show the current value in dB or press Shift to show its pitch range.
The following module-specific settings are available in the Module Settings window:
- Time Smooth
-
Smoothes the temporal display.
NOTE
Alternatively, you can move the mouse pointer over the selected module, hold Alt , and use the mouse wheel to adjust this parameter. - Peak Fallback
-
Sets the speed of release for the level meters and peak indicators.
NOTE
・Alternatively, you can move the mouse pointer over the selected module, hold Ctrl/Cmd , and use the mouse wheel to adjust this parameter.
・If this control is turned all the way to the left, the peak indicators are disabled. - Threshold
-
Sets a threshold level below which the display is masked.
NOTE
Alternatively, you can move the mouse pointer over the selected module and use the mouse wheel to adjust this parameter. - Bands/Oct.
-
Sets the number of bands per octave.
- Minimum
-
Sets the minimum value of the scale.
- Maximum
-
Sets the maximum value of the scale.
- Slope
-
Adds a slope to the frequency spectrum.
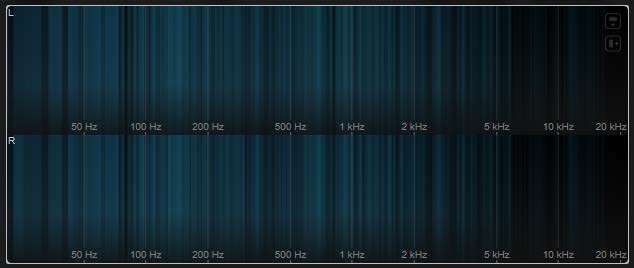
Spectrum Intensity
This module represents the frequency magnitude of the audio. The more intensely a bar is colored, the higher the magnitude at this frequency.
The following module-specific settings are available in the
Module Settings
window:
- Time Smooth
-
Smoothes the temporal display.
NOTE
Alternatively, you can move the mouse pointer over the selected module, hold Alt , and use the mouse wheel to adjust this parameter. - FFT Window
-
Sets the block size of the window that is used for the analysis. If Multi is selected, 3 different block sizes are used at the same time.
- Color
-
Allows you to choose a color scheme.
- Minimum
-
Sets the minimum value of the scale.
- Maximum
-
Sets the maximum value of the scale.
- Slope
-
Adds a slope to the frequency spectrum.
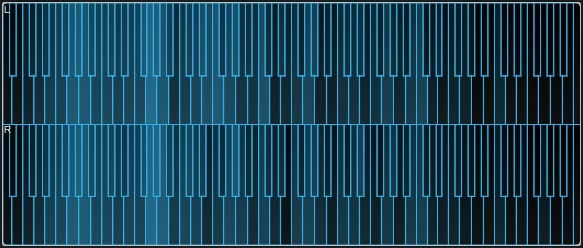
Spectrum Keyboard
This module represents the frequency magnitude of the audio mapped to the keys of a piano keyboard. The more intensely a key is colored, the higher the magnitude at its frequency.
The following module-specific settings are available in the
Module Settings
window:
- Time Smooth
-
Smoothes the temporal display.
NOTE
Alternatively, you can move the mouse pointer over the selected module, hold Alt , and use the mouse wheel to adjust this parameter. - Color
-
Allows you to choose a color scheme.
- Minimum
-
Sets the minimum value of the scale.
- Maximum
-
Sets the maximum value of the scale.
- Slope
-
Adds a slope to the frequency spectrum.
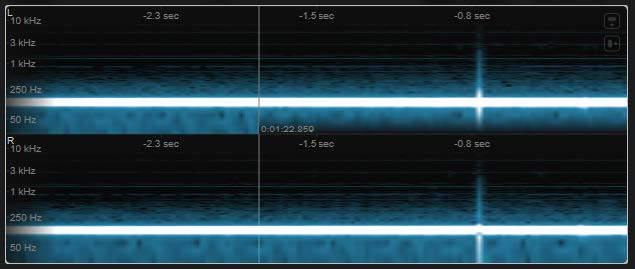
Spectrogram
This module shows the last seconds of the audio stream. This allows you to detect disturbances in the spectrogram and to monitor the noise level and frequencies, for example.
NOTE
This module runs in Maximum Audio Performance mode.
The following module-specific settings are available in the Module Settings window:
- FFT Window
-
Sets the block size of the window that is used for the analysis. This allows you to adjust the trade-off between temporal resolution and frequency resolution. If you specify a higher value, more frequencies are analyzed but they are located less accurately in the time domain.
- Duration
-
Sets the duration of the audio stream that is displayed.
NOTE
Alternatively, you can move the mouse pointer over the selected module, hold Ctrl/Cmd , and use the mouse wheel to adjust this parameter. - Color
-
Allows you to choose a color scheme.
- Minimum
-
Sets the minimum value of the scale.
Sets the maximum value of the scale.
NOTE
Alternatively, you can move the mouse pointer over the selected module and use the mouse wheel to adjust the Minimum and Maximum parameters simultaneously.
Phase Modules
The modules in this category allow you to visualize the phase or directional relationship between the channels of the audio signal.
The following modules and module-specific settings are available:
Phasescope
This module uses a vectorscope display to show the phase and amplitude relationship between the left and right stereo channels. This provides you with directional information about a stereo audio signal.
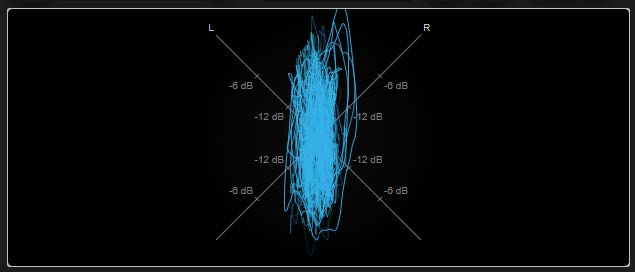
Hold Shift and move the mouse pointer over the display to measure the angle.
NOTE
In addition to the signal of the track, the display can show the signal of a side-chain input. For this to work, you must select a Main & Side-Chain view from the channel selector. The side-chain signal is then shown in white.
The following module-specific settings are available in the Module Settings window:
- Zoom
-
Allows you to zoom on the graphical display.
NOTE
Alternatively, you can move the mouse pointer over the selected module and use the mouse wheel to adjust this parameter. - Auto Zoom
-
If this button is activated, the zoom factor is adapted automatically.
- Mode
-
Sets the display mode. The following modes are available: Lines, Dots, Envelope.
- Peak Fallback
-
Sets the speed of release for the peak envelope in Envelope mode.
NOTE
If this control is turned all the way to the left, the peak envelope is disabled. - Scale
-
Activates/Deactivates the axis labeling.
NOTE
This option is only available if Auto Zoom is deactivated.
Panorama
This module uses a polar coordinate display to show the phase and amplitude relationship between the left and right stereo channels. This provides you with directional information about a stereo audio signal.
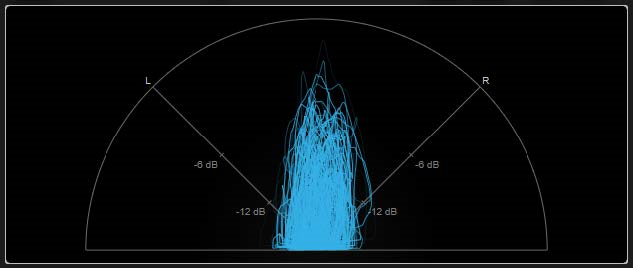
NOTE
In addition to the signal of the track, the display can show the signal of a side-chain input. For this to work, you must select a Main & Side-Chain view from the channel selector. The side-chain signal is then shown in white.
The following module-specific settings are available in the Module Settings window:
- Zoom
-
Allows you to zoom on the graphical display.
NOTE
Alternatively, you can move the mouse pointer over the selected module and use the mouse wheel to adjust this parameter. - Auto Zoom
-
If this button is activated, the zoom factor is adapted automatically.
- Mode
-
Sets the display mode. The following modes are available: Lines, Dots, Envelope.
- Peak Fallback
-
Sets the speed of release for the peak envelope in Envelope mode.
NOTE
If this control is turned all the way to the left, the peak envelope is disabled. - Scale
-
Activates/Deactivates the axis labeling.
NOTE
This option is only available if Auto Zoom is deactivated.
Multipanorama
This module provides you with frequency-dependent directional information about a stereo audio signal.

The following module-specific settings are available in the Module Settings window:
- Time Smooth
-
Sets the time for which an energy impulse is displayed.
- Bands/Oct.
-
Sets the number of bands per octave.
- Color
-
Allows you to choose a color scheme.
Correlation
This module visualizes the phase-correlation between the left and right channel. This allows you, for example, to check the mono compatibility of a stereo recording.
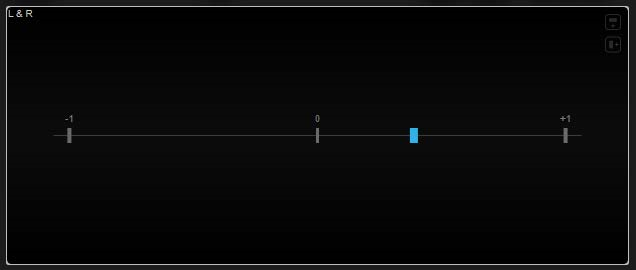
The following module-specific setting is available in the Module Settings window:
- Time Smooth
-
Smoothes the temporal display of the correlation.
NOTE
Alternatively, you can move the mouse pointer over the selected module, hold Alt , and use the mouse wheel to adjust this parameter
Multicorrelation
This module visualizes the phase-correlation between the left and right channel for different frequency bands.
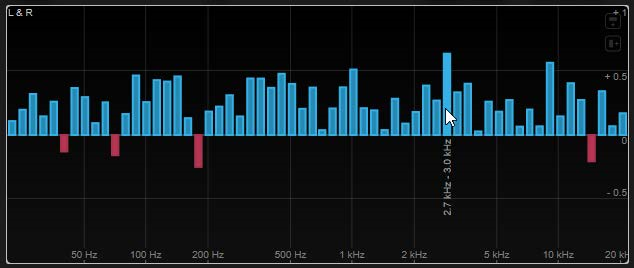
Move the mouse pointer over a bar to display its frequency range in Hz. Hold Ctrl/Cmd to display its current value. Hold Shift to display its pitch range.
The following module-specific settings are available in the Module Settings window:
- Time Smooth
-
Smoothes the temporal display of the correlation.
NOTE
Alternatively, you can move the mouse pointer over the selected module, hold Alt , and use the mouse wheel to adjust this parameter. - Bands/Oct.
-
Sets the number of bands per octave.
Balance
This module visualizes the balance between the left and right channel.
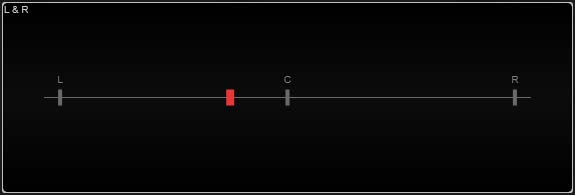
The following module-specific setting is available in the Module Settings window:
- Time Smooth
-
Smoothes the temporal display of the correlation.
NOTE
Alternatively, you can move the mouse pointer over the selected module, hold Alt , and use the mouse wheel to adjust this parameter.
Waveform Modules
The modules in this category allow you to visualize the waveform of the audio signal.
The following modules and module-specific settings are available:
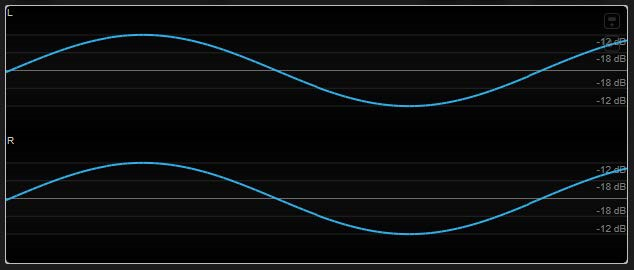
Oscilloscope
This module shows a highly magnified view of the waveform.
NOTE
In addition to the signal of the track, the display can show the signal of a side-chain input. For this to work, you must select a Main & Side-Chain view from the channel selector. The side-chain signal is then shown in white.
The following module-specific settings are available in the Module Settings window:
- Zoom
-
Allows you to zoom on the graphical display by adjusting the amplitude.
NOTE
Alternatively, you can move the mouse pointer over the selected module, hold Alt/Opt , and use the mouse wheel to adjust this parameter. - Frequency
-
Allows you to zoom on the graphical display by adjusting the frequency.
NOTE
Alternatively, you can move the mouse pointer over the selected module, hold Ctrl/Cmd , and use the mouse wheel to adjust this parameter. - Trigger
-
Sets the channel that is used to synchronize the audio signal.
NOTE
Alternatively, you can click the waveform of the corresponding channel. - Scale
-
Activates/Deactivates the axis labeling.
NOTE
This option is only available if Auto Zoom is deactivated. - Phase
-
Allows you to shift the zero-crossing position.
Wavescope
This module displays the real-time waveform of the audio signal.
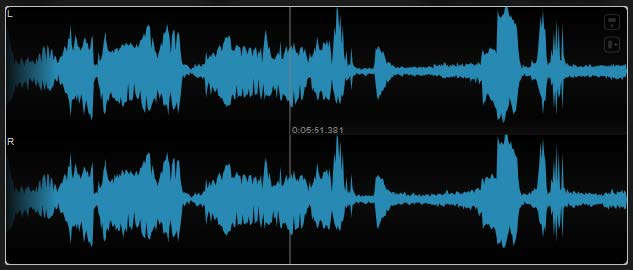
Move the mouse pointer over a waveform position to display the corresponding project time.
NOTE
In addition to the signal of the track, the display can show the signal of a side-chain input. For this to work, you must select a Main & Side-Chain view from the channel selector. The side-chain signal is then shown in white.
The following module-specific settings are available in the Module Settings window:
- Zoom
-
Allows you to zoom on the graphical display.
NOTE
Alternatively, you can move the mouse pointer over the selected module and use the mouse wheel to adjust this parameter. - Duration
-
Sets the duration of the audio stream that is displayed.
NOTE
Alternatively, you can move the mouse pointer over the selected module, hold Ctrl/Cmd , and use the mouse wheel to adjust this parameter. - Tempo Sync
-
If this button is activated, you can set Duration in beats.
NOTE
The equivalent duration is limited to a minimum of 0.5 s and a maximum of 30 s. - Scale
-
Activates/Deactivates the axis labeling.
NOTE
This option is only available if Auto Zoom is deactivated. - Station.Cursor
-
If this button is activated, the waveform moves continuously under the stationary cursor. If this button is deactivated, the waveform is refreshed when the cursor moves over it.
Wavecircle
This module displays the real-time waveform of the audio signal as a circle.
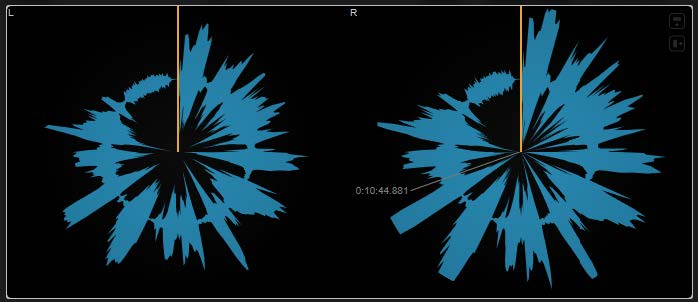
Move the mouse pointer over a waveform position to display the corresponding project time.
NOTE
In addition to the signal of the track, the display can show the signal of a side-chain input. For this to work, you must select a Main & Side-Chain view from the channel selector. The side-chain signal is then shown in white.
The following module-specific settings are available in the Module Settings window:
- Zoom
-
Allows you to zoom on the graphical display.
NOTE
Alternatively, you can move the mouse pointer over the selected module and use the mouse wheel to adjust this parameter. - Duration
-
Sets the duration of the audio stream that is displayed.
NOTE
Alternatively, you can move the mouse pointer over the selected module, hold Ctrl/Cmd , and use the mouse wheel to adjust this parameter. - Tempo Sync
-
If this button is activated, you can set Duration in beats.
NOTE
The equivalent duration is limited to a minimum of 0.5 s and a maximum of 30 s. - Reverse
-
Changes the rotation direction.
- Station.Cursor
-
If this button is activated, the waveform moves continuously under the stationary cursor. If this button is deactivated, the waveform is refreshed when the cursor moves over it.
Other Modules
This category provides a bit meter.
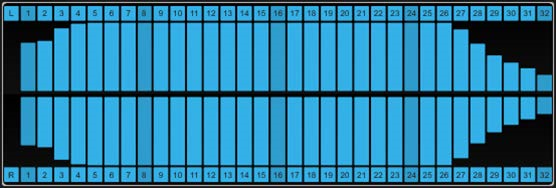
Bits
This module shows which bits are currently used by the audio signal. The shorter a bar, the less a bit is being used. A colored square above or below a bar indicates if a bit has been used at all since the start of the measurement.
The following module-specific setting is available in the Module Settings window:
- Time Smooth
-
Smoothes the temporal display, which facilitates monitoring which of the bits were used last. With Time Smooth deactivated, the bars are either fully displayed or fully hidden, which simply indicates if a bit is used or not.
NOTE
Alternatively, you can move the mouse pointer over the selected module and use the mouse wheel to adjust this parameter.
