Modulation Plug-ins
Modulation Plug-ins
Cloner
Cloner adds up to 4 detuned and delayed voices to the signal for rich modulation and chorus effects.
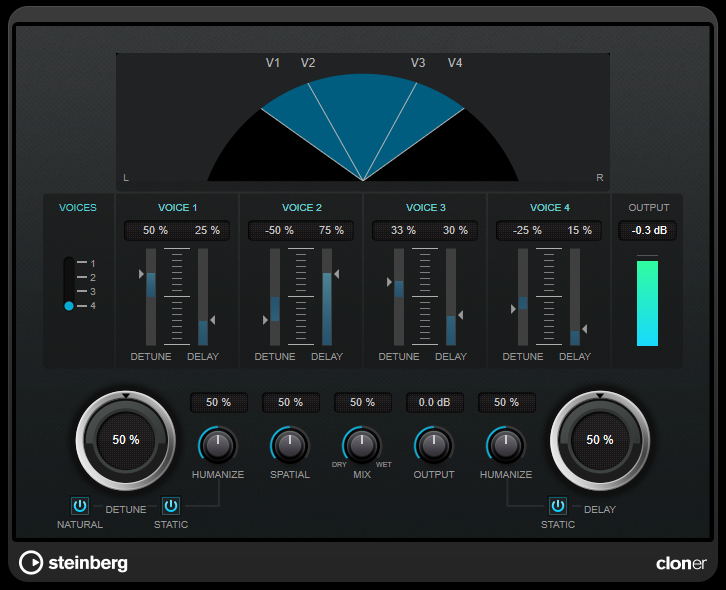
- Graphical Display
- VOICES
-
Sets the number of voices. Each voice has a [Detune] and a [Delay] slider.
- [DETUNE] Slider (1 to 4)
-
Sets the relative amount of detune for each voice. Positive and negative values can be set. If set to zero, no detune takes place for that voice.
- [DELAY] Slider (1 to 4)
-
Sets the relative delay amount for each voice. If set to zero, no delay takes place for that voice.
- DETUNE
-
Sets the overall amount of detune for all voices. If set to zero, no detune takes place regardless of the [Detune] slider settings.
- NATURAL
-
Changes the pitch algorithm that is used for detune.
- HUMANIZE (Detune)
-
Sets the amount of detune variation if [Static Detune] is deactivated. With [Humanize], the detune is continuously modulated for a more natural effect.
- STATIC (Detune)
-
Activate this button to use a static amount of detune.
- MIX
-
Sets the level balance between the dry signal and the wet signal. If the effect is used as a send effect, set this parameter to the maximum value, as you can control the dry/effect balance with the send level.
- SPATIAL
-
Spreads the voices across the stereo spectrum. Turn the control clockwise for a deeper stereo effect.
- OUTPUT (-12 to 12 dB)
-
Sets the output gain.
- DELAY
-
Governs the overall depth of the delay for all voices. If set to zero, no delay takes place regardless of the [Delay] slider settings.
- HUMANIZE (Delay)
-
Controls the amount of delay variation if [Static Delay] is deactivated. With [Humanize], the delay is continuously modulated for a more natural effect.
- STATIC (Delay)
-
Activate this button to use a static delay amount.
FX Modulator
This multi-effect modulation plug-in combines several modulation effects that allow for extensive sound shaping, from classic ducking effects to exciting rhythmic patterns. You can create custom-shaped LFOs and modulate up to 6 integrated effect modules at once. The LFO can be triggered via MIDI or separate side-chain inputs, where the envelope of the side-chain signal is added to the LFO.
NOTE
VST Rack does not support side-chaining. Consequently, this plug-in does not accept side-chain input.
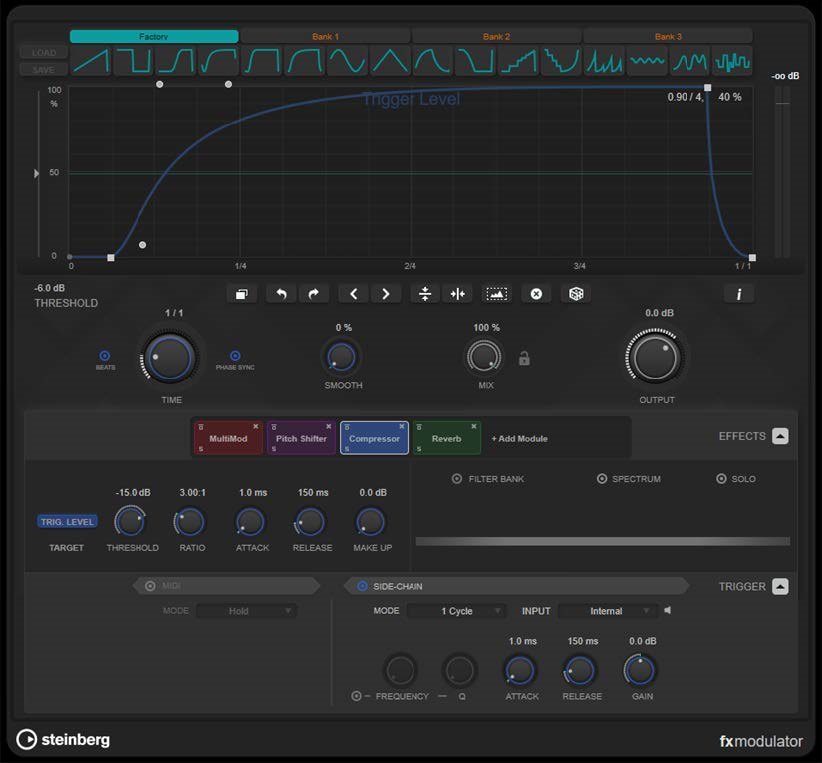
Curve Section
This section contains a curve editor that allows you to define the modulation curve. You can apply predefined curve shapes, or create and store custom curve shapes.
- Factory
-
The factory bank allows you to apply predefined curve shapes to the whole curve or a selection range. You cannot change the assignment of the factory slots. However, you can adjust factory curves in the editor after applying it.
- Bank 1-3
-
User banks allow you to apply custom curve shapes to the whole curve or a selection range.
-
To add the curve shape that is displayed in the editor to a user bank, click an empty slot.
-
To remove the curve shape of a slot, click x and click again to confirm. To cancel, click elsewhere.
Load opens a browser window that shows the available bank presets. -
To load a bank preset to the selected bank, double-click it.
-
To filter the list of bank presets, click Set Up Window Layout at the top right of the browser window, activate Filters, and select your filter settings.
Save allows you to save the curve shapes in the selected bank as a bank preset.
-
- Lock Banks 1-3 When Loading Presets
-
Locks/Unlocks Bank 1, Bank 2, and Bank 3 while browsing through presets.
- Curve editor
-
Shows the shape of the modulation curve and allows you to manually adjust it. The editor allows the following editing techniques:
-
To add a node, double-click the curve.
-
To move a node, drag it. If you move a node close to a horizontal or vertical grid line, it automatically snaps to the grid. To suspend this behavior, hold Shift while dragging.
-
To delete a node or shape handle, double-click it.
-
To move, delete, or flip multiple nodes or shape handles, drag a selection rectangle around them and edit them.
-
To modify the shape of the curve, drag the curve between two nodes.
-
To create an S-shaped curve, hold Shift and drag the shape handle left of a node.
-
To compress or expand the curve, hold Alt and drag a node of a selection up or down.
-
- Threshold
-
Sets the threshold value for 1 Cycle trigger mode. The threshold value is shown as a horizontal line within the display. This control is only available if Side-Chain is activated and 1 Cycle mode is selected in the Trigger section.
- Duplicate Curve
-
Duplicates the shape of the curve.
- Undo/Redo
-
Undoes/Redoes actions in the curve editor.
NOTE
Each modulation curve has its own undo/redo history. - Shift Curve to the Left
-
Moves the curve to the left.
- Shift Curve to the Right
-
Moves the curve to the right.
- Flip Vertically
-
Flips the shape of the whole curve or a selection range vertically.
- Flip Horizontally
-
Flips the shape of the whole curve or a selection range horizontally.
- Select All Curve Points
-
Selects all curve nodes and handles.
- Reset Curve
-
Resets the curve to default.
- Create Random Curve
-
Applies a random shape to the whole curve or a selection range.
- Show Curve Editing Instructions
-
Shows/Hides a list of techniques for editing the modulation curve in the editor.
Main Section
This section contains the general modulation parameters and settings.
- Time
-
Sets the time base for the modulation curve individually for each modulated effect parameter. The default value of 1/1 means that 1 cycle of modulation has a length of 1 bar. The tempo of the song is automatically taken into account.
If Beats is activated, Time is displayed in beats instead of milliseconds.
If Phase Sync is activated, the modulation curve is synchronized to the song position in the project, making the modulation highly reproducible. If Phase Sync is deactivated, Time allows a free modulation, making effects like chorus and flanger sound unpredictable. - Smooth
-
Smoothes sharp edges and steep slopes of the modulation curve individually for each modulated effect parameter. This can avoid artifacts that are caused by abrupt value changes.
- Mix
-
Sets the level balance between the dry and the wet signal.
- Lock Mix Value When Loading Presets
-
Locks/Unlocks the balance between dry and wet signal when loading presets.
- Output
-
Sets the output level.
Effects Section
This section allows you to add, edit, and remove effects. You can create effect chains by adding up to 6 different effect modules from 14 effects available overall. You can modify the order of the effects in the chain by dragging the modules.
For each effect, you can see which is its target parameter that is affected by the modulation curve. Some effects have multiple target parameters. A filter bank allows you to restrict the modulation to a defined frequency range.
- Effects
-
Shows/Hides the effect parameters and filter bank settings.
- Target
-
Shows the parameter that is modulated by the modulation curve. For effects with
multiple target parameters, click a parameter to show and edit its specific modulation curve. - Filter Bank
-
Activates/Deactivates the filter bank for the selected module. If activated, the effect is restricted to the range defined on the frequency display. Frequencies below and above this range are bypassed.
- Spectrum
-
Activates/Deactivates the spectrum display for the effect signal on the frequency
display.
NOTE
Activating this option increases the CPU load. - Solo
-
Allows you to listen to the set frequency range exclusively. Frequencies below and above this range are muted.
- Frequency display
-
Shows the spectrum of the effect signal and allows you to define the frequency range of the filter bank. To adjust the range, drag the frequency handles or drag the area between the handles.
Trigger Section
This section allows you to determine how the modulation curves are applied when triggered via MIDI or side-chaining.
The following settings are available for MIDI triggering:
- Trigger
-
Shows/Hides the settings for MIDI and side-chain triggering.
- MIDI
-
Activates/Deactivates triggering via MIDI.
- Mode
-
Sets the mode for MIDI triggering.
-
If Hold is selected, the modulation curve is applied as long as a MIDI note is
played. -
If 1 Cycle is selected and a MIDI note is played, the modulation curve is only
applied once, regardless of the note length. You must play a note again to apply
the curve again.
NOTE
This mode is useful to create MIDI-triggered ducking effects with the Volume or
Compressor effect modules.
-
The following settings are available for side-chain triggering:
- Side-Chain
-
Activates/Deactivates triggering via side-chain input.
- Mode
-
Sets the mode for side-chain triggering.
-
If Continuous is selected, the envelope of the side-chain signal is added to the modulation curve.
-
If 1 Cycle is selected and the envelope of the side-chain signal exceeds the
threshold, the modulation curve is applied once.
-
NOTE
・This mode is useful to create envelope-triggered ducking effects with the Volume or Compressor effect modules.
・If this mode is selected, the envelope of the side-chain signal and the threshold are shown in the curve editor, and you can set the Threshold there.
- Input
-
Sets the side-chain input. If Internal is selected, the input signal of the plug-in is used as the side-chain source. If Side-Chain 1 to Side-Chain 6 is selected, the signal of tracks that are routed to the corresponding plug-in side-chain input is used.
- Side-Chain Filter Listen
-
Allows you to solo the side-chain filter. This way, you can quickly check the part of the signal that is filtered out using the current settings.
- Frequency
-
Sets the frequency of the side-chain filter.
You can set the frequency either in Hz or as a note value. If you enter a note value, the frequency is automatically changed to Hz. For example, a note value of A3 sets the frequency to 440 Hz. When you enter a note value, you can also enter a cent offset. For example, enter A5 -23 or C4 +49.- NOTE
-
-
Ensure that you enter a space between the note and the cent offset. Only then are cent offsets taken into account.
-
- Q
-
Sets the resonance or width of the side-chain filter.
- Attack
-
Sets the attack time for the side-chain envelope signal.
- Release
-
Sets the release time for the side-chain envelope signal.
- Gain
-
Attenuates or boosts the side-chain envelope signal.
Effect Modules
Modules allow you to create an effect chain. Each effect can be used only once in the module chain. You can drag modules in the module chain to rearrange them and change the processing order.
- General Effect Settings
-
The following settings are available for each module:
Bypass
Bypasses the module. This allows you to compare the sound of the unprocessed signal to that of the processed signal.
Solo
Solos the module. Only one module can be soloed at a time.
Remove
Removes the module from the module chain.
The following effect modules are available:
Chorus
This is a single-stage chorus effect that doubles the input signal with a slightly detuned version.
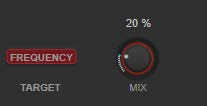
- Target
-
Shows the parameter that is modulated. Frequency changes the modulation.
Mix
Sets the level balance between the dry and the wet signal.
Flanger
This is a classic flanger effect.
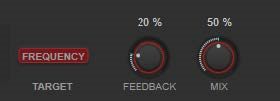
- Target
-
Shows the parameter that is modulated. Frequency changes the modulation.
- Feedback
-
Determines the character of the flanger effect. Higher settings produce a more
metallic-sounding sweep. - Mix
-
Sets the level balance between the dry and the wet signal.
Filter
This is a filter modulation effect. The frequency and resonance of the filter can be modulated by an LFO.

- Target
-
Selects a parameter for editing its modulation curve. Frequency changes the filter frequency. Q changes the resonance of the filter.
- Filter Type
-
Sets the filter type. Low-pass, high-pass, band-pass, and notch filters are available.
- Mix
-
Sets the level balance between the dry and the wet signal.
MultiMod
This is a three-stage chorus-flanger combined effect.

- Target
-
Selects a stage for editing its modulation curve.
- Feedback
-
Determines the character of the flanger effect. Higher settings produce a more
metallic-sounding sweep. - Delay
-
Affects the frequency range of the modulation sweep by adjusting the initial delay time.
- Mix
-
Sets the level balance between the dry and the wet signal.
Width
This effect expands or reduces the stereo width.
NOTE
This effect module only works if the plug-in is applied on a stereo track.

- Target
-
Shows the parameter that is modulated. Mix changes the level balance between the
dry signal and the wet signal. - Delay
-
Increases the amount of differences between the left and right channels to further increase the stereo effect.
- Color
-
Generates additional differences between the channels to increase the stereo
enhancement. - Mono In
-
Defines the input signal as dual-mono audio.
NOTE
For the stereo effect to work, you must activate this option if your input signal is a dual-mono audio file. - Listen Mono Out
-
Sets the output to mono. This allows you to check for unwanted coloring of the sound which can occur when creating an artificial stereo image.
Pan
This is a panning effect.
NOTE
This effect module only works if the plug-in is applied on a stereo track.
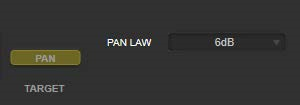
- Target
-
Shows the parameter that is modulated. Pan changes the level balance between the
left and right channel. - Pan Law
-
Sets the stereo pan law. 6 dB, 4.5 dB, 3 dB, and 0 dB determine the attenuation of the signal at the center position. Equal Power means that the power of the signal remains the same regardless of the pan setting.
Bit Crusher
This effect uses bit reduction to decimate and truncate the input audio signal to get a noisy, distorted sound.

- Target
-
Selects a parameter for editing its modulation curve. Mix changes the level balance between the dry signal and the wet signal. Sample Div. changes the amount by which the audio samples are decimated. At the highest setting, nearly all of the information describing the original audio signal is eliminated, turning the signal into unrecognizable noise.
- Bits (0 to 24 bits)
-
Defines the bit resolution. A setting of 24 gives the highest audio quality, while a setting of 1 creates mostly noise.
- Mode
-
Allows you to select one of the four operating modes. In each mode, the effect sounds differently. Modes 1 and 3 are nastier and noisier, while modes 2 and 4 are more subtle.
Overdrive
This effect creates a tube-like overdrive effect.
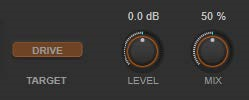
- Target
-
Shows the parameter that is modulated. Drive adds harmonics to the output signal.
- Level
-
Adjusts the output level.
- Mix
-
Sets the level balance between the dry and the wet signal.
Pitch Shifter
This is a pitch-shifting effect.

- Target
-
Selects a parameter for editing its modulation curve. Detune changes the pitch of the input signal in semitones. Formant changes the natural timbre of the input signal.
- Formant Preservation
-
Keeps the formants when changing the pitch with the Detune control.
- Mix
-
Sets the level balance between the dry and the wet signal.
Frequency Shifter
This effect shifts each frequency of the input signal by a fixed amount, which alters the harmonic relations. Adding feedback produces a sound similar to a phaser.
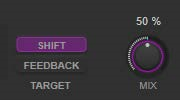
- Target
-
Selects a parameter for editing its modulation curve. Shift changes the amount of
frequency shift. Feedback changes the amount of the signal that is sent from the
output of the effect back to its input. - Mix
-
Sets the level balance between the dry and the wet signal.
Compressor

- Target
-
Shows the parameter that is modulated. Trig. Level changes the envelope. Compared
to a standard compressor effect which generates the envelope from the input signal, this module uses the modulation curve as the envelope. When the envelope signal exceeds the threshold, compression is applied. - Threshold
-
Determines the level where the compressor kicks in.
- Ratio
-
Sets the amount of gain reduction applied to signals above the set threshold. A ratio of 3:1 means that for every 3 dB the input level increases, the output level increases by 1 dB.
Attack (0.1 to 100 ms)
Determines how fast the compressor responds to signals above the set threshold.
If the attack time is long, more of the early part of the signal passes through
unprocessed. - Release (10 to 1000 ms)
-
Sets the time after which the gain returns to its original level when the signal drops below the threshold.
- Make-Up (0 to 24 dB or Auto mode)
-
Compensates for output gain loss caused by compression.
Volume
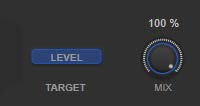
- Target
-
Shows the parameter that is modulated. Level changes the output level.
- Mix
-
Sets the level balance between the dry and the wet signal.
Time Shifter
- Target
-
Shows the parameter that is modulated. Delay changes the delay time.
- Mix
-
Sets the level balance between the dry and the wet signal.
Reverb
This is a versatile reverb for realistic room ambience and reverb effects.

- Target
-
Shows the parameter that is modulated. Mix changes the level balance between the
dry signal and the wet signal. - Pre-Delay
-
Determines how much time passes before the reverb is applied. This allows you to
simulate larger rooms by increasing the time it takes for the first reflections to reach the listener. - Time
-
Allows you to set the reverb time in seconds.
- Size
-
Alters the delay times of the early reflections to simulate larger or smaller spaces.
Rotary
This modulation effect simulates the effect of a rotating speaker.
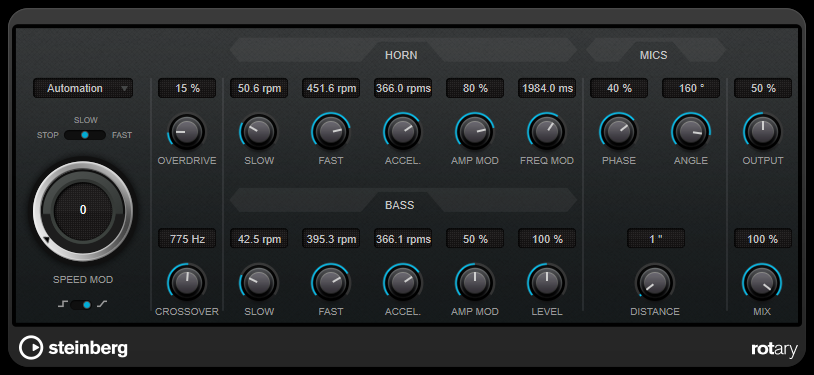
A rotary speaker cabinet features speakers rotating at variable speeds to produce a swirling chorus effect, commonly used with organs.
Speed settings
- SPEED MOD Control (MIDI)
- Speed Selector (stop/slow/fast)
-
Allows you to control the speed of the rotary speaker.
- SPEED MOD
-
If the [Set Speed Change Mode] setting is set to the right, this knob allows you to modulate the rotary speed.
- Set Speed Change Mode
-
If this is set to the left, the speed selector settings are taken into account. If this is set to the right, you can modulate the speed with the [Speed Mod] knob.
Additional settings
- OVERDRIVE
-
Applies a soft overdrive or distortion.
- CROSSOVER
-
Sets the crossover frequency (200 to 3000 Hz) between the low and high frequency loudspeakers.
Horn
- SLOW
-
Allows for a fine adjustment of the high rotor [slow] speed.
- FAST
-
Allows for a fine adjustment of the high rotor [fast] speed.
- ACCEL.
-
Allows for a fine adjustment of the high rotor acceleration time.
- AMP MOD
-
Controls the high rotor amplitude modulation.
- FREQ MOD
-
Controls the high rotor frequency modulation.
Bass
- SLOW
-
Allows for a fine adjustment of the low rotor [slow] speed.
- FAST
-
Allows for a fine adjustment of the low rotor [fast] speed.
- ACCEL.
-
Allows for a fine adjustment of the low rotor acceleration time.
- AMP MOD
-
Adjusts the modulation depth of the amplitude.
- LEVEL
-
Adjusts the overall bass level.
Mics
- PHASE
-
Adjusts the phasing amount in the sound of the high rotor.
- ANGLE
-
Sets the simulated microphone angle. A value of 0 ° corresponds to a mono miking setup with a single microphone in front of the speaker cabinet, 180 ° corresponds to a stereo miking setup with a microphone on each side of the cabinet.
- DISTANCE
-
Sets the simulated microphone distance from the speaker in inches.
Final Settings
- OUTPUT
-
Sets the output level.
- MIX
-
Sets the level balance between the dry signal and the wet signal.
StudioChorus
StudioChorus is a two-stage chorus effect that adds short delays to the signal and modulates the pitch of the delayed signals to produce a doubling effect. The two separate stages of chorus modulation are independent and are processed serially (cascaded).
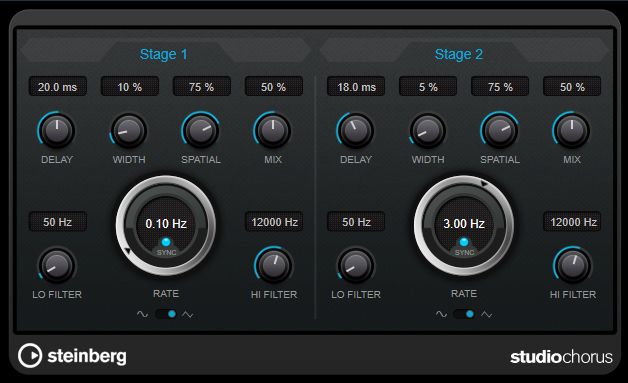
- DELAY
-
Affects the frequency range of the modulation sweep by adjusting the initial delay time.
- WIDTH
-
Sets the depth of the chorus effect. Higher settings produce a more pronounced effect.
- SPATIAL
-
Sets the stereo width of the effect. Turn clockwise for a wider stereo effect.
- MIX
-
Sets the level balance between the dry signal and the wet signal. If the effect is used as a send effect, set this parameter to the maximum value, as you can control the dry/effect balance with the send level.
- RATE
-
If [Tempo Sync] is activated, [Rate] allows you to specify the base note value for synchronizing the modulation sweep to the tempo of the host application (1/1 to 1/32, straight, triplet, or dotted).
If [Tempo Sync] is deactivated, the sweep rate can be set freely with the [Rate] dial. - SYNC
-
Activates/Deactivates tempo sync.
- Waveform Shape
-
Allows you to select the modulation waveform, altering the character of the chorus sweep. A sine and a triangle waveform are available.
- LO FILTER/HI FILTER
-
Allows you to roll off low and high frequencies of the effect signal.
