
Using a generated plan to automatically set up a system
The plan results generated by Room Planner can be exported as a Room Planner data file for system setup (.plcf1 extension), then used for automatic setup with the RM-CR signal processor.
Simply install and connect the devices according to the plan, and then use RM-CR Device Manager to follow the AUTO SETUP wizard in order to automatically configure and adjust the devices.
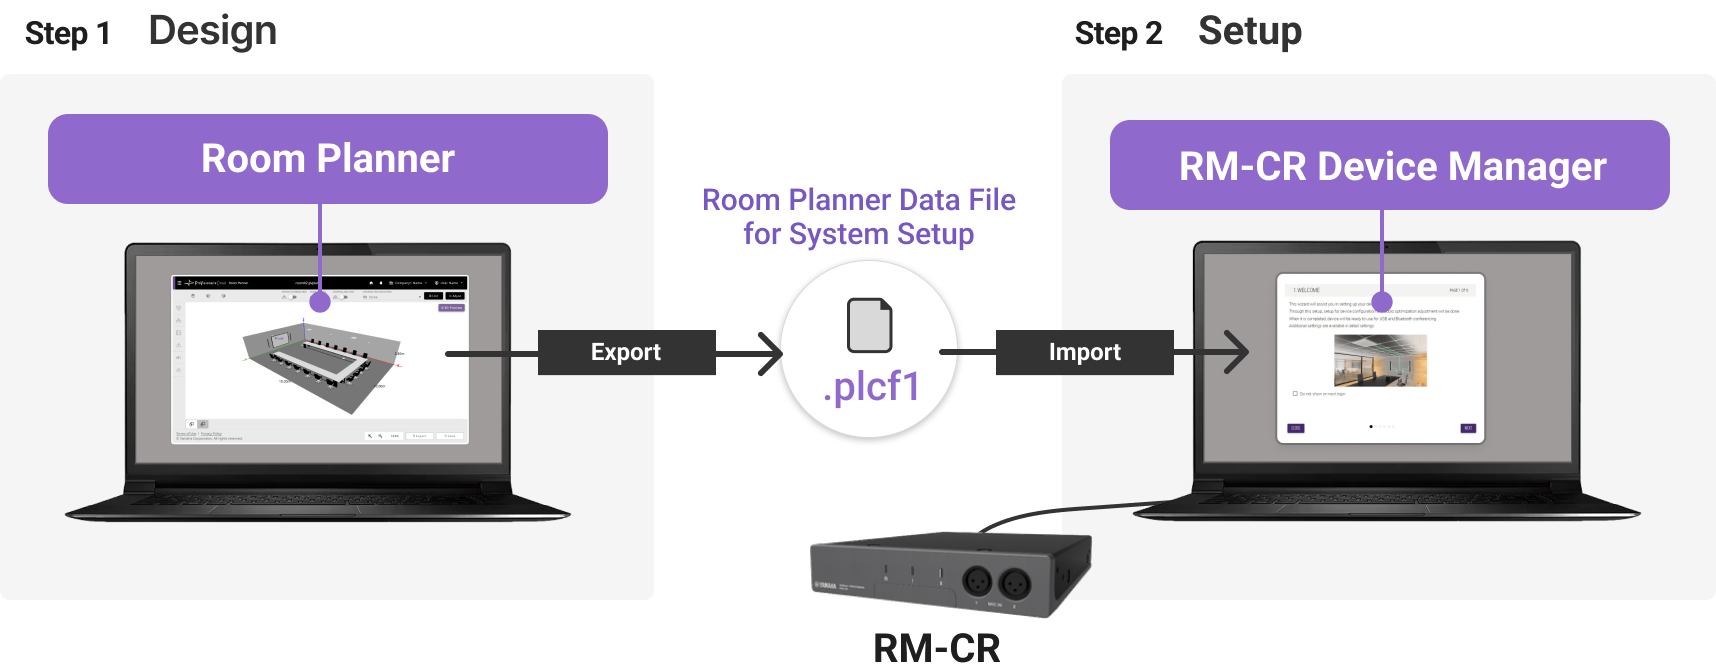
Procedure for setting up by using a plan
Room Planner
|
RM-CR Device Manager
|
Step 1 | Plan - Creating a plan with Room Planner
Start Room Planner, and then create a plan.
-
Specify all room conditions.
- For a plan that supports Voice Lift:
-
For Step 1, refer to the procedure “Creating a Voice Lift plan” on the previous page to create the plan.
-
Generate the plan
After specifying all of the room conditions, click the [Design] button to automatically generate the plan.
- For a plan that supports Voice Lift:
-
In order to perform automatic setup with Voice Lift, the system must be designed to allow Voice Lift to be reasonably effective.
Review the results screen to check whether the recommended conditions are met.If the recommended conditions are not met, the function for automatic setup with Voice Lift will not be available.
Adjust the room conditions according to the information under “TIPS FOR IMPROVEMENT” in the results screen.-
If the Room Planner data file for system setup is exported as is, automatic setup will be possible, but the Voice Lift audio settings will not be specified automatically.
-
RM-CR Device Manager can be used to manually configure the audio settings.
-
-
Review the generated plan in the results screen.
In the [Coverage Area Simulation] drop-down list, select the coverage area to be displayed.
If necessary, edit the room conditions.
-
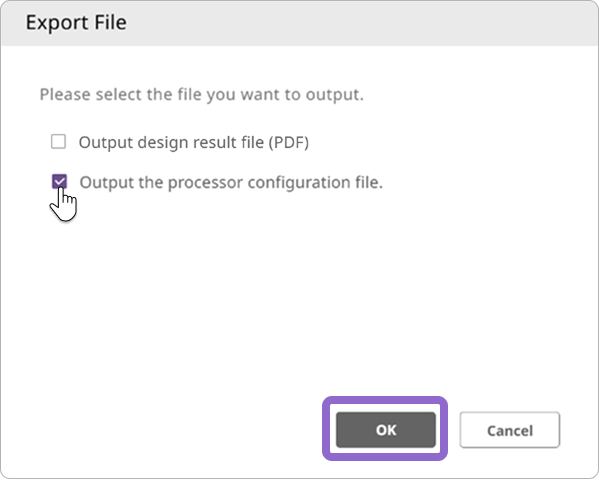
Save the generated plan as a Room Planner data file for system setup.
Click the [Export] button, and then select [Output Room Planner Data File for System Setup] to export the data.
Step 2 | Setup - Automatically setting up with RM-CR
Use the Room Planner data file for system setup (exported with Room Planner) for automatic setup with the RM-CR signal processor.
-
Install and connect the devices according to the plan.
Install and connect the devices according to the Room Planner design results.
For connection details, refer to the RM-CR Reference Manual.Use firmware version 3.0.0 or later. Versions 2.8.0 or earlier do not support auto setup of Voice Lift.
-
Start RM-CR Device Manager.
On the computer connected to RM-CR, start RM-CR Device Manager, and then click the [AUTO SETUP] button to start up the AUTO SETUP wizard.
In the import window, import the Room Planner data file for system setup (.plcf1 extension) exported in Step 1. -
Set up according to the on-screen instructions.
-
After setup is finished, adjust the settings in RM-CR Device Manager, if necessary.
|
For setup details, refer to the RM-CR Reference Manual. |