
Getting Started with Room Planner
Opening Room Planner
In order to use Room Planner, sign in from the sign in screen of ProVisionaire Cloud.
Access the ProVisionaire Cloud
-
Open the ProVisionaire Cloud window in the browser.
-
Click the [Sign In] button.
 ProVisionaire Cloud > [Sign In]
The Sign In screen for Yamaha Music ID for Business opens.
Signing in
-
Type in the email address and password.
Type in the email address and password for the Yamaha Music ID for Business account. If the password has been lost, click “Reset Password” to reset the password.
-
Click the [Sign In] button.
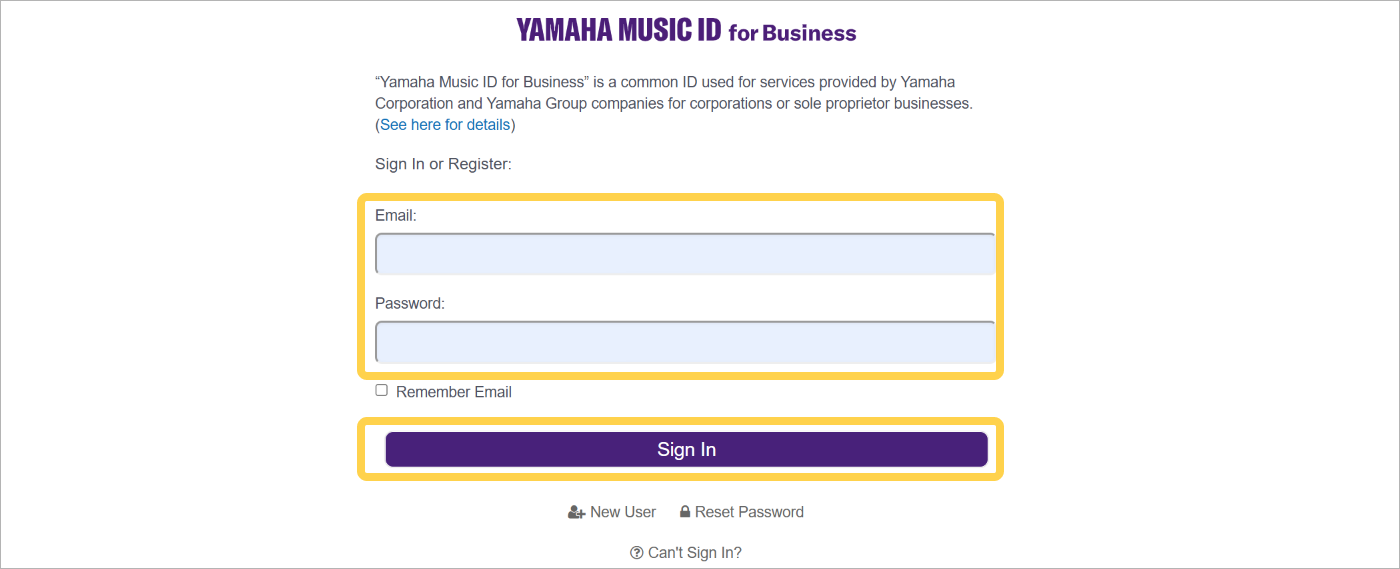 Yamaha Music ID for Business > Sign in or Register Screen
A confirmation screen appears. A verification email is sent to the email address that was entered.
-
In the screen, type the verification code provided in the email, and then click the [Submit] button.
 Yamaha Music ID for Business > Confirmation Screen
ProVisionaire Cloud starts.
For details, refer to the link below.
-
When ProVisionaire Cloud first starts: The top screen of License Management * appears.
-
For the second and subsequent times: The top screen of the feature last used appears.
* License Management: A web service for managing licenses of Yamaha professional audio products
-
Displaying Room Planner
If a screen other than Room Planner is displayed, switch features from the common header of ProVisionaire Cloud.
-
Click
 (feature selection menu) in the left corner of the header.
A list of features appears.
-
Select [Room Planner].

The top screen of Room Planner appears.
Starting to create a plan
In the top screen of Room Planner, select whether to create a new plan or open an existing file.
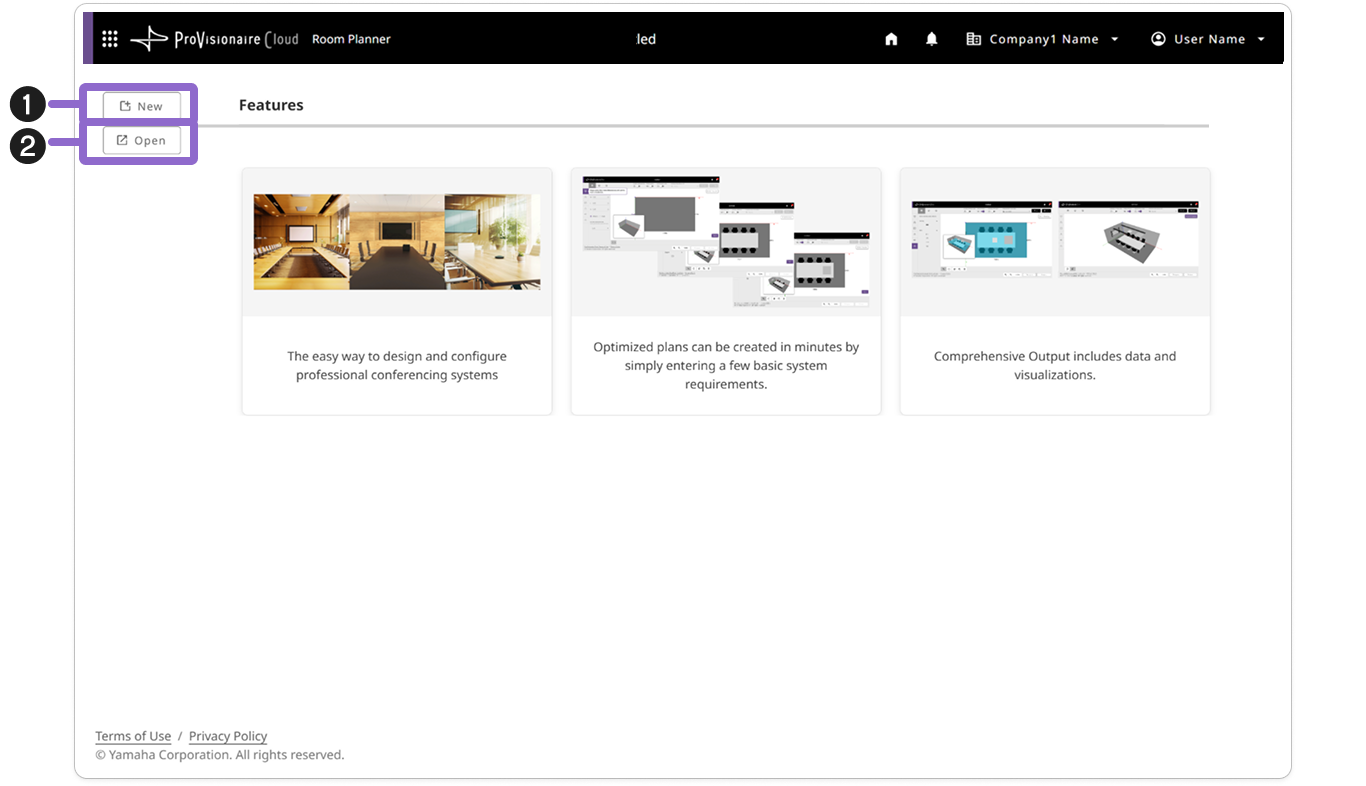
- 1 [New] button
-
Creates a new plan. Click the button to display the confirmation dialog box for using the room image recognition feature.
- Room Image Recognition Function
-
The room image recognition feature uses AI to recognize the type and arrangement of furniture as well as the materials of the walls, ceiling and floor, based on uploaded images of the room. These are applied to the conditions for the room being created to help specify the room conditions.
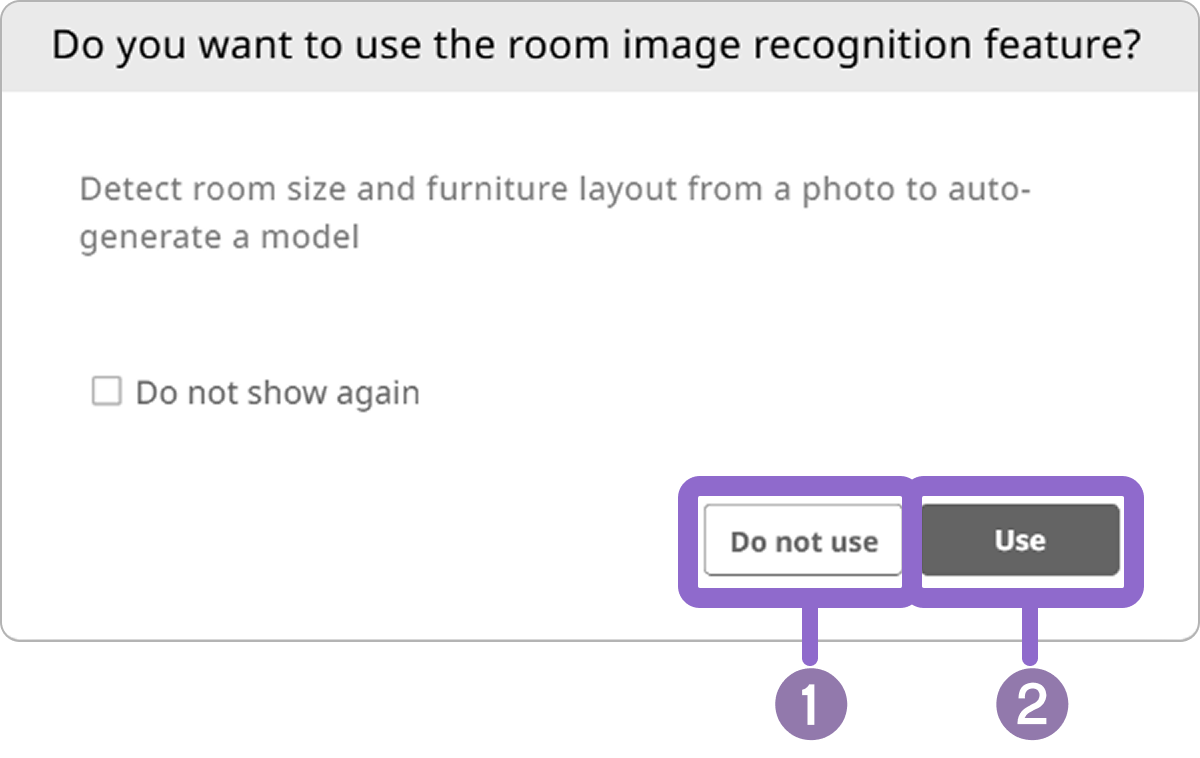
- 1 [Do not use] button
-
Click to specify the conditions without using the room image recognition feature.
Proceed to create a new plan. - 2 [Use] button
-
Click to create a plan by using the room image recognition feature.
|
- 2 [Open] button
-
Creates a plan by resuming a saved file. The file selection screen appears. Select a file, and then click the [Open] button.
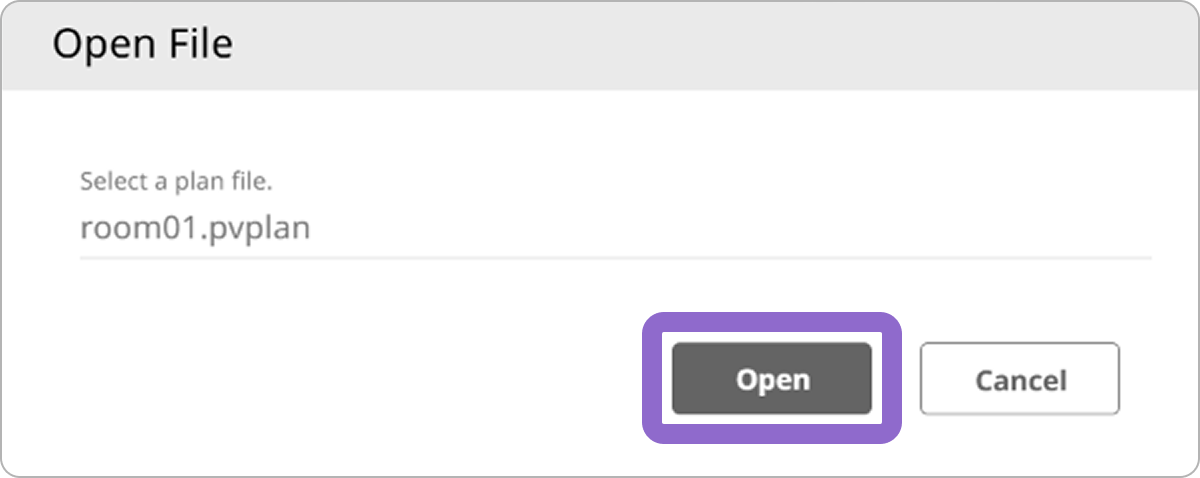
|
ProVisionaire Cloud is periodically updated to incorporate improvements and new features. To use all features, you need to redesign the plan.
|