Screen structure
2. Screen structure
ProVisionaire Amp Editor consists of a "menu bar," "tool bar," "Project sheet," "Tuning sheet," and "device sheet."
The "Project sheet" is a sheet for placing devices. The devices placed here are registered in the project.
The "Tuning sheet" is a sheet where you specify the EQ or levels of a device. Power amp channels can be grouped across multiple devices of the same series, allowing linked operation of the same types of parameters using either relative values or absolute values.
The "Device sheet" is where you can make detailed settings for each device.
Each sheet has the following areas.
| Sheet | Area |
|---|---|
|
"Devices" area
|
|
|
"Components" area
|
|
|
"Presets" area
|
|
|
- |
2.1. Common to all sheets
Here we explain items that are common to all sheets.

-
Menu bar
The commands that can be executed by ProVisionaire Amp Editor can be found here, grouped by category. Click here to see a list of commands. ( Menu bars and tool bar ) -
Tool bar
Frequently-used functions are provided here as buttons. ( Menu bars and tool bar ) -
Bird’s Eye view
This shows an overview of the sheet. The area surrounded by a green frame is shown in the sheet. Drag the frame to move the area shown in the sheet. When the ←→ icon is shown at the four corners, you can drag it to make the frame larger or smaller, and the sheet display area will change accordingly.
To zoom-in/out the Bird’s Eye view itself, hold down < Ctrl > and turn the mouse wheel.
When the cursor is located at the border between the Bird’s Eye view and the area above, the cursor changes shape, letting you drag to change the height of the view.
In the upper right of the area is a "
 " symbol; when you click this, the area becomes an icon and is placed at the left or right side of the screen, allowing the sheet to occupy more of the screen. When you place the cursor on the icon, the area is temporarily expanded. If you want to once again view an iconized area in its fixed position, move the cursor over the icon and click the "
 " symbol that appears.
Use the
 button of the sheet to access the sheet list, and select the sheet to which you want to move.
When the number of sheets increases, the
 buttons appear. The
 button moves one sheet to the left. The
 button moves one sheet to the right.
The area contains the following buttons and edit boxes.
| Button or edit box | Summary |
|---|---|
|
|
Expands the entire tree. |
|
|
Collapses the entire tree. |
|
|
Finds and displays the objects that meet the conditions that you entered. |
|
|
Registers the style of the selected object in the computer as a style. |


When the cursor is located at the border between a sheet and the area, the cursor changes shape, letting you drag to change the width of the area.
2.2. "Project sheet"
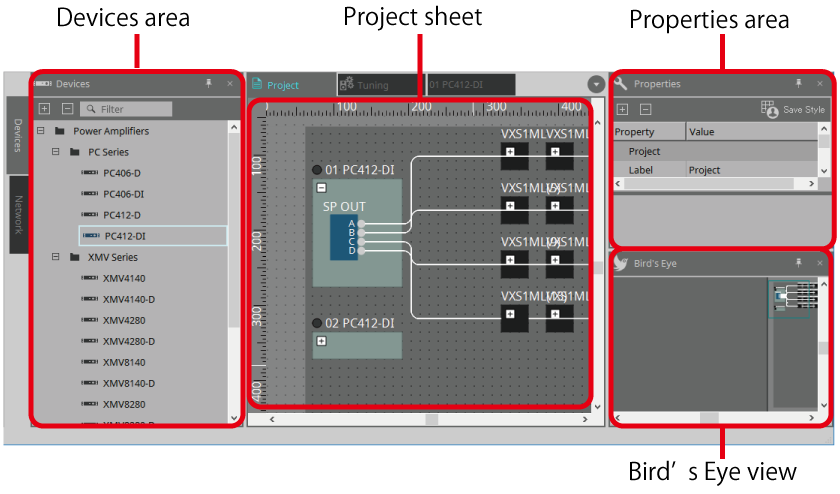
-
"Devices" area
This lists the devices that are placed in the "Project" sheet. To register a device in the project, drag and drop the device into the "Project" sheet. ( "Devices" area ) -
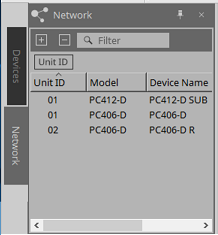
"Network" area
This lists the devices detected by the computer. To register a device in the project, drag and drop the device into the "Project" sheet. ( "Network" area )
-
"Project" sheet
In this sheet you can place devices to register them in the project, or create a connection diagram. ( "Project" sheet )
Double-click a device to open the device sheet. -
"Properties" area
Here you can view and edit information about the selected object.
2.3. "Tuning sheet"
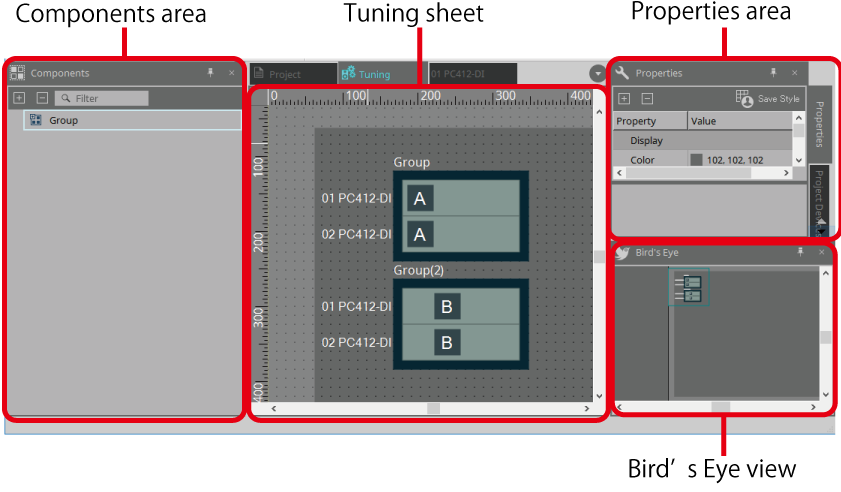
-
"Components" area
Register a link group by dragging and dropping a "Group" component into the "Tuning" sheet. -
"Tuning" sheet
In this sheet you can create and edit a link group.
A link group is a function that lets you link individual channels between devices. ( "Tuning" sheet ) -
"Properties" area
Here you can view and edit information about the selected object. -
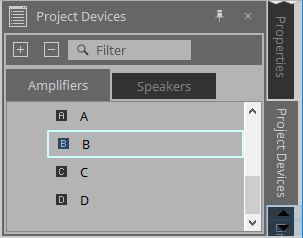
"Project Devices" area
Of the devices placed in the "Project" sheet, the devices to which link grouping is applicable are shown in the tree.
Register a device in a link group by dragging and dropping it onto the "Group" component. ( "Project Devices" area )
-
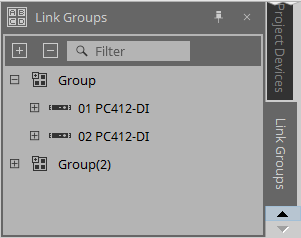
"Link Groups" area
This shows the state of link group assignments as a tree. ( "Link Groups" area )
2.4. Device sheet
The device sheet for a PC-series unit is shown here as an example.
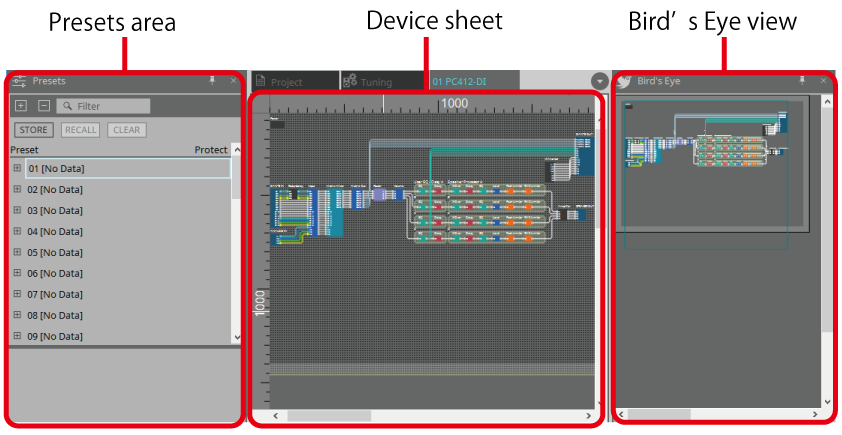
-
"Presets" area
Here you can store and recall parameters for the PC-series device. ( "Presets" area )
To store or recall presets for the entire project, use the "Linked Presets Manager" window that appears when you click the button. (
"Linked Presets Manager" window
)
button. (
"Linked Presets Manager" window
)
Presets for the entire project can also be recalled from the .
.
-
Device sheet
Components for the various devices are placed here. When you double-click a component, the component editor appears, allowing you to edit the parameters of the device.