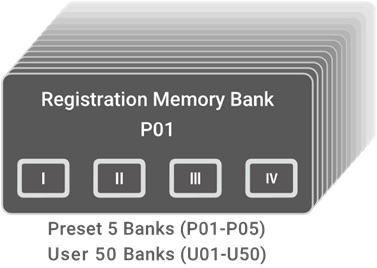
[REG] Registration Memory
You can register a variety of settings to these buttons, and then call them up at any time with a single touch. This is called the Registration Memory function. Registered settings can be saved to a Registration Memory Bank of four buttons.
Lamp states of the Registration Memory buttons
For the [I]–[IV] buttons, the lamp state indicates the registration state of the setting described below.
• Off: No setting is registered for this button.
• Blue: A setting is registered for this button.
• Red: A setting is registered for this button, and it was the last button registered/triggered.
• Red, blinking temporarily: A setting has just been registered for this button.
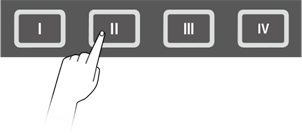
Registering the current settings in Registration Memory
1. Press and hold a button ([I]–[IV]) until the LCD screen indicates that registration is complete.

NOTICE
• Settings that you have registered in a Registration Memory will be lost if you select a different Registration Memory Bank. If you do not want to lose those settings, be sure to save the Registration Memory Bank.
Saving settings in a User Registration Memory Bank
You can save Registration Memories [I]–[IV] together as one bank.
1. Press the [ENTER] button on the top screen of Registration Memory Bank Mode.

2. Use the [+] and [-] buttons to select the bank number (U01–U50) that is the save destination.
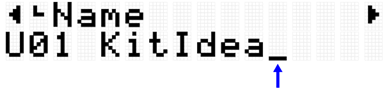
3. Press the [ENTER] button to display the Bank Name edit screen. The cursor will appear at the left end of the Bank Name.

4. Edit the name of the Registration Memory Bank.
5. After editing the Bank Name, press the [ENTER] button to display the confirmation screen before saving.

6. Press the [ENTER] button again to save the bank.
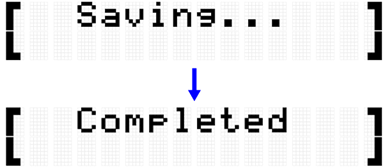
“Saving...” is displayed, and then after a few moments “Completed” is displayed to indicate that the bank has been saved.
NOTE
• User Registration Memory Banks (U01–U50) can be saved in the root directory of a USB flash drive. See the section on [MENU]→File for details.
• The edited state of the currently selected Registration Memory Bank is maintained when the power is turned off, even if it has not been saved as a User Registration Memory Bank. See this page for details about which items have their settings maintained even when the power is turned off.
Recalling a Registration Memory
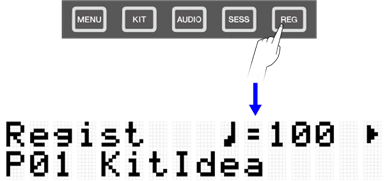
1. Press the [REG] button to enter Registration Memory Bank Mode.
NOTE
If the top screen (Bank Select screen) of Registration Memory Bank Mode does not appear after pressing the [REG] button, press the [REG] button again to move to the top screen.
2. Use the [+] and [-] buttons to select a Registration Memory Bank.

3. Press a button ([I]–[IV]) to recall the registered settings (short press).
NOTICE
• Be careful not to hold down the [I]–[IV] buttons for too long. Pressing and holding down the [I]–[IV] buttons will overwrite the registered settings with the current settings.
Registration Memory Bank List
No. | Bank Name | Memory | Description |
P01 | KitIdea | I | With the effect preset Kit “P01 Maple” selected, [KIT]→KitEdit→ReverbType is set to “06 Hall.” |
II | With the effect preset Kit “P32 BeatBoxPine” selected, [KIT]→KitEdit→VariationType is set to “19 DynFlanger.” | ||
III | With the effect preset Kit “P05 R&B” selected, [KIT]→KitEdit→VariationType is set to “10 TempoDelay2 D.” | ||
IV | With the preset Kit “P01 Maple” selected, [KIT]→VoiceEdit→Tuning and [KIT]→VoiceEdit→Decay are set for an appropriate effect. The first item is used to simulate changes to drum tunings and cymbal diameter. The second item is used mainly to simulate drum muting and half-open hi-hats. | ||
P02 | PadIdea | I | With the preset Kit “P01 Maple” selected, Note Repeat, Link, and Velocity Limits are set for an appropriate effect. By setting Pads S1 and A4 in the same Link Group ([KIT]→PadEdit→LinkGroup) and setting separate Velocity Limit ranges for each ([KIT]→PadEdit→VelLow and [KIT]→PadEdit→VelHigh), the Snare Open Rim (the Voice assigned to A4) will be generated only if either Pad is hit hard. In addition, by setting the A1–A3 RGB Square Pads to the same Link Group and setting different Note Repeat Rates for each ([KIT]→PadEdit→NoteRepRat), you can create interesting sounds for the snare drum. |
II | With the preset Kit “P05 R&B” selected, Note Repeat, Hold Mode, and Choke are set for an appropriate effect. The Note Repeat Rate ([KIT]→PadEdit→NoteRepRat) for Hi-hat Close can be varied by hitting the A1–A8 RGB Square Pads. In addition, various beats can be created by combining the K, S1, S2, R1, R2, M1, and M2 Pads. | ||
III | With preset Kit “P47 SE&VocalEast” selected, the functions when the Pads are hit ([KIT]→PadEdit→NoteFunc) are set for an appropriate effect. The A1 RGB Square Pad can be used to turn off all Voices currently sounding (AllSoundOff), and A2 can be used to choke the sound of the Kit (KitChoke). | ||
IV | With preset Kit “P25 EDM Yellow” selected, the functions when the Pads are pressed further ([KIT]→PadEdit→ATFunc) are set for an appropriate effect. Various expressions can be achieved with Note Repeats by pressing the A5–A8 RGB Square Pads while pressing A1–A4. | ||
P03 | TriggerIdea | I | With the preset Kit “P01 Maple” selected, the preset Trigger “P01 Normal Tx” has been adjusted for this setting. To make beat performance more stable, set the velocity curve to “Loud2” for Pad K only. Velocity is also fixed by setting [MENU]→Trigger→Note→VelFixVal to “110” for the A2, A3, A5, and A7 RGB Square Pads. |
II | With the preset Kit “P01 Maple” selected, the preset Trigger “P01 Normal Tx” has been adjusted for this setting. The values in [MENU]→Trigger→Note→VelMax and [MENU]→Trigger→AfterTouch→ATMax for Pad S2 have been set smaller to facilitate ghost notes on the snare drum. | ||
III | With the preset Kit “P01 Maple” selected, the preset Trigger “P01 Normal Tx” has been adjusted for this setting. As the value for [MENU]→Trigger→A/D Gain grows larger, greater output will be generated with less power. | ||
IV | With the preset Kit “P01 Maple” selected, the preset Trigger “P01 Normal Tx” has been adjusted for this setting. All Pads are set to the same snare tone, and [MENU]→Trigger→Note→VelCurve and [MENU]→Trigger→AfterTouch→ATCurve are set to different curves for each Pad. Compare the differences between the curves. | ||
P04 | KitList | I | This bank allows you to recall the Kit you want to use during your performance with one touch. The following Kits are registered, starting with [I]. • P01 Maple • P10 ModernJazz • P14 GaragePunk • P16 Vintage70s |
II | |||
III | |||
IV | |||
P05 | Empty | I | There is no data, so the button lamp is off. |
II | |||
III | |||
IV |
Selecting an item to recall (load)
You can select an item to recall (load) when a Registration Memory button is pressed (short press).
1. On the top screen of Registration Memory Bank Mode, press the [>] button and select “LoadSetting.”

2. Press the [ENTER] button to move to the setting screen for each item.

3. Use the [<] and [>] buttons to select an item, and then switch it On or Off.
Item (Display) | Description | Default Setting |
Kit | Settings in Kit Mode. See this page for details. | On |
Settings in Audio Mode. See this page for details. | Off | |
Settings in Session Creator Mode (including section selection state). See this page for details. | Off | |
Mixer | Settings in [MENU]→Mixer | Off |
Click | Settings in [MENU]→Click | Off |
Trigger | Settings in [MENU]→Trigger | On |
Utility | Settings in [MENU]→Utility | Off |
Tempo | Tempo settings. See this page for details. | On |