[MENU] File Management
Data that has been saved on this product can be saved as a file in the root directory of a USB flash drive, and saved files can be loaded into this product.
NOTE
• The product will only recognize files in the root directory of a USB flash drive.
Target data for file management
The following types of files can be used with this product. Target data is saved as a single file in the root directory of a USB flash drive.
Target Data (Display) | Description |
All | All settings to be backed up |
OneKit | Selected User Kit |
AllKit | All User Kits (U01–U50) |
OneTrigger | Selected User Trigger |
AllTrigger | All User Triggers (U01–U50) |
OneRegist | Abbreviation for "One Registration Memory Bank." Selected User Registration Memory Bank |
AllRegist | Abbreviation for "All Registration Memory Banks." All User Registration Memory Banks (U01–U50) |
OneSample | Abbreviation for "One User Sample." Selected audio file (WAV or AIFF) in the root directory of a USB flash drive, and selected User Sample in the User Sample Memory on this product |
AllSample | Abbreviation for "All User Samples." All audio files (WAV or AIFF) in the root directory of a USB flash drive, and all User Samples in the User Sample Memory on this product (001–100) |
@
File management functions
Function (Display) | Description |
Save | Use this function to save the data on this product as a file in the root directory of a USB flash drive. See this page for the operation procedure. This is not displayed if a User Sample ("OneSample" or "AllSample") is selected as the target data. NOTE • When “OneKit” is saved as data, the User Sample set in the User Kit is saved together with that Kit. When “AllKit” is saved as data, all User Samples (001–100), including empty slots, are also saved together the Kits. |
Load | Use this function to load data into the product from a file in the root directory of a USB flash drive. See this page for the operation procedure. See this page for the operation procedure when selecting a User Sample ("OneSample" or "AllSample") as the target data. NOTE • When loading a “OneKit” file, the User Sample set in the User Kit is loaded together with that Kit. When loading an “AllKit” file, all User Samples (001–100), including empty slots, are also loaded together with the Kits. • When loading a “OneKit” file, the User Sample might fail to load due to insufficient internal memory for User Samples. If that happens, the Voice of the Pad to which the User Sample that failed to load is assigned is set to Category = 017, Number = 001. |
Rename | Use this function to edit the name of the file in the root directory of a USB flash drive. See this page for the operation procedure. |
Delete | Use this function to delete files in the root directory of a USB flash drive. See this page for the operation procedure. |
Abbreviation for "Delete Internal Memory." Use this function to delete User Samples that have been imported into the User Sample Memory on this product. This function appears on the screen only when a User Sample ("OneSample" or "AllSample") is selected as the target data. See this page for the operation procedure. |
Number of files recognized by this product
This product can recognize up to 500 files—for each file extension—of the group of files in the root directory of a USB flash drive. If this number of files is exceeded, “USB Device List Full” will appear on the LCD screen. Either erase unnecessary files or move them to a location other than the root directory of the USB flash drive, or use a new USB flash drive.
NOTE
To cancel the operation while this function is in progress, press the [EXIT] button.
Saving files on a USB flash drive
Saving data beginning with “All”
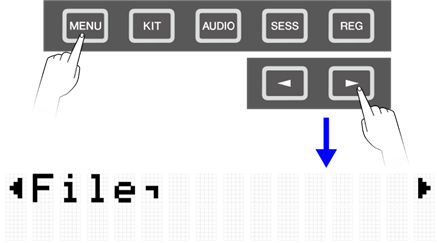
1. On the [MENU]→File screen, press the [ENTER] button to move to the Data Select screen.

2. Use the [<] and [>] buttons to select Data.
3. Press the [ENTER] button to display the save screen.

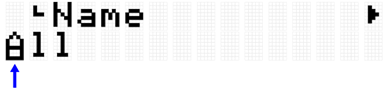
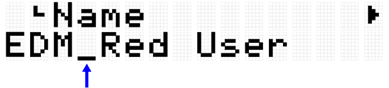
4. Press the [ENTER] button again to display the File Name edit screen. The cursor will appear at the left end of the data display.
5. If necessary, edit the name of the file to be saved.
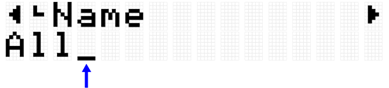
6. After editing the File Name, press the [ENTER] button to display the confirmation screen before saving.

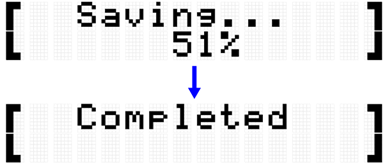
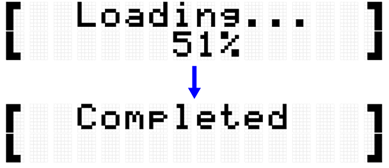
7. Press the [ENTER] button again to save the file.
Saving data beginning with “One”
1. On the [MENU]→File screen, press the [ENTER] button to move to the Data Select screen.

2. Use the [<] and [>] buttons to select Data.
3. Press the [ENTER] button to display the save screen.

4. Use the [+] and [-] buttons to select the number of the data you want to save.

5. Press the [ENTER] button to display the File Name edit screen. The cursor will appear at the left end of the file name.

6. Edit the name of the file to be saved.
7. Press the [ENTER] button. A confirmation message is displayed.
8. Press the [ENTER] button again to save the file.

Loading files from a USB flash drive
This section describes the operation for loading into this product a file in the root directory of a USB flash drive.
NOTE
• The target data in this description are Kits, Triggers, and Registration Memory Banks. See this page for the operation procedure when selecting a User Sample (“OneSample” or “AllSample”) as the target data.
Loading data beginning with “All”
1. On the [MENU]→File screen, press the [ENTER] button to move to the Data Select screen.

2. Use the [<] and [>] buttons to select Data.
3. Press the [ENTER] button. When “Save” is displayed, use the [<] and [>] buttons to select “Load.”

4. Use the [+] and [-] buttons to select the file to load.

5. Press the [ENTER] button to display the confirmation screen for loading the file.

6. Press the [ENTER] button again to load the file.
Loading data beginning with “One”
1. On the [MENU]→File screen, press the [ENTER] button to move to the Data Select screen.
2. Use the [<] and [>] buttons to select Data.
3. Press the [ENTER] button. When “Save” is displayed, use the [<] and [>] buttons to select “Load.”

4. Use the [+] and [-] buttons to select the file to load.

5. Press the [ENTER] button. When “Load to” is displayed, use the [+] and [-] buttons to select the User Data number (U01–U50) to be loaded.

6. Press the [ENTER] button to display the confirmation screen for loading the file.

7. Press the [ENTER] button again to load the file.
Renaming a file name
1. On the [MENU]→File screen, press the [ENTER] button to move to the Data Select screen.
2. Use the [<] and [>] buttons to select Data.
3. Press the [ENTER] button. When “Save” is displayed, use the [<] and [>] buttons to select “Rename.”

4. Use the [+] and [-] buttons to select the file to rename.

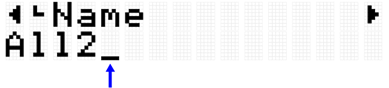
5. Press the [ENTER] button to display the File Name edit screen. The cursor (arrow in the figure below) will appear at the left end of the file name.
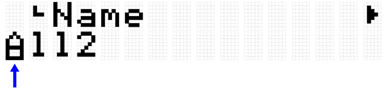
6. Edit the name of the file.
7. Press the [ENTER] button to display the confirmation screen for renaming the file.

8. Press the [ENTER] button again to rename the file.

Deleting a file
1. On the [MENU]→File screen, press the [ENTER] button to move to the Data Select screen.
2. Use the [<] and [>] buttons to select Data.
3. Press the [ENTER] button. When “Save” is displayed, use the [<] and [>] buttons to select “Delete.”

4. Use the [+] and [-] buttons to select the file to delete.

5. Press the [ENTER] button to display the confirmation screen for deleting the file.

6. Press the [ENTER] button again to delete the file.

Deleting User Samples from this product
You can delete User Samples (001–100 of Voice Category 017) that are loaded in the User Sample Memory on this product, instead of a USB flash drive.
Deleting all User Samples
1. On the [MENU]→File screen, press the [ENTER] button to move to the Data Select screen.
2. Use the [<] and [>] buttons to select “AllSample.”

3. Press the [ENTER] button. When “Load” is displayed, use the [<] and [>] buttons to select “DeleteIntMem.”

4. Press the [ENTER] button. A confirmation message for deleting the User Samples is displayed.

• Press the [ENTER] button again to delete the User Samples.
Deleting the selected User Sample
1. On the [MENU]→File screen, press the [ENTER] button to move to the Data Select screen.
2. Use the [<] and [>] buttons to select “OneSample.”

3. Press the [ENTER] button. When “Load” is displayed, use the [<] and [>] buttons to select “DeleteIntMem.”

4. Use the [+] and [-] buttons to select the User Sample to delete.

5. Press the [ENTER] button. A confirmation message for deleting the User Sample is displayed.

6. Press the [ENTER] button again to delete the User Sample.
Other file functions
The last two items in the Data Select menu level that are displayed when you press [MENU]→File→[ENTER] have memory related functions.
Item (Display) | Description |
Abbreviation for "USB Memory Format." In some cases, you might not be able to use a USB flash drive simply by connecting it to the [USB TO DEVICE] terminal.In that case, press the [ENTER] button on this screen to format the USB flash drive. NOTICE Formatting will delete all files and directories (folders) stored on the USB flash drive. Make sure the USB flash drive does not contain any necessary data before formatting it. NOTE If a formatted USB flash drive is connected to the [USB TO DEVICE] terminal, the second line of this screen indicates the memory usage (used capacity/total capacity). | |
Abbreviation for "Internal Memory Optimize." Use this function to optimize the memory for User Samples on this product. Optimization is the process of reorganizing the memory to expand the region that can be used. Optimizing the memory might increase the amount of contiguous memory space available. Press the [ENTER] button on this screen to optimize the memory. NOTE The second line of this screen indicates the memory usage for User Samples (used capacity/total capacity). |