[MENU] Trigger (Pad Sensitivity)
From among the provided settings, you can select your favorite Pad sensitivity to get your best playing feel. This setting, called “Trigger,” includes MIDI transmission/reception settings. This product has 12 Trigger presets. You can edit these settings and save up to 50 User Triggers.
Selecting a Trigger
1. On the top screen of Menu Mode, press the [>] button to move to the Trigger screen.

2. Press the [ENTER] button to move to the Trigger Select screen.

3. Use the [+] and [-] buttons to select a Trigger.

Trigger List
No. | Trigger Name (Display) | Description |
P01 | Normal Tx | For all Pads, “VelCurve” and “ATCurve” are set to “Normal.” In addition, “MIDINote” for all Pads is set based on the GM (General MIDI) Drum Map. These settings are for controlling an external tone generator via MIDI transmission from this product. |
P02 | Loud1 Tx | For all Pads, “VelCurve” and “ATCurve” are set to “Loud1.” For all Pads, “MIDINote” is set based on the GM (General MIDI) Drum Map. These settings are for controlling an external tone generator via MIDI transmission from this product. |
P03 | Loud2 Tx | For all Pads, “VelCurve” and “ATCurve” are set to “Loud2.” For all Pads, “MIDINote” is set based on the GM (General MIDI) Drum Map. These settings are for controlling an external tone generator via MIDI transmission from this product. |
P04 | Hard1 Tx | For all Pads, “VelCurve” and “ATCurve” are set to “Hard1.” For all Pads, “MIDINote” is set based on the GM (General MIDI) Drum Map. These settings are for controlling an external tone generator via MIDI transmission from this product. |
P05 | Hard2Tx | For all Pads, “VelCurve” and “ATCurve” are set to “Hard2.” For all Pads, “MIDINote” is set based on the GM (General MIDI) Drum Map. These settings are for controlling an external tone generator via MIDI transmission from this product. |
P06 | Fixed Tx | For all Pads, “VelFixVal” and “ATFixVal” are set to “127.” For all Pads, “MIDINote” is set based on the GM (General MIDI) Drum Map. These settings are for controlling an external tone generator via MIDI transmission from this product. |
P07 | Normal Rx | For all Pads, “VelCurve” and “ATCurve” are set to “Normal.” In addition, “MIDINote” for all Pads is set so that the numbers are ordered sequentially. These settings are for controlling the built-in tone generator from an external device via MIDI. |
P08 | Loud1 Rx | For all Pads, “VelCurve” and “ATCurve” are set to “Loud1.” For all Pads, “MIDINote” is set so that the numbers are ordered sequentially. These settings are for controlling the built-in tone generator from an external device via MIDI. |
P09 | Loud2 Rx | For all Pads, “VelCurve” and “ATCurve” are set to “Loud2.” For all Pads, “MIDINote” is set so that the numbers are ordered sequentially. These settings are for controlling the built-in tone generator from an external device via MIDI. |
P10 | Hard1 Rx | For all Pads, “VelCurve” and “ATCurve” are set to “Hard1.” For all Pads, “MIDINote” is set so that the numbers are ordered sequentially. These settings are for controlling the built-in tone generator from an external device via MIDI. |
P11 | Hard2 Rx | For all Pads, “VelCurve” and “ATCurve” are set to “Hard2.” For all Pads, “MIDINote” is set so that the numbers are ordered sequentially. These settings are for controlling the built-in tone generator from an external device via MIDI. |
P12 | Fixed Rx | For all Pads, “VelFixVal” and “ATFixVal” are set to “127.” For all Pads, “MIDINote” is set so that the numbers are ordered sequentially. These settings are for controlling the built-in tone generator from an external device via MIDI. |
If you want to finely adjust these items, you can edit them for each Pad. Edited settings can be saved as User Triggers. See this page for details.
Basic procedure (from editing to saving a Trigger)
1. Use the [+] and [-] buttons to select a Trigger.

2. Use the [<] and [>] buttons to select an item, and then hit the Pad whose settings you want to change.

3. Press the [<] button to return to the Trigger Select screen, and then press the [ENTER] button to move to the User Trigger Save screen.

4. Use the [+] and [-] buttons to select the Trigger number (U01–U50) that is the save destination.

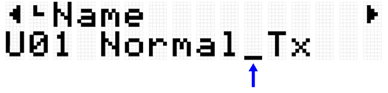
5. Press the [ENTER] button to display the Trigger Name edit screen. The cursor will appear at the left end of the Trigger Name.
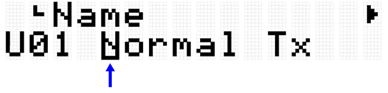
6. Edit the Trigger Name.
7. After editing the Trigger Name, press the [ENTER] button to display the confirmation screen before saving.

8. Press the [ENTER] button again to save the User Trigger.

NOTE
• User Triggers (U01–U50) can be saved in the root directory of a USB flash drive. See the section on [MENU]→File for details.
• The edited state of the currently selected Trigger is maintained when the power is turned off, even if it has not been saved as a User Trigger. See this page for details about which items have their settings maintained even when the power is turned off.
MIDI related settings
This detailed explanation corresponds with Step 2 of the “Basic procedure.”

You can configure settings related to MIDI messages that are transmitted or received when a Pad is operated. Default values are unique to each Trigger.
Item (Display) | Description | Setting Range |
MIDICh | Abbreviation for "MIDI Channel." Sets the MIDI channel for MIDI messages that are transmitted or received when the designated Pad is operated. | 1–16 |
Abbreviation for "MIDI Note Number." Sets the MIDI note number for MIDI messages that are transmitted or received when the designated Pad is operated. | 1 (C#-2)–127 (G8) | |
MIDIRcvPad | Abbreviation for "MIDI Receive Pad." Sets whether the designated Pad is considered to have been operated ("On") or not ("Off") when a MIDI message with the MIDI note number and MIDI channel for that Pad is received. | Off, On |
Note On/Aftertouch settings
This detailed explanation corresponds with Step 2 of the “Basic procedure.” Default values are unique to each Trigger.
Item (Display) | Description | Setting Range |
Abbreviation for "A/D Gain." Selects "On" or "Off" for note output of the designated Pad. | 0–127 |
Note On related settings
This detailed explanation corresponds with Step 2 of the “Basic procedure.”

You can configure settings related to Note On messages when a Pad is operated. Default values are unique to each Trigger.
Item (Display) | Description | Setting Range |
Abbreviation for "Note Output." Selects "On" or "Off" for note output of the designated Pad. | Off, On | |
Abbreviation for "Velocity Fixed Value." Sets the MIDI Velocity that is transmitted when the designated Pad is hit. When set to any value from 1 to 127, the selected value is transmitted as the MIDI Velocity of the designated Pad regardless of how hard the Pad is hit. When set to Off, the MIDI Velocity is determined according to how hard the Pad is hit. The relationship between how hard the Pad is hit and the MIDI Velocity will be determined by “VelCurve” (the next item). | Off, 1–127 | |
Abbreviation for "Velocity Curve." Select a Velocity Curve for the designated Pad. | Loud2, Loud1, Normal, Hard1, Hard2, Fix1–5, Spline11–15, Spline21–25, Offset1–5 | |
Abbreviation for "Velocity Minimum." Sets the lower limit of the MIDI Velocity for the designated Pad. No matter how softly the Pad is hit, the MIDI Velocity generated will not drop below this value. | 1–127 | |
Abbreviation for "Velocity Maximum." Sets the upper limit of the MIDI Velocity for the designated Pad. No matter how strongly the Pad is hit, the MIDI Velocity generated will not rise above this value. | 1–127 |
Aftertouch related settings
This detailed explanation corresponds with Step 2 of the “Basic procedure.”

You can configure settings related to Aftertouch when a Pad is operated. Default values are unique to each Trigger.
Item (Display) | Description | Setting Range |
Abbreviation for "After Touch Output." Selects "On" or "Off" for Aftertouch output of the designated Pad. | Off, On | |
ATType | Abbreviation for "After Touch Type." Select whether Channel or Polyphonic is transmitted as a MIDI Aftertouch message for the designated Pad. | Channel, Poly |
ATPriority | Abbreviation for "After Touch Priority." Select whether the MIDI Note message for the designated Pad is output ("Low") or not ("High") while the Aftertouch of that Pad is being output. | Low, High |
Abbreviation for "After Touch Fixed Value." Sets the Aftertouch strength for the designated Pad. When set to any value from 1 to 127, the selected value is transmitted as the Aftertouch for the designated Pad regardless of how hard the Pad is pressed further. When set to Off, the Aftertouch is determined according to how hard the Pad is pressed further. The relationship between how hard the Pad is pressed further and the Aftertouch will be determined by “ATCurve” (the next item). | Off, 1–127 | |
Abbreviation for "After Touch Curve." Select an Aftertouch Curve for the designated Pad. | Loud2, Loud1, Normal, Hard1, Hard2, Fix1–5, Spline11–15, Spline21–25, Offset1–5 | |
ATMin | Abbreviation for "After Touch Minimum." Sets the lower limit of the Aftertouch for the designated Pad. No matter how softly the Pad is pressed further, the Aftertouch generated will not drop below this value. | 1–127 |
Abbreviation for "After Touch Maximum." Sets the upper limit of the Aftertouch for the designated Pad. No matter how strongly the Pad is pressed further, the Aftertouch generated will not rise above this value. | 1–127 |