Microphones: RM-CG
24. Microphones: RM-CG
24.1. Overview
This will be a fixed configuration ceiling microphone.
| To control "RM-CG," you must set an initial password for the device and log in. |
24.2. "Project" sheet
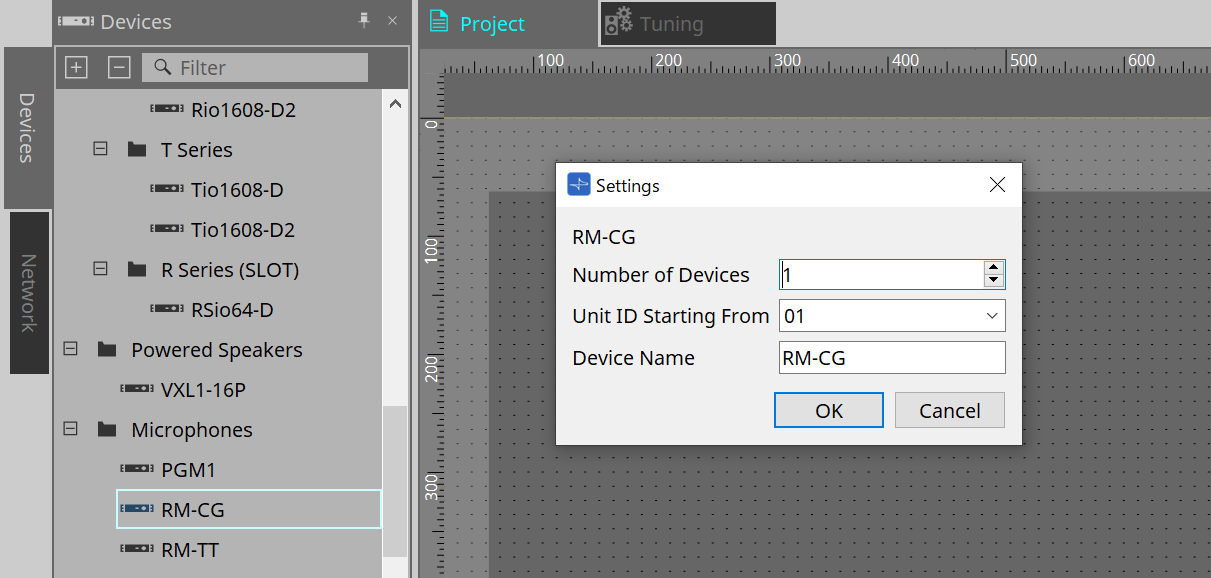
When placing devices, the Settings screen shown below will be displayed.
-
Number of Devices
Selects the number of RM-CG units placed on the sheet. -
Unit ID Starting From
You can select the starting number for the device Unit IDs. -
Device Name
The device name can be displayed and edited.
24.3. [System] menu
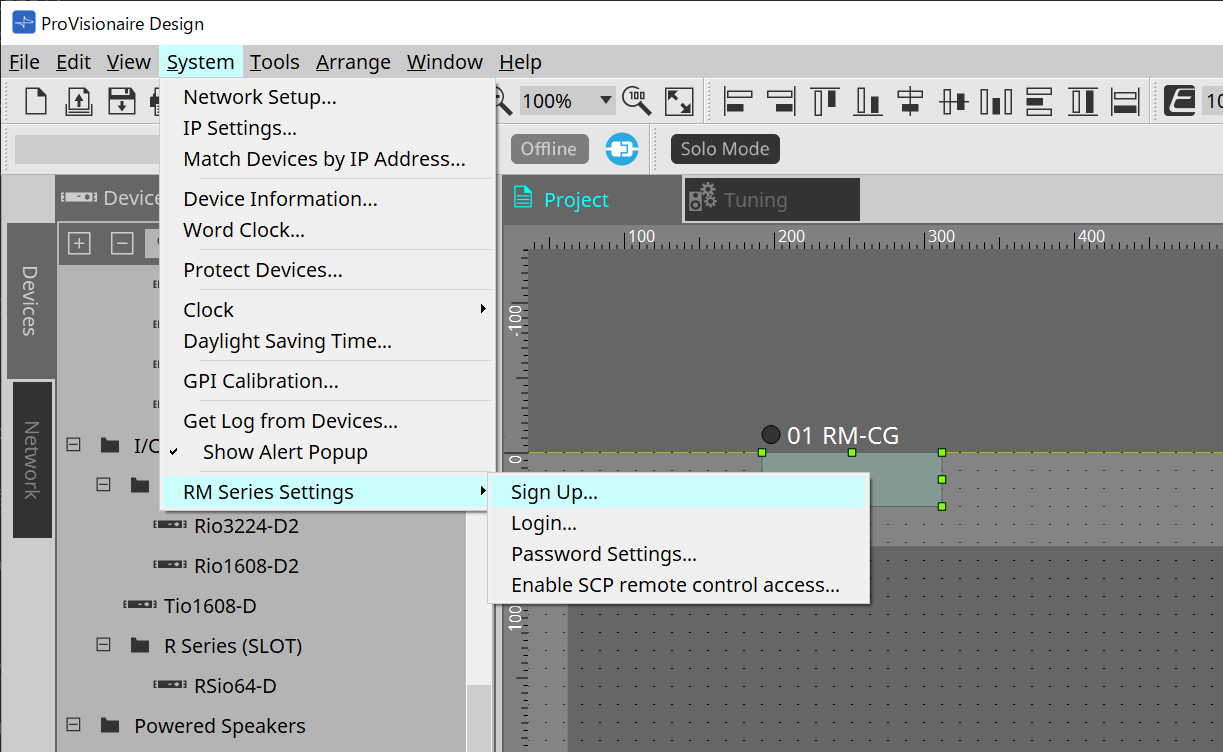
Settings are made in RM Series Settings, which is displayed from the [System] menu on the menu bar.
-
RM Series Settings
-
Sign Up
Sets the initial password. -
Login
Enters the password before controlling the device with ProVisionaire Design. -
Password Settings
Changes the device password. -
Enable SCP remote control access
Turn this on to control devices using ProVisionaire Design or a remote control.
-
|
When the ProVisionaire Design and devices are set to online, "Enable SCP remote control access" is automatically turned on.
After setting the devices, please reset as necessary. |
24.4. "Network" area
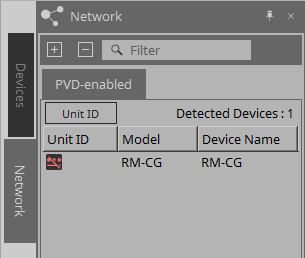
To control "RM-CG," you must set an initial password for the device and log in.
Right-click on RM-CG in Network and select Sign Up/Login.
Alternately, do this in RM Series Settings, which is displayed from the [System] menu on the menu bar.
| Until you login, you will not be able to configure the settings using ProVisionaire Design. |
24.6. Device sheet screen configuration
When the RM-CG device sheet is opened, the device sheet and the "Bird’s Eye view" will be displayed.
When you double-click a component in the device sheet, the component editor opens.

①
Tool buttons
Frequently-used commands are provided here as buttons.
②
Bird’s Eye view
This shows an overview of the sheet.
24.7. Tool buttons
Frequently-used commands are provided here as buttons.
| Button | Command | Overview |
|---|---|---|
|
|
Mic Mute |
Mutes the microphone. |
24.8. Component editors
When you double-click a component in the device sheet, the component editor opens.
This section describes the RM-CG component editor, and the dialogs and windows that are closely associated with the components.

| Number | Component name | Details | Link |
|---|---|---|---|
|
① |
Microphone Settings |
This adjusts the tracking speed and range and the automixer settings. |
|
|
② |
Reference Signal for AEC |
Displays the reference signal level of the adaptive echo canceller. |
--- |
|
③ |
DSP Settings |
Specifies the various DSP settings, such as adaptive echo canceller and noise reduction. |
|
|
④ |
6Band EQ |
Adjusts the 6-band EQ. |
|
|
⑤ |
Mute Setting |
Sets the link to Mic Mute for each channel. |
|
|
⑥ |
Fader |
Adjusts the audio signal level. |
--- |
|
⑦ |
Router |
Changes the assignments from input channels to output channels. |
--- |
|
⑧ |
Dante Out |
--- |
--- |
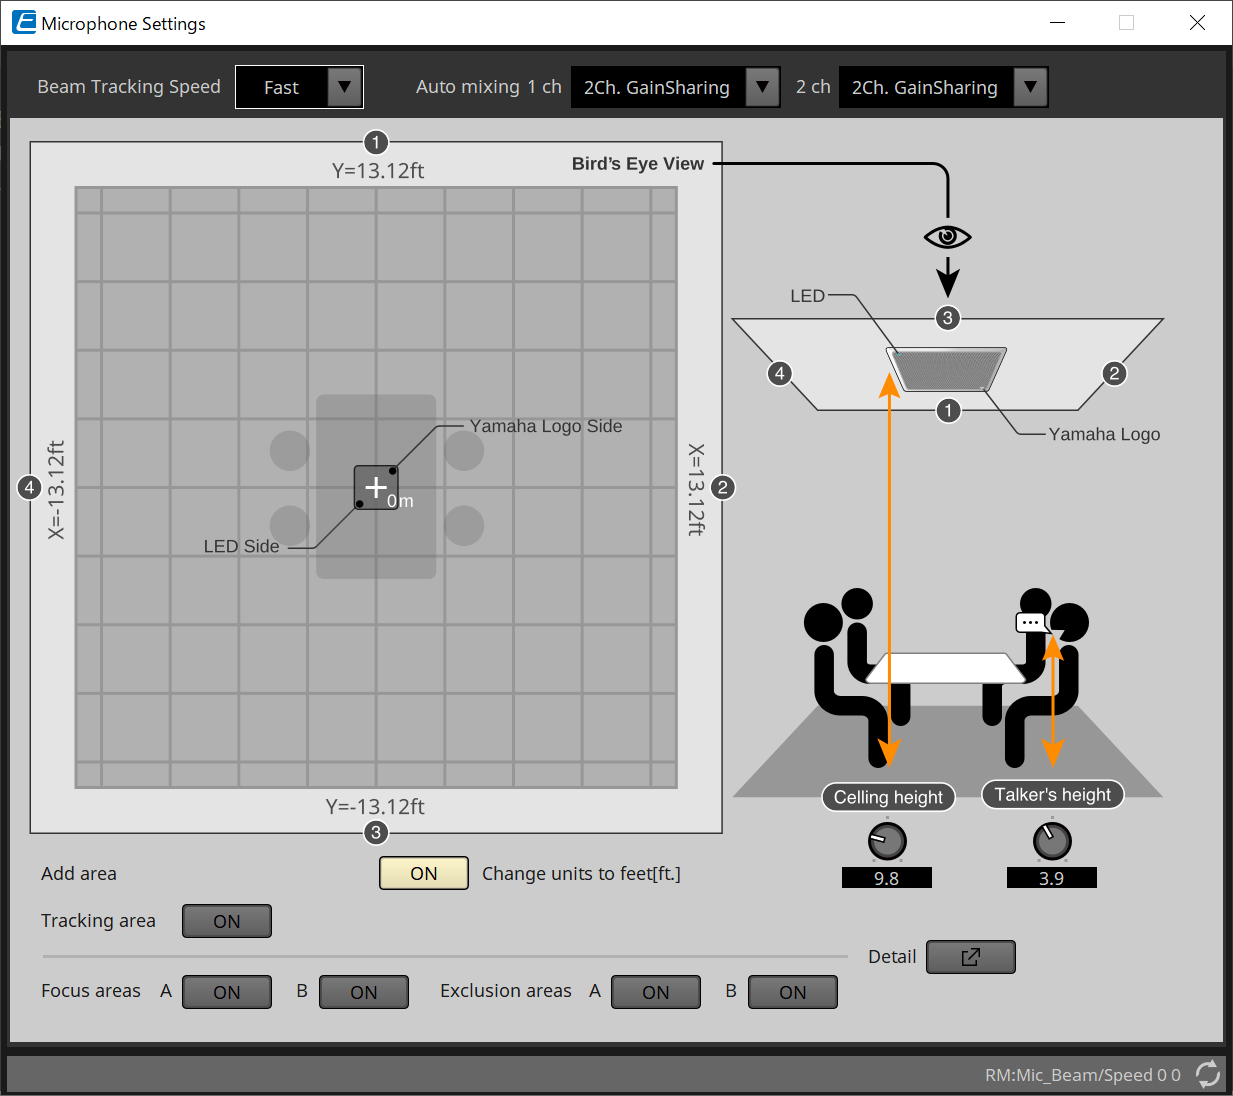
24.8.1. "Microphone Settings" component editor
The tracking speed and range can be checked/adjusted.
The automixer settings can also be checked/changed.
-
Beam Tracking Speed
Set the reaction time at which the beam follows the talker.-
Slow
his setting increases the stability of volume changes, but slows the talker tracking. Select this mode when the volume changes frequently due to a room with long reverberation times. -
Fast
Default setting. Well-balanced setting between volume change stability and talker tracking.
-
-
Auto mixing
Set the type of automatic audio mixing of microphone beam inputs.-
1Ch.Gating
Select this setting for single beam mode. This provides higher clarity but more volume variation for a small group of talkers in a reverberant room with long reverberations times. -
2Ch.GainSharing
Default setting. Select this setting for gainsharing of two beams. Well balanced setting between clarity and volume variation. -
4Ch.GainSharing
Select this setting for gainsharing of four beams. This mode provides less volume variation with lower clarity for a more natural sound with many talkers in a good acoustical room with low reverberation times. -
All Mix
Select this mode mixing of four beams. This mode provides less volume variation and clarity with the most natural sound with many talkers in a good acoustical room with low reverberation.
-
|
The Ch.1 output signal uses all signal processing, and is optimized for conference audio.
The Ch.2 output signal is optimized for applications that require linearly processed signals or low latency. |
-
Tracking area
The beam tracking range can be restricted to within a ±4 m (13.1 ft.) square.
This is used to separate tracking areas in an environment with multiple RM-CGs, or to restrict the perimeter of a single RM-CG. -
Focus areas
A maximum of 2 focus areas can be defined, which allows the ceiling microphone to more clearly pick up speech within that specific area, even at low volumes.
This setting can be used alone or in addition to "Tracking Area."
Note that if the [Focus Area] overlaps with an [Exclusion Area], the [Exclusion Area] is prioritized and voice tracking within the overlap area is not permitted. -
Exclusion areas
This specifies areas to exclude sound sources such as projectors, air conditioners, and other unwanted sounds like coffee stations.
To prevent beam tracking, a maximum of two [Exclusion Area] can be set.
This setting can be used independently of the [Tracking Area] setting.
Note that if the [Exclusion Area] overlaps with a [Focus Area], the [Exclusion Area] is prioritized and beam tracking is prevented in these areas. -
Detail button
When this button is clicked, a screen where you can enter numerical values for area settings will open.
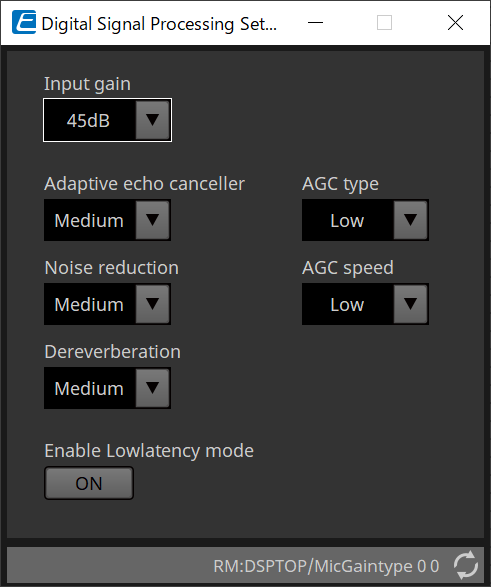
24.8.2. "DSP Settings" component editor
The following settings can also be checked/changed.
-
Input Gain
This sets the input gain. -
Adaptive echo canceller
Select suppression strength of the echo canceller.-
Off:
Select this to disable the internal echo canceller when using an external echo canceller of a conferencing application or an external device. -
Low:
elect this setting to keep the original sound as much as possible and still suppress acoustic echo. -
Medium:
Default setting. Well-balanced setting between echo cancelation strength and sound quality. -
High:
Select this setting for acoustically poor rooms with high echo levels and long reverberance times.
-
-
Noise reduction
Select strength of noise reduction against steady state noise.-
Off:
Select this setting to disable the internal noise suppression for use with the external noise reduction of a conferencing application or an external device. -
Low:
Select this setting for minimum steady state noise suppression while keeping the original sound as much as possible. This setting provides a natural room sound more than the amount of noise removed. -
Medium:
Default setting. Well-balanced setting between noise suppression effects and sound quality. -
High:
Select this setting for maximum steady state noise reduction in rooms with a lot of steady state noise such as loud fans or HVAC systems.
-
-
Dereverberation
Select the strength of the Dereverberation function.-
Off:
No Dereverberation function. For use with external signal processing of a conference application or an external DSP. -
Low:
Select this setting for minimal Dereverberation for rooms with good acoustics and low reverberation times. -
Medium:
Default setting used for most rooms and is a good balance between Dereverberation and sound quality. -
High:
Select this mode for maximum Dereverberation for rooms with poor acoustics and long reverberation times. (e.g. glass walls & other reflective surfaces)
-
-
AGC type
Set strength of the auto gain control to reduce the fluctuation of the voice level, which is sent to remote listeners on the line.-
Off
Select this setting to disable automatic volume adjustment or to use another auto gain control of a conferencing application or an external device. -
Low
Default setting. Produces a natural sound level. Low talker volume input will remain low. High talker volume will be attenuated if it is too loud. -
High
elect this setting to compensate for high dynamic talker volume changes. This setting will increase the volume level of quiet talkers in the room and will attenuate volume output if it is too loud.
-
-
AGC speed
Set the reaction speed of the volume change of the auto gain control.-
Low:
Default setting and general well-balanced setting between volume change and effect. -
High:
Select this setting for faster volume level compensation.
-
-
Enable Low latency mode
Select this option for applications that require short audio delays, such as voice lifts.
All signal processing on Ch2 (lower output of the DSP Settings component) is disabled.
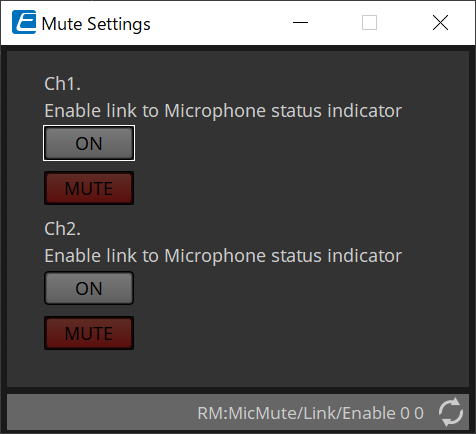
24.8.3. "Mute Settings" component editor
Sets whether the mute status is displayed using the Status LED on the RM-CG/RM-TT main unit.
-
ON button
When this is ON, mutes when the main unit is muted. -
MUTE button
This mutes each channel.