Microphones: RM-TT
25. Microphones: RM-TT
25.1. Overview
This will be a fixed configuration tabletop microphone.
| To control "RM-TT," you must set an initial password for the device and log in. |
25.2. "Project" sheet
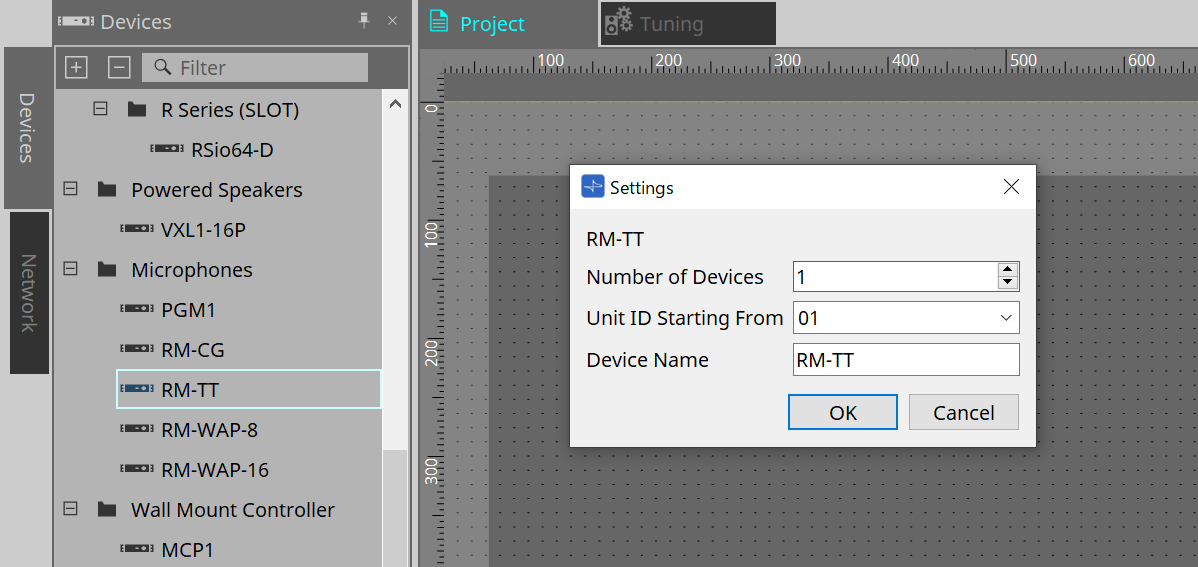
When placing devices, the Settings screen shown below will be displayed.
-
Number of Devices
Selects the number of RM-TT units placed on the sheet. -
Unit ID Starting From
You can select the starting number for the device Unit IDs. -
Device Name
The device name can be displayed and edited.
25.3. [System] menu
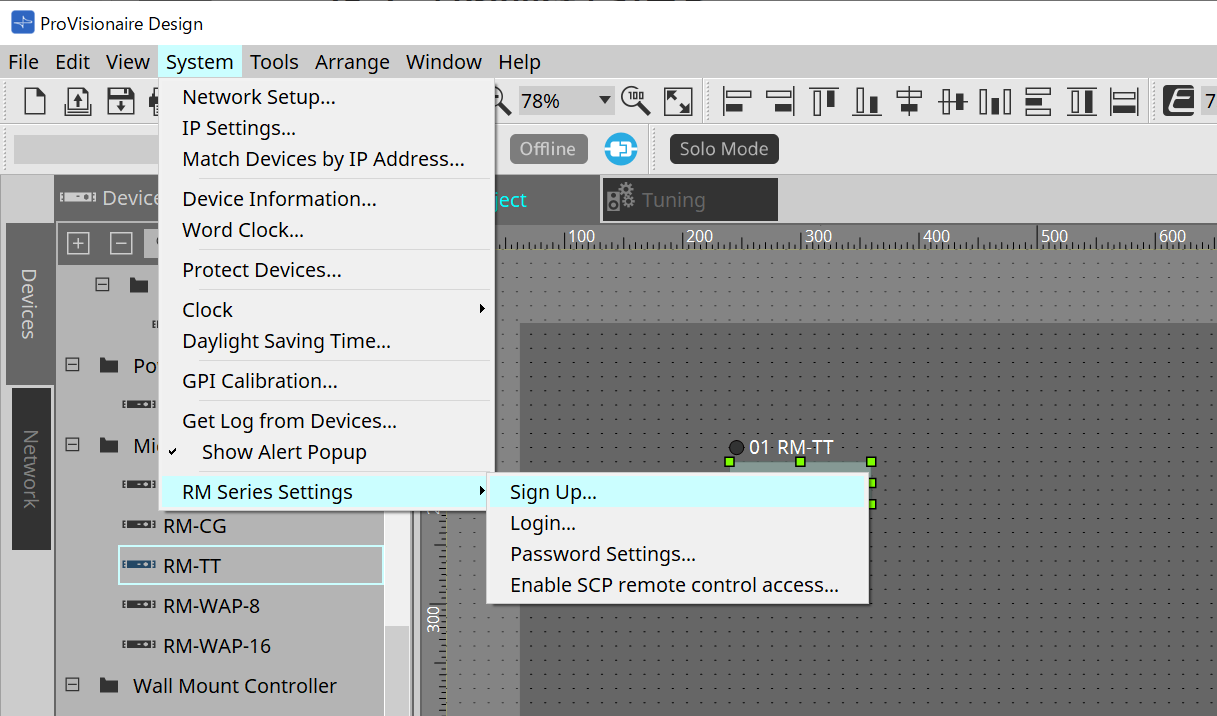
Settings are made in RM Series Settings, which is displayed from the [System] menu on the menu bar.
-
RM Series Settings
-
Sign Up
Sets the initial password. -
Login
Enters the password before controlling the device with ProVisionaire Design. -
Password Settings
Changes the device password. -
Enable SCP remote control access
Turn this on to control devices using ProVisionaire Design or a remote control.
-
|
When the ProVisionaire Design and devices are set to online, "Enable SCP remote control access" is automatically turned on.
After setting the devices, please reset as necessary. |
25.4. "Network" area
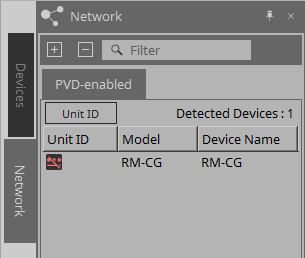
To control "RM-TT," you must set an initial password for the device and log in.
Right-click on RM-TT in Network and select Sign Up/Login.
Alternately, do this in RM Series Settings, which is displayed from the [System] menu on the menu bar.
| Until you login, you will not be able to configure the settings using ProVisionaire Design. |
25.6. Device sheet screen configuration
When the RM-TT device sheet is opened, the device sheet and the "Bird’s Eye view" will be displayed.
When you double-click a component in the device sheet, the component editor opens.

①
Tool buttons
Frequently-used commands are provided here as buttons.
②
Bird’s Eye view
This shows an overview of the sheet.
25.7. Tool buttons
Frequently-used commands are provided here as buttons.
| Button | Command | Summary |
|---|---|---|
|
|
Mic Mute |
Mutes the microphone. |
25.8. Component editors
When you double-click a component in the device sheet, the component editor opens.
This section describes the RM-TT component editor, and the dialogs and windows that are closely associated with the components.

| Number | Component name | Details | Link |
|---|---|---|---|
|
① |
Microphone Settings |
Sets the mute button operation and the mic’s directivity. |
|
|
② |
Reference Signal for AEC |
Displays the reference signal level of the adaptive echo canceller. |
--- |
|
③ |
DSP Settings |
Specifies the various DSP settings, such as adaptive echo canceller and noise reduction. |
|
|
④ |
6Band EQ |
Adjusts the 6-band EQ. |
|
|
⑤ |
Mute Setting |
Sets whether or not the mute status is displayed on the indicator on the upper screen. |
|
|
⑥ |
Fader |
Adjusts the audio signal level. |
--- |
|
⑦ |
Router |
Changes the assignments from input channels to output channels. |
--- |
|
⑧ |
Dante Out |
--- |
--- |
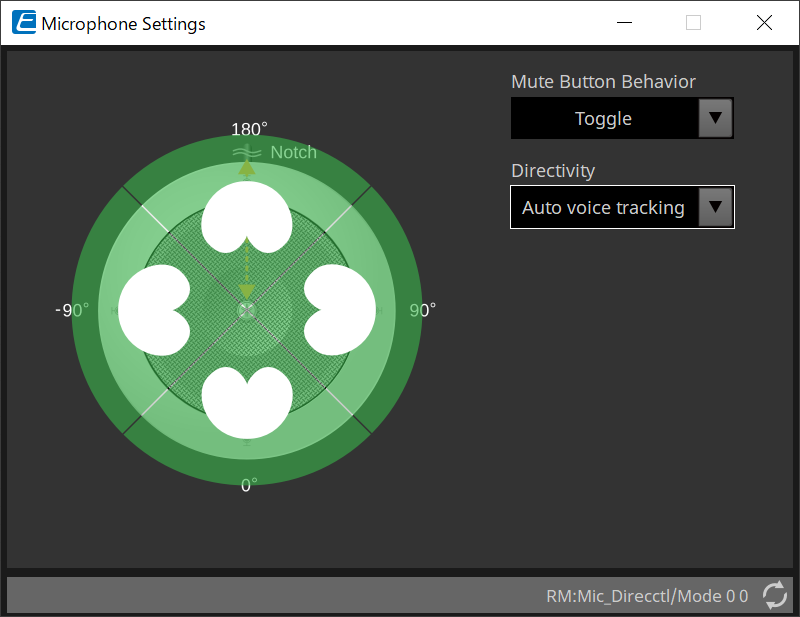
25.8.1. "Microphone Settings" component editor
The tracking speed and range can be checked/adjusted.
The automixer settings can also be checked/changed.
-
Mute Button Behavior
-
Toggle
Mute on and off will be toggled by pressing the mute button. -
Push to talk
Microphone will be muted unless the button is pressed and held. -
Disable
Mute button on the device is disabled and mute status can only be changed externally (controller or different microphone in same group).
-
-
Directivity
Sets the directivity of the microphone.-
Auto voice tracking
This is the default setting. Select this setting for automatic tracking mode. The microphone automatically focuses on the voice of the person speaking. -
Omnidirectional
With this setting, all microphone elements are always active. Audio is picked up in the hemisphere above the microphone. Multiple voices can be captured simultaneously using the Omni setting. This setting should only be selected for quiet rooms with no reverberation and good acoustical conditions. -
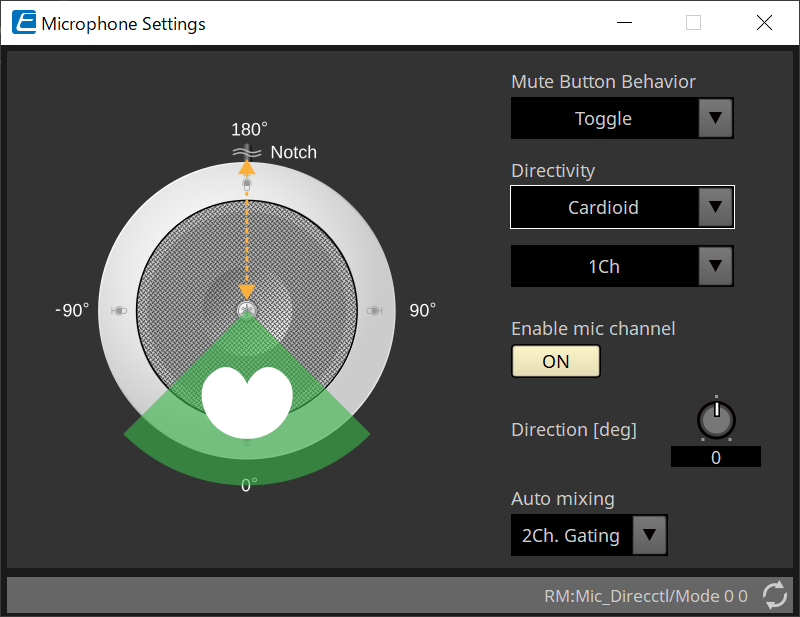
Cardioid
This setting allows to select the direction of up to 4 active cardioid pick-up patterns. Select this setting if participants are always in the same location in relation to the microphone. Cardioid requires that an auto-mixing strategy is selected. -
Supercardioid
Same as cardioid, but the directivity of the pick-up pattern is narrower than cardioid. -
Hypercardioid
Same as cardioid and Supercardioid, but the pick-up pattern is even narrower than supercardioid. -
Toroid
Select this setting in environments with noise sources above the microphone. Audio pick-up is limited in vertical direction; the microphone focuses on voice sources horizontal to the microphone. -
Bidirectional
Select this setting to cover two talker positions opposite (180°) from each other.
-
When the microphone directivity is set to "Cardioid," "Supercardioid," or "Hypercardioid," the automixer settings can be checked/changed.
-
Enable mic channel
Turns the microphone for the CH selected in Directivity ON or OFF. -
Direction[deg]
Sets/changes the acoustic angle of the microphone for the CH selected in Directivity. -
Auto mixing
-
1Ch. Gating
Select this setting to allow one input channel to be active at a time. This setting provides highest clarity of the active talker, but more volume variation. Use the setting when several talkers participate in the meeting or in reverberant rooms. -
2Ch. Gating
Default setting. Select this setting to automatically mix up to two microphones using gain sharing. This setting allows for a well balanced experience between clarity and volume variations. -
4Ch. Gating
Select this setting to allow all four channels to be mixed using gainsharing. This mode provides a better volume variation experience but with less clarity. This setting is recommended for settings with several active participants in the discussion. Use the setting only in a room with good acoustics and low reverberation times. -
All Mix
Select this mode to mix all four channels without gain-sharing. The listener might experience more volume variation but will experience the most natural sound with many talkers. Use the setting only in a room with good acoustics and low reverberation times.
-
For details on components other than the "Microphone Settings" component editor, refer to "RM-CG".